homepage: Dr. Carol JVF Burns

See the Sewing/Crafts section of my main Table of Contents for other sewing projects!

Splitting a Large Embroidery Design

Want to machine-embroider a design that's bigger than your biggest hoop?

If the design has some natural ‘gaps’ (like spaces between words/objects)
then the technique discussed on this page works well:

insert alignment markers into design;
hoop first piece and stitch out;
align adjacent piece (using common pins and a fabric glue stick);
stitch out second piece;
repeat as needed.

The procedure is illustrated here with a mermaid-theme mixer cover for my daughter Julia!

(1) Hardware/software:

I use my Janome Memory Craft 350E embroidery machine with Embrilliance software.

Get the free alignment markers: It is assumed you know how to use your embroidery machine and software;
only basic instructions are given here.

Embrilliance commands are indicated in bold typewriter type.


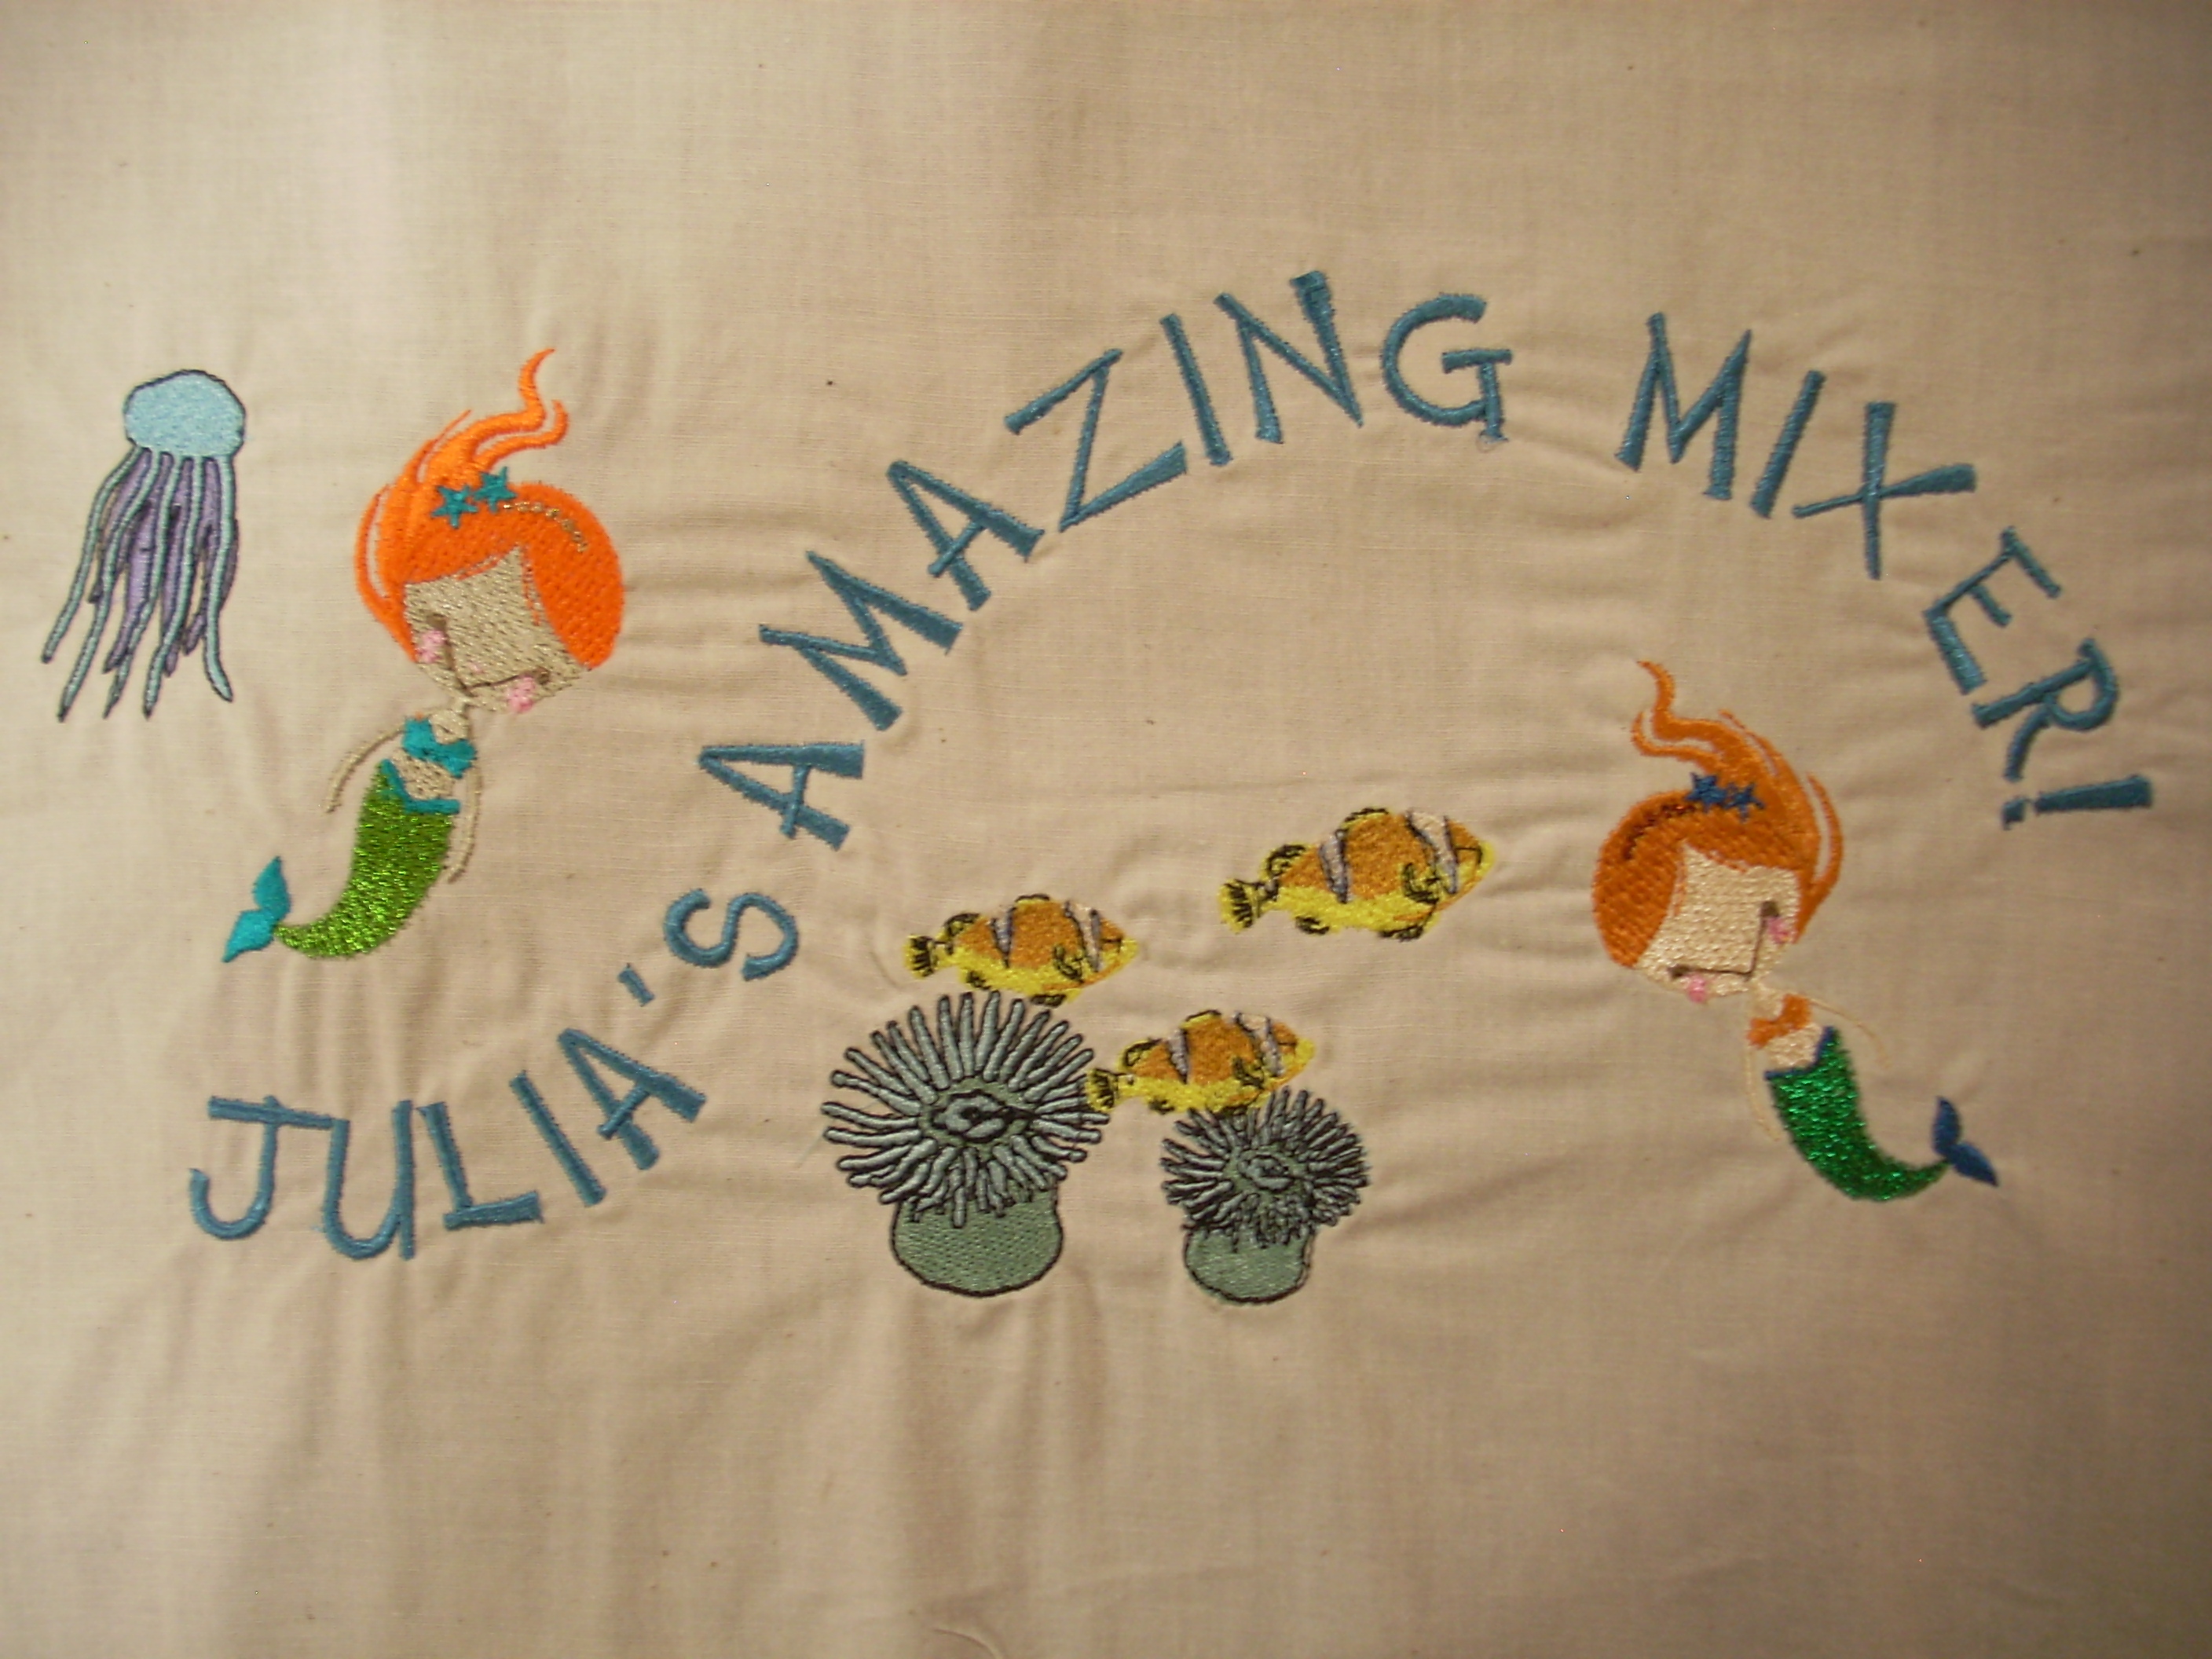
(2) Custom hoop:

Create a desired-size custom hoop for your entire design.
Make your creation as big as you want!

SAVE the entire design: JuliaMixer.be
(Of course, you'll use file names that are meaningful to you!)

Also make a copy:
SAVE: JuliaMixerCopy.be

Close the original file, so it's safely tucked away!

All the remaining steps are done with the copy: it will be successively edited as you break your design into smaller pieces to sew out.


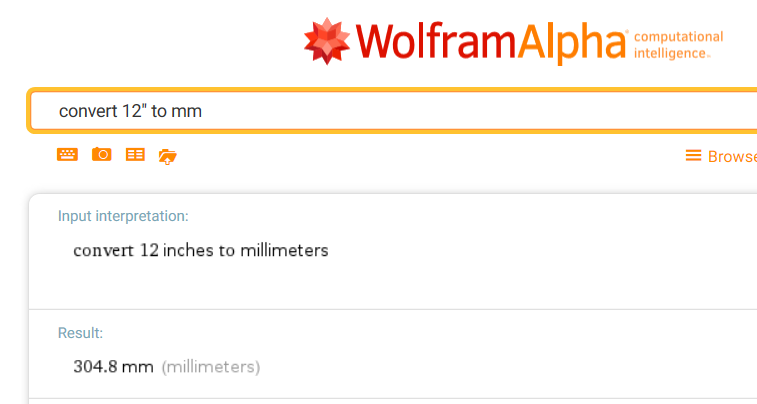
convert units (as needed) at WolframAlpha

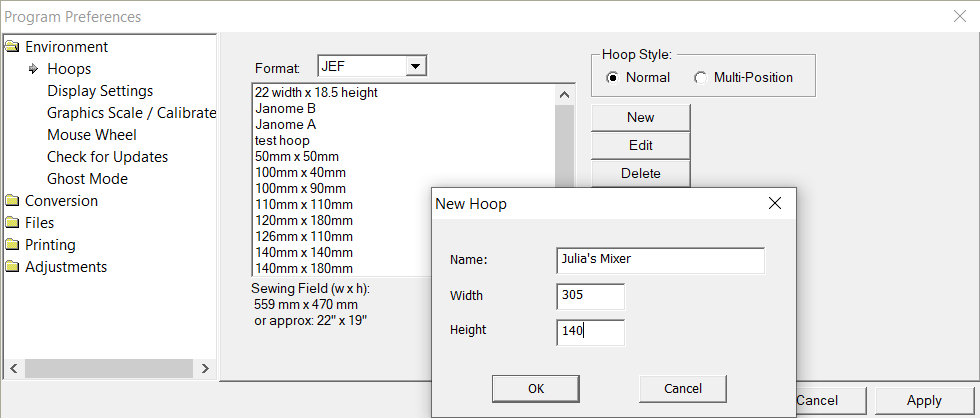
custom hoop:
Edit-Preferences-New
give a descriptive title;
put desired length/width in millimeters


(3) Group entire design:

Make sure your copy file is active.

Change the hoop to the largest hoop for your machine.
(For me: Janome B, 200mm x 140mm)
Edit-Preferences-(select desired hoop)-Apply
Don't worry about the warning that your design goes outside this hoop!

Group the entire design so it moves together as one unit, as follows:
  • with your mouse, make a rectangle around all the objects
  • Edit-Group
Position the design so the upper left corner is in the hoop.

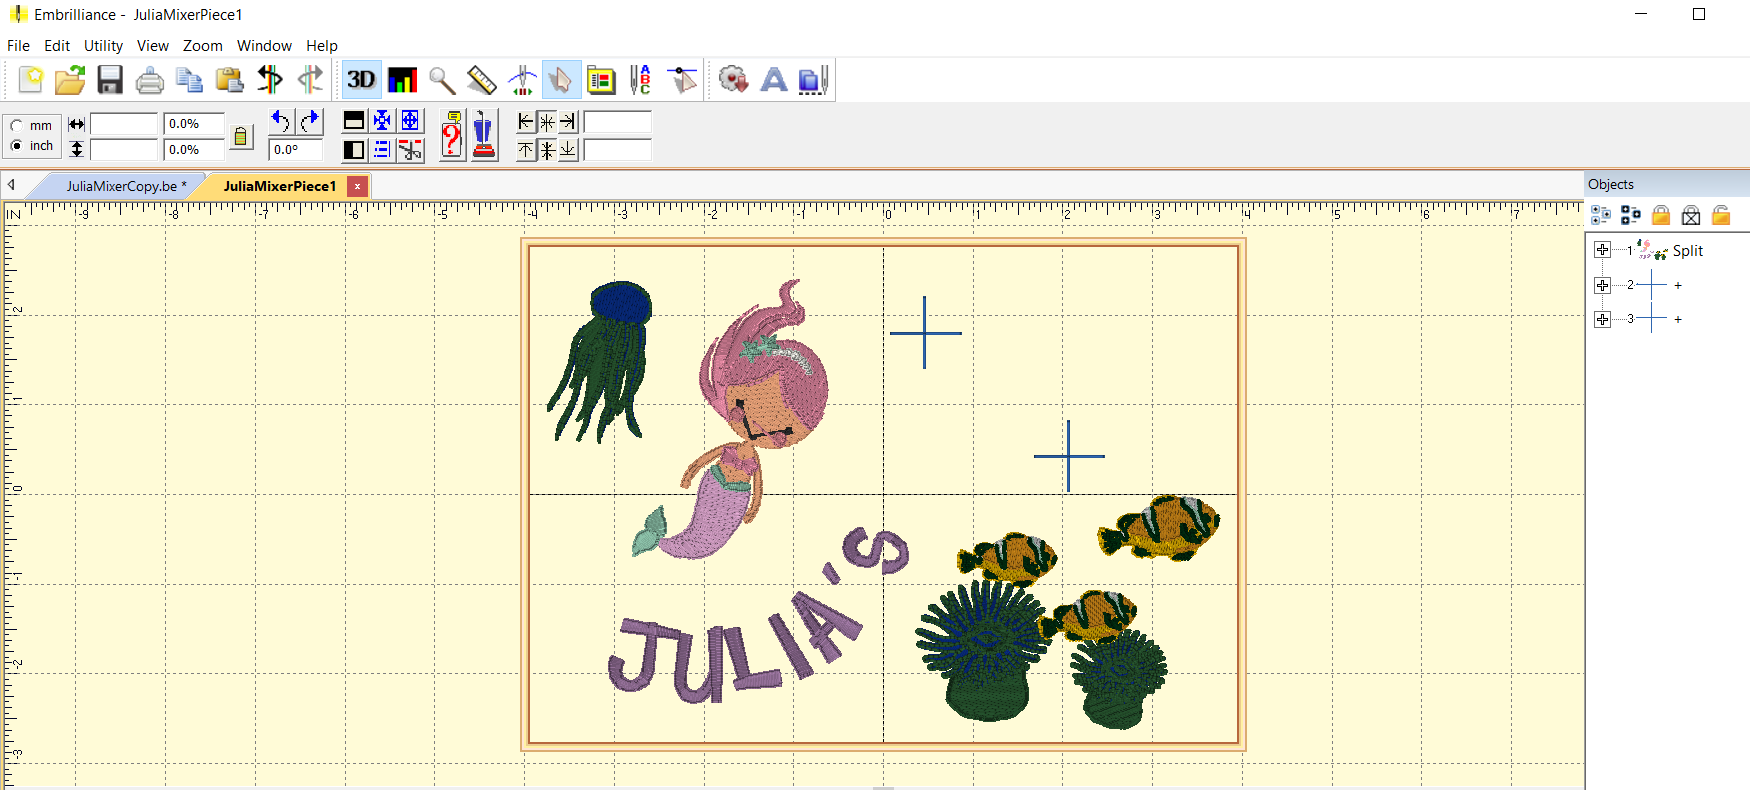
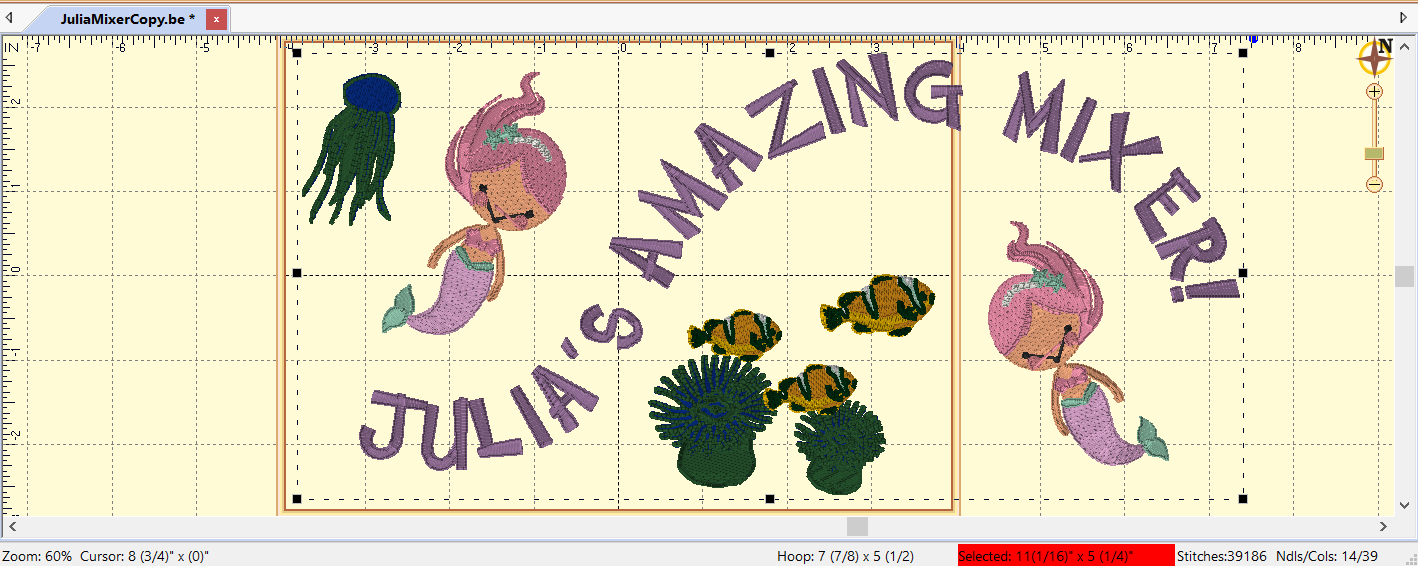
put upper left corner of design
in your machine's largest hoop:
don't worry about the (red) warning
that your design goes outside this hoop
(Note: the colors here are not the actual stitching colors)


(4) Select/split first piece to stitch:

Using natural ‘gaps’ between the pieces of your design,
split off the first piece to stitch, as follows:

(a) click ‘stitch edit mode’ on toolbar
stitch edit mode
(b) click ‘freehand select’
freehand select
(c) start at upper right and trace around,
carefully moving between (say) letters (see image at right)
(d) click ‘split the stitches into a new design’
split stitches
into a new design


You'll now see a new entry in the ‘Objects’ pane, called ‘split’!
Click on ‘stitch edit mode’ again to turn it off.

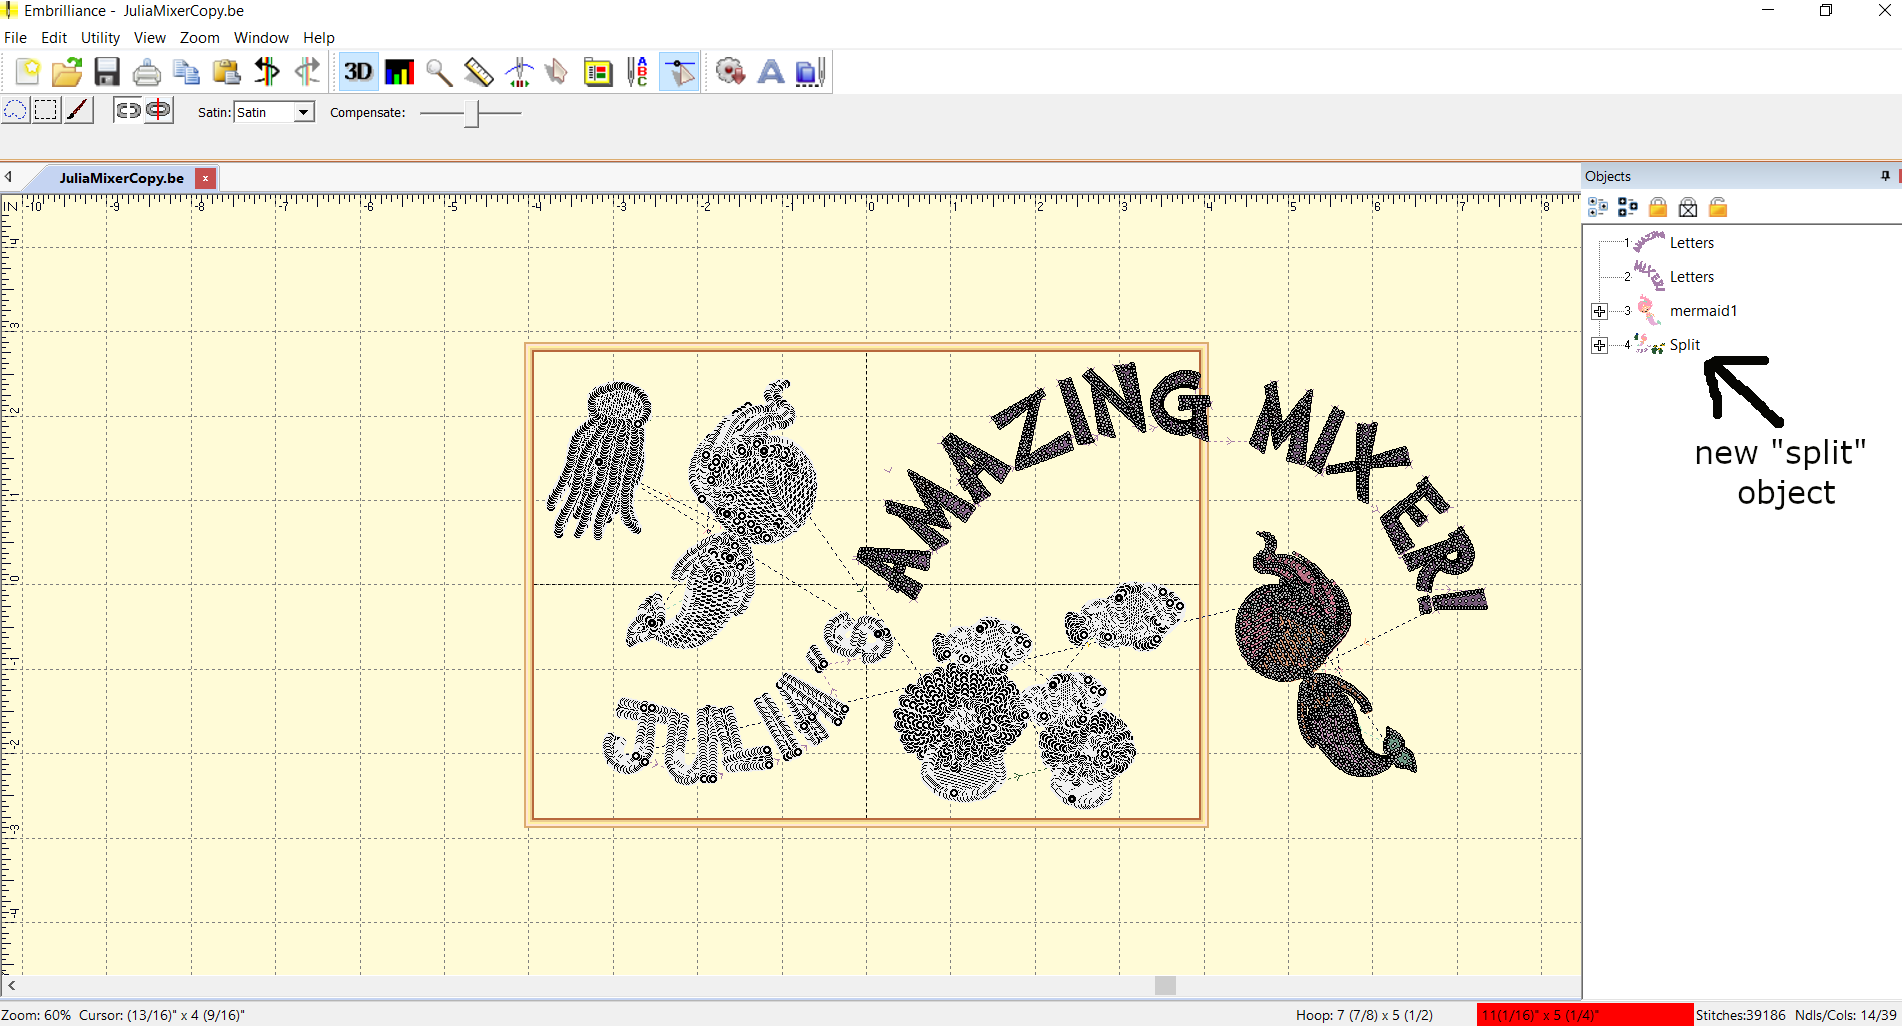
use ‘freehand select’ to ‘split off’ a first piece to stitch


(5) Insert alignment markers:

Alignment markers are used to re-align the fabric after unhooping
a first piece, and re-hooping for a second piece (and so on).

Two alignment markers are needed, in order to get both the correct positioning and rotation.

Insert alignment markers as follows:
(a) click ‘merge design’
merge design
(b) choose the alignment library  
(c) choose ‘+’  
(d) copy and paste, so you now have two ‘+’ markers  
(e) Position the markers on/near two different places that lie between the current piece and the next piece—think ahead! Whenever possible, position the markers in spaces, so they're easy to see and you won't stitch over them.

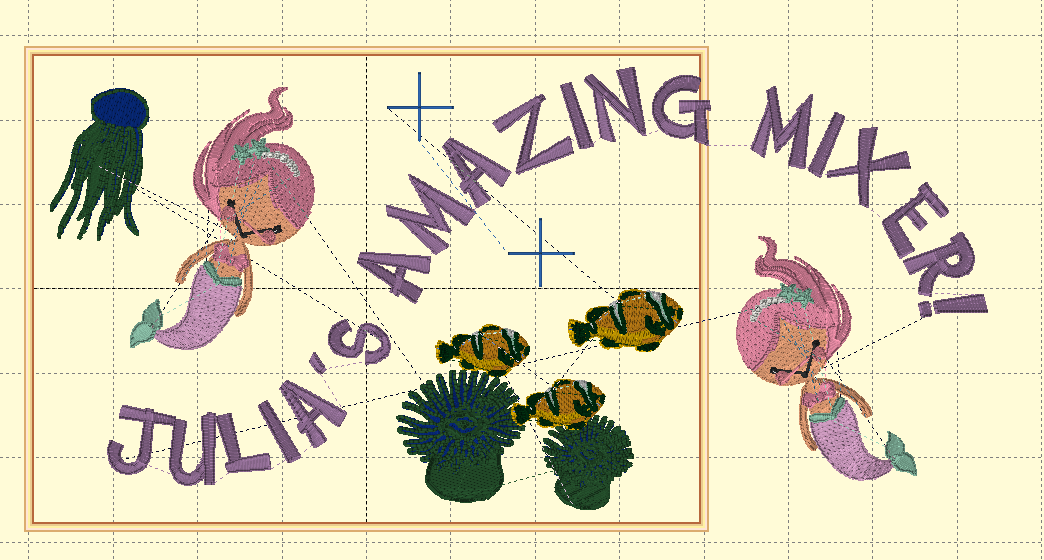
insert two alignment markers between current piece and next piece


(6) Check alignment marker placement:

It's critical that alignment markers get stitched out in both the current piece and the next piece.

To check this, proceed as follows:

(a) click ‘split’ in the ‘Objects’ pane and confirm that both markers are inside the rectangle formed by the black selection squares; if not, adjust
(b) click ‘reverse selection’ in the ‘Objects’ pane and confirm that both markers are inside the (future) second piece; if not, adjust
reverse selection
(c) repeat as needed  

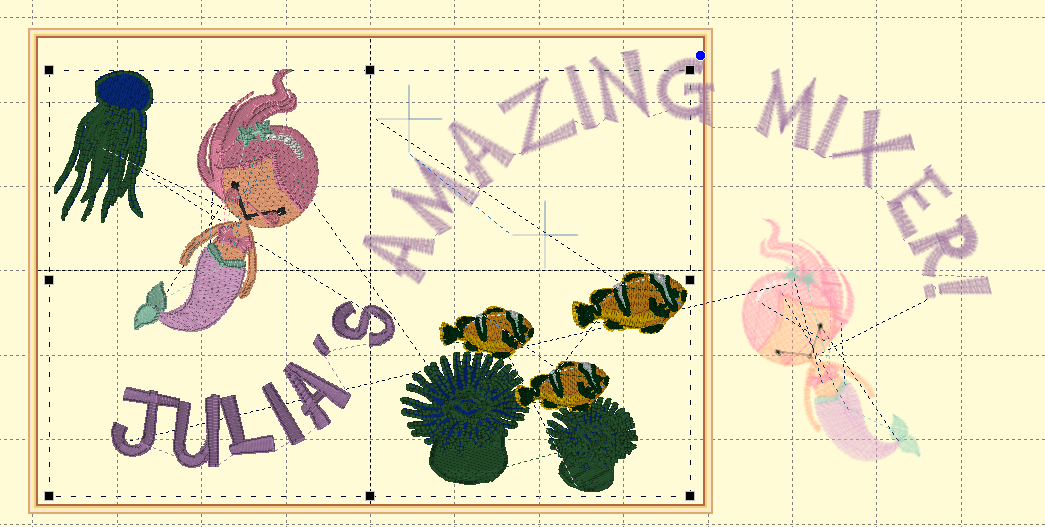
both alignment markers are inside
the rectangle formed by the black selection squares
of the first piece ...

... and inside the (future) second piece


(7) Grab the ‘split’ object and alignment markers for piece #1:

Adjacent stitch files must both contain alignment markers.
Note: All alignment markers will be removed at the end of the project.

Create the stitch file for piece #1:
  • (a) in the object pane, select ‘split’;
    cntl-select both alignment markers
  • (b) copy (cntl-C)
  • (c) File-New Page to get a new page;
    paste (cntl-V) into this new page
  • (d) save the new page as JuliaMixerPiece1.be
  • (e) Transfer this first piece to your embroidery machine, and stitch it out!
    Stitch the alignment markers in a prominent color.
    (Make sure the fabric you stitch it on is big enough to hold your entire design, and that you have the correct placement.)
  • (f) You're now done with JuliaMixerPiece1.be, so close this file.

piece #1 can now be stitched out;
stitch the alignment markers in a prominent color


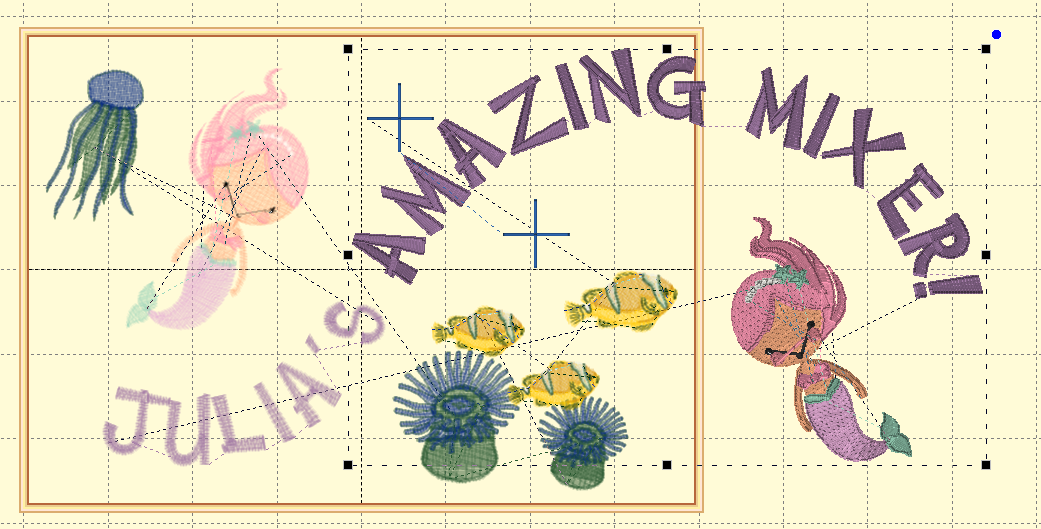
(8) Prepare piece #2:

Go back to JuliaMixerCopy.be, and prepare piece #2:
  • (a) delete ‘split’, since it has already been saved as piece #1;
    be sure that you don't delete the alignment markers!
  • (b) as in step 3: group the entire remaining design (including alignment markers);
    re-position so piece #2 is in the hoop, and save
  • (c) Is this the last piece?
    If so, then save as JuliaMixerPieceLast.be, and jump to (e).
    If not, then repeat steps 4, 5, and 6:
    select/split the second piece to stitch—but this time,
    include the alignment markers between pieces #1 and #2;
    insert and check alignment markers between pieces #2 and #3
  • (d) as in step 7:
    in the object pane, select ‘split’ (which includes alignment markers between pieces #1 and #2);
    cntl-select the alignment markers between pieces #2 and #3;
    copy and paste into a new page;
    save as JuliaMixerPiece2.be
  • (e) The alignment markers between piece #1 and this next piece
    must stitch out first!
    As needed, edit the order in the ‘Objects’ pane:
    you can right-click on an alignment marker and choose ‘move first’,
    or just drag objects to achieve the desired order.

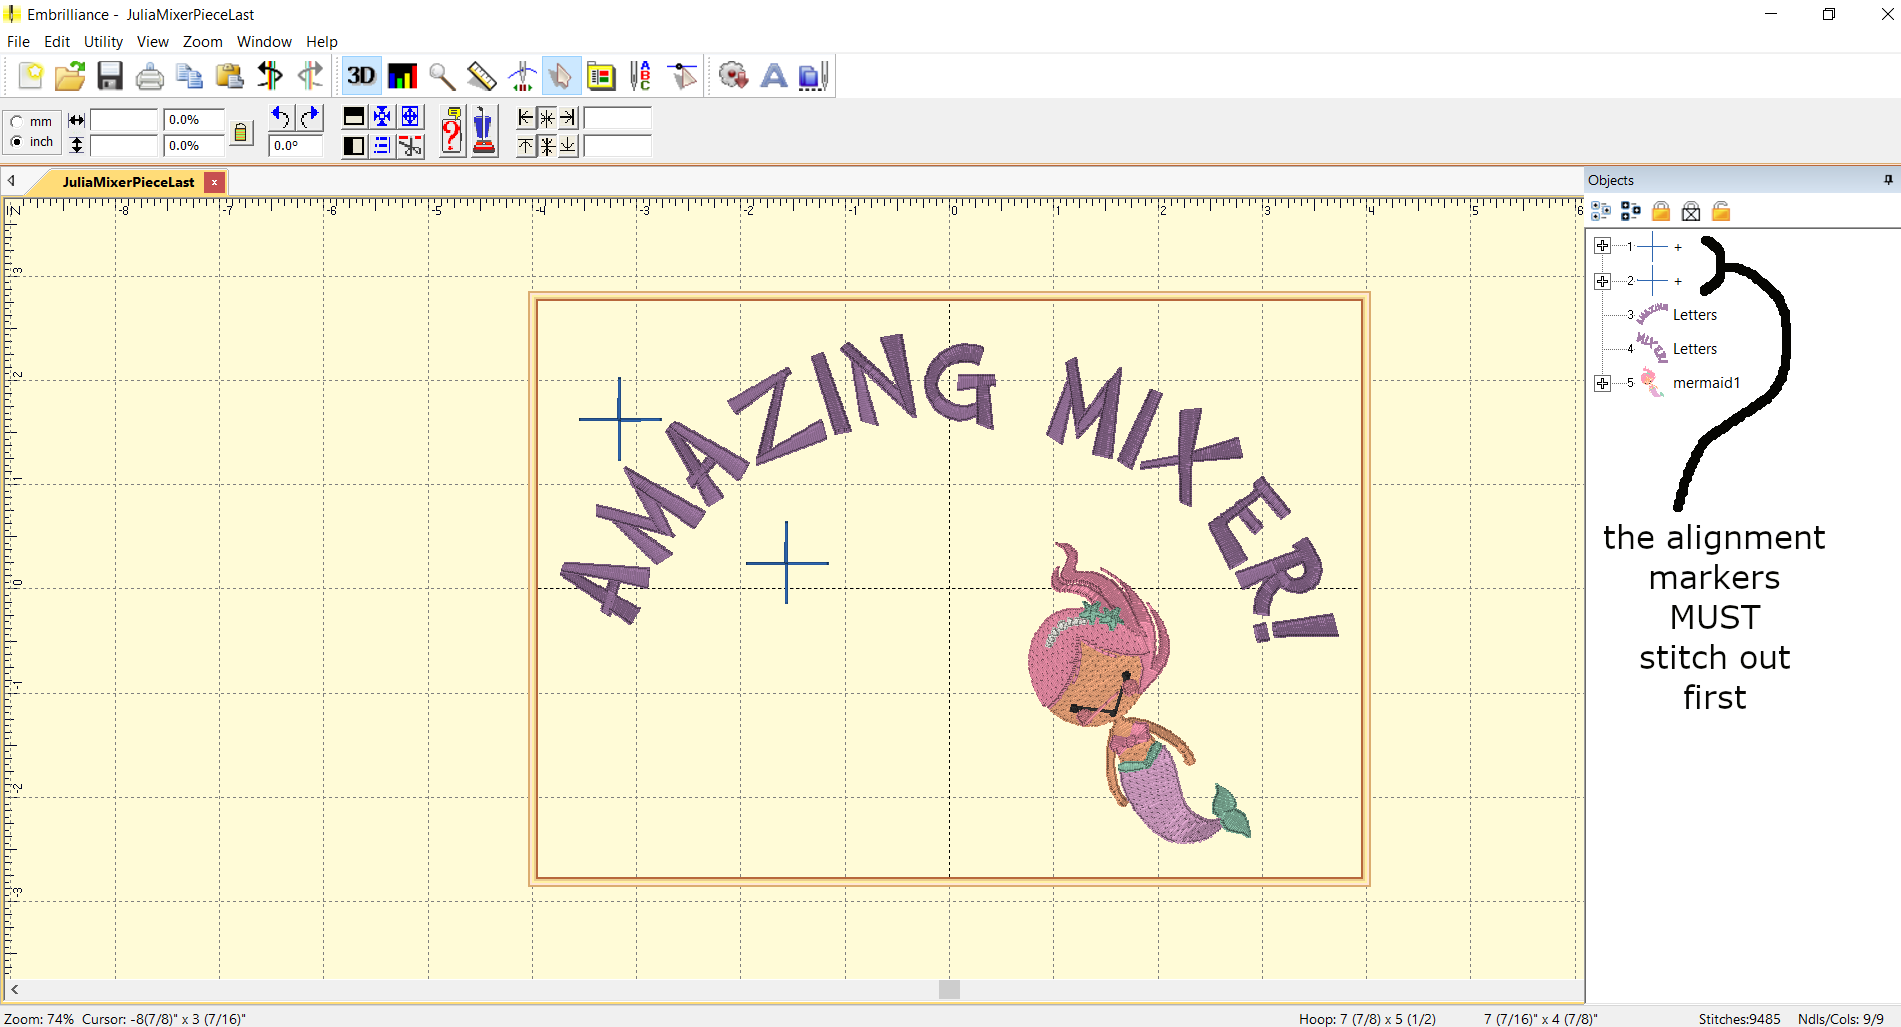
prepare piece #2:
the alignment markers between piece #1 and the next piece must stitch out first!
(If there's a third piece, there will be two additional alignment markers.)


(9) Align and stitch out piece #2:
  • (a) transfer the stitch file for piece #2 to your embroidery machine
  • (b) hoop just a new piece of stabilizer (NOT the design fabric)
  • (c) stitch out just the alignment markers between pieces #1 and #2 on the stabilizer;
    if the stitches pull out, use a pen to trace over the visible punctures on the stabilizer
  • (d) remove the hoop from the machine (but do NOT remove the stabilizer)
  • (e) working on a thick piece of cardboard (see image at right):
    put a common pin through the center of the first marker on your design fabric;
    put this same pin through the center of the first marker on the stabilizer.
    Repeat for the second alignment marker, thus properly positioning the second piece.
  • (f) Use fabric glue or a temporary adhesive spray to adhere the design fabric to the stabilizer.
    (I don't try to hoop the design fabric for piece #2 and beyond; it just sits on top, adhered to the stabilizer.)
  • (g) Return hoop to machine and stitch out piece #2.

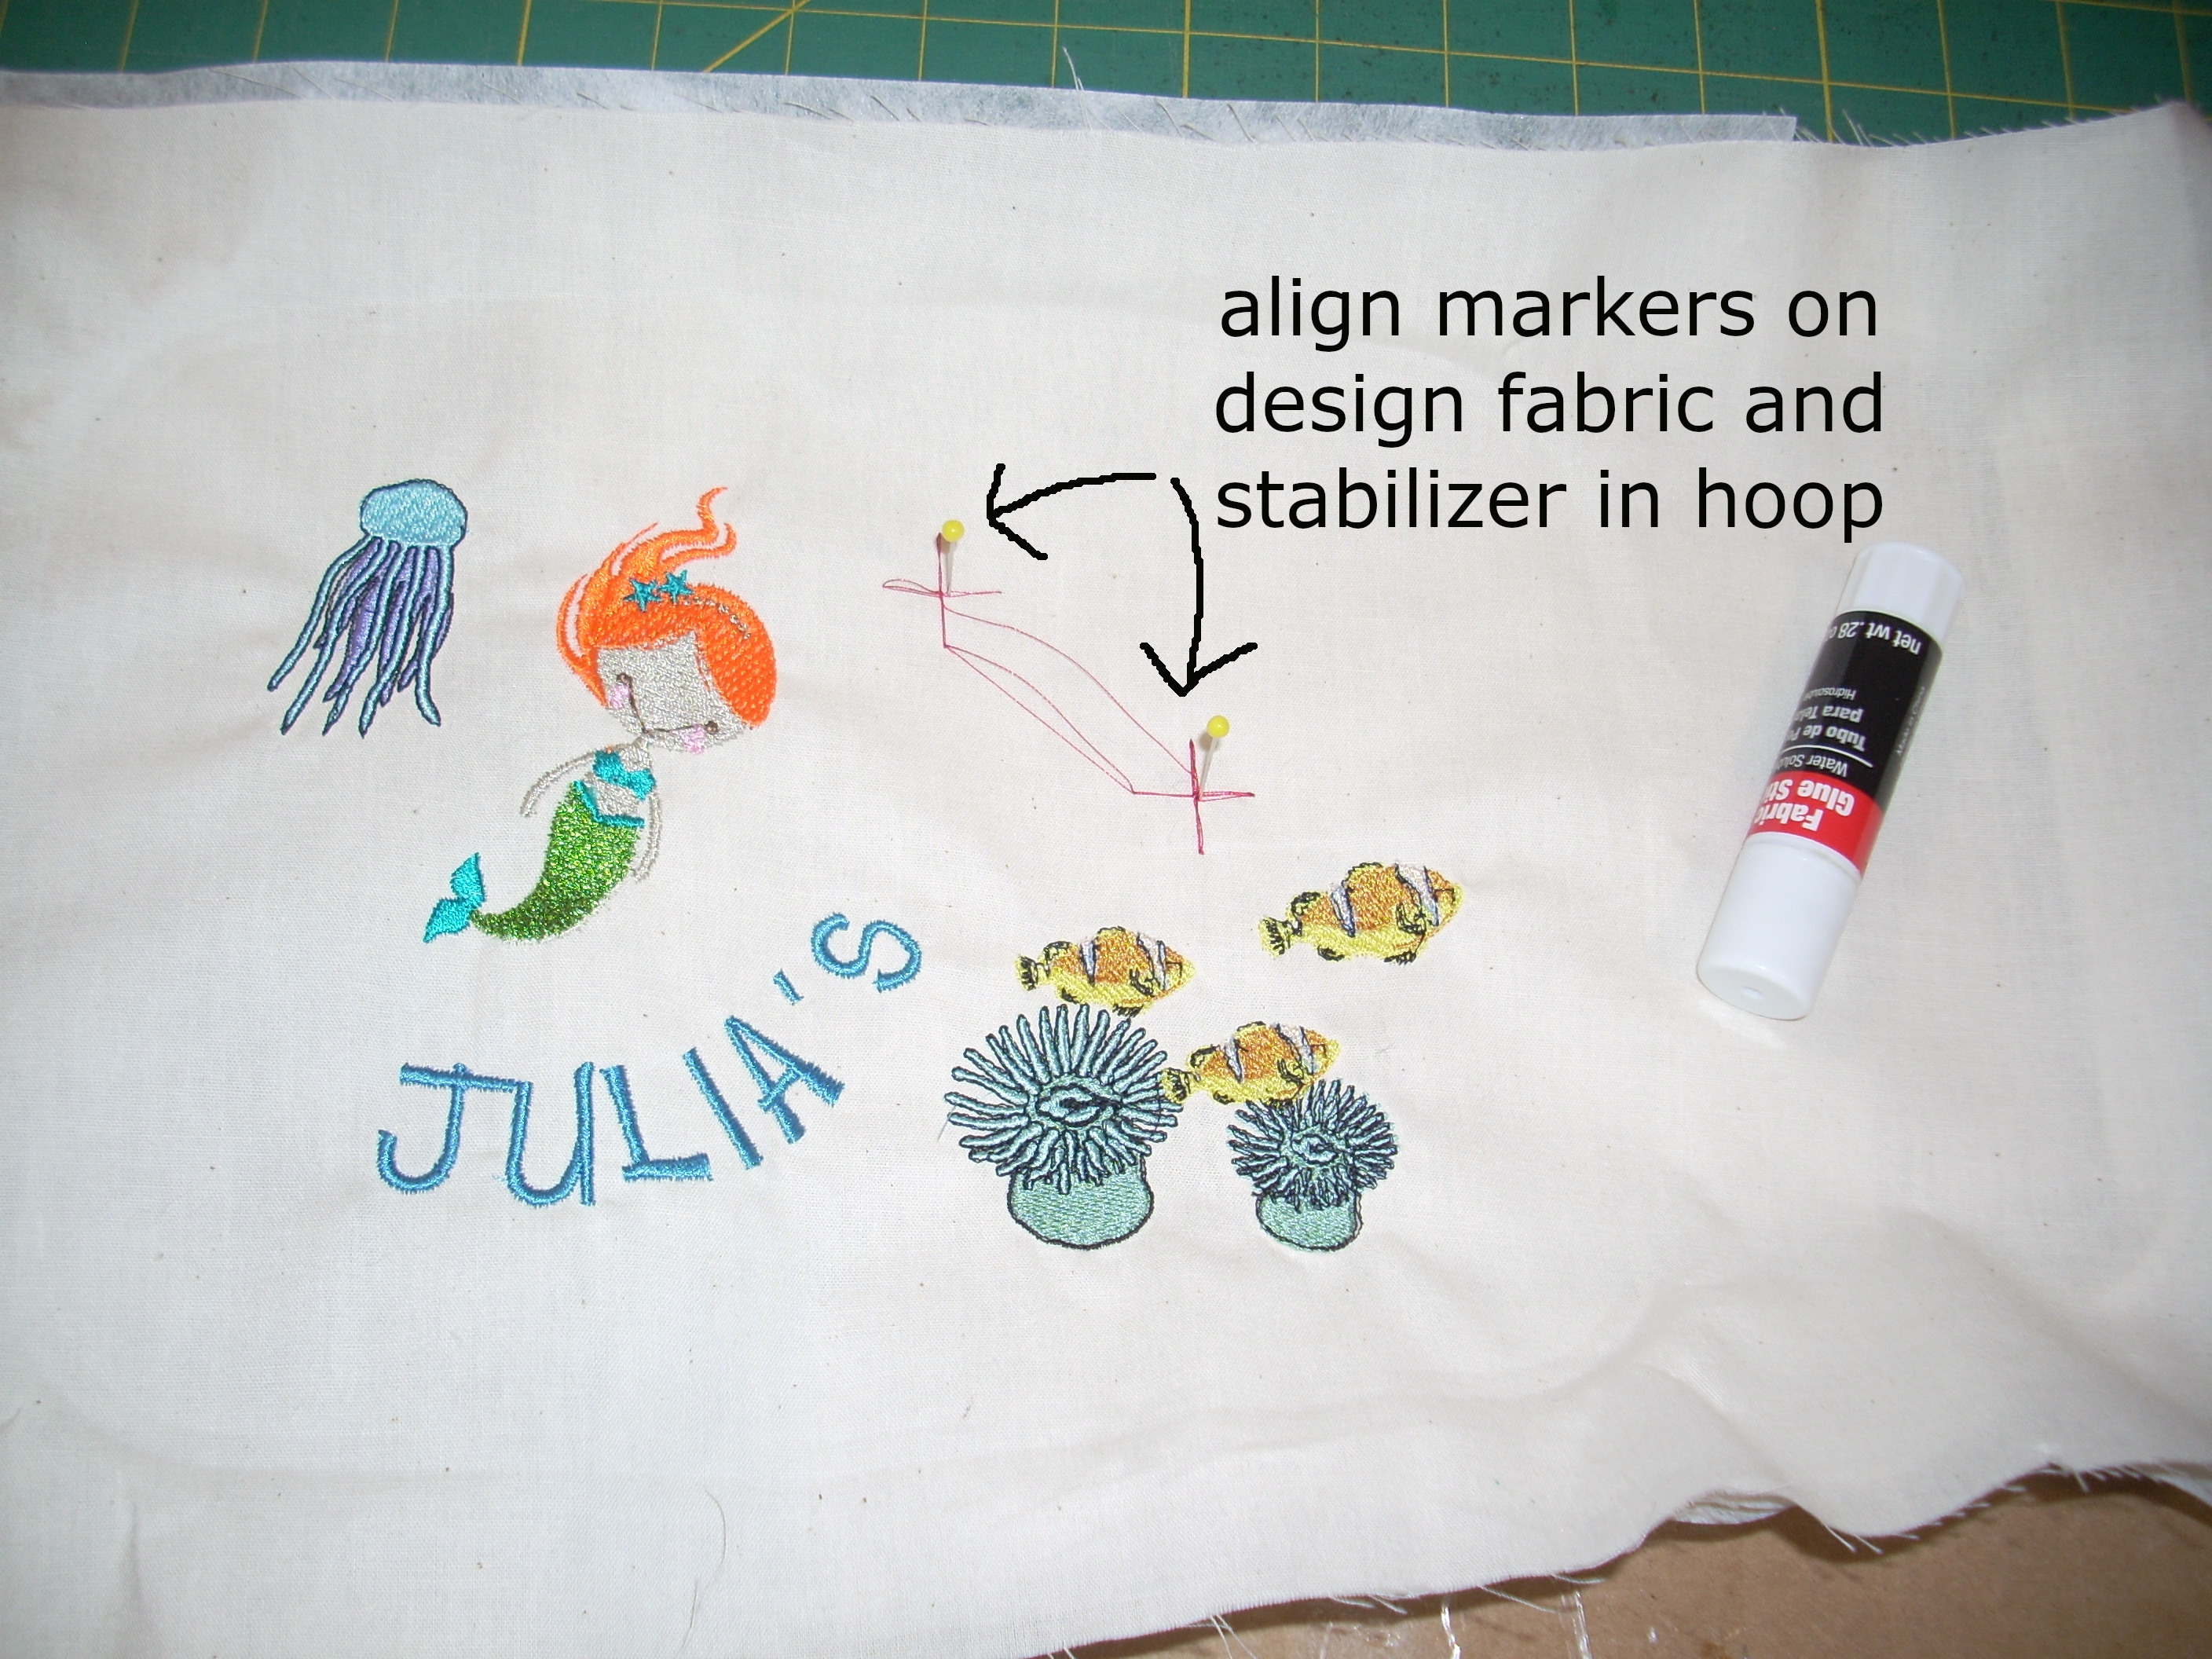
with two common pins,
align markers on design fabric and stabilizer in hoop,
thus properly positioning the second piece;
adhere layers with fabric glue or spray adhesive


(10) Repeat, as needed, for all additional pieces:

Repeat steps 8 and 9 (changing piece numbers as appropriate) as needed.
When completed: remove stabilizer; trim jump stitches; remove alignment markers.
Done!!

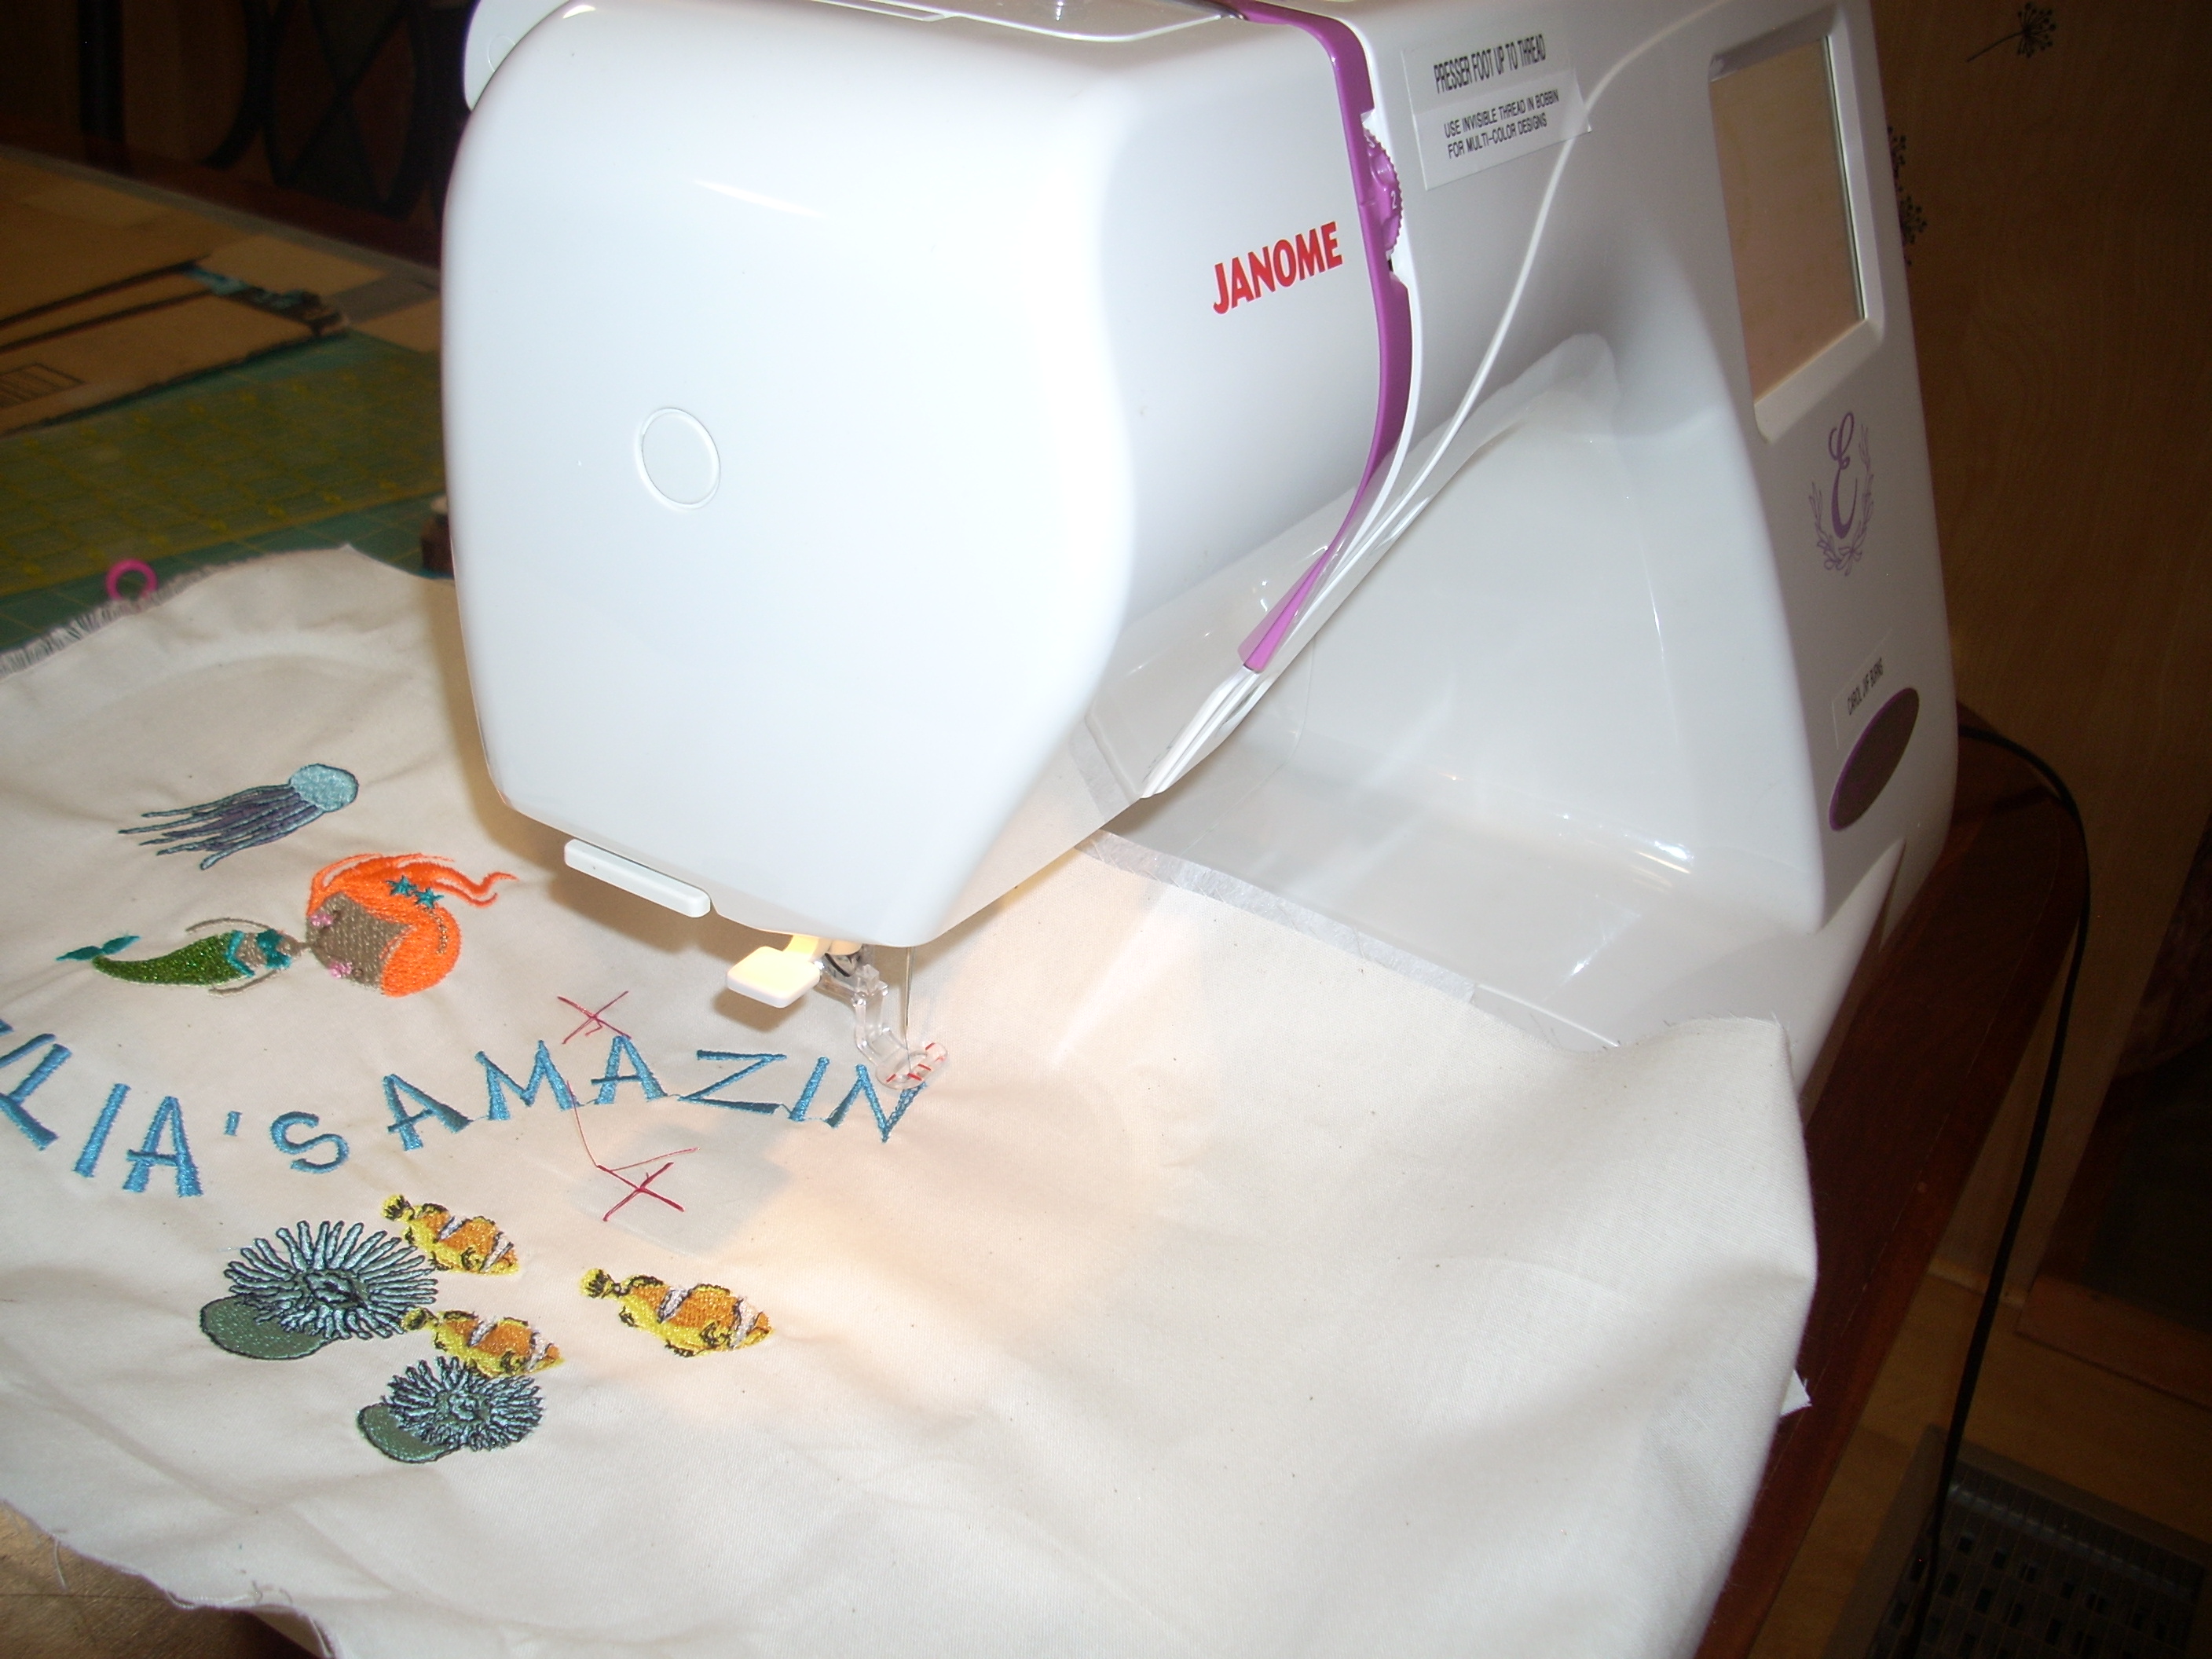
stitching out piece #2