|
|
|
|
|
|
(1) DETERMINE BOX DIMENSIONS:
All units are inches.
For example, $\,w - \frac 12\,$ means $\,w\,$ inches minus half an inch. Let:
|
 determine length, width, and height of desired box |
|
(2) CUT CARDBOARD TEMPLATE: If $\,w - \frac 12 < h\,,$ cut a piece of cardboard: $$(2h + w) \times \bigl(\ell + 2(w - \frac 12)\bigr) \ \ \ \text{ which simplifies to }\ \ \ (2h + w) \times (\ell + 2w - 1)$$ See the diagram at right. If $\,w - \frac 12 \ge h\,,$ then replace the $\,w - \frac 12\,$ measurement by $\,h\,.$ (In this case, the ‘corner rectangles’ become squares.) Thus, the desired dimensions are: $$(2h + w) \times \bigl(\ell + 2h\bigr)$$ If you're making more than one of the same box, this first one becomes your box template:
|
The THICK RED LINES are cut. The DASHED GREEN LINES are folded. |
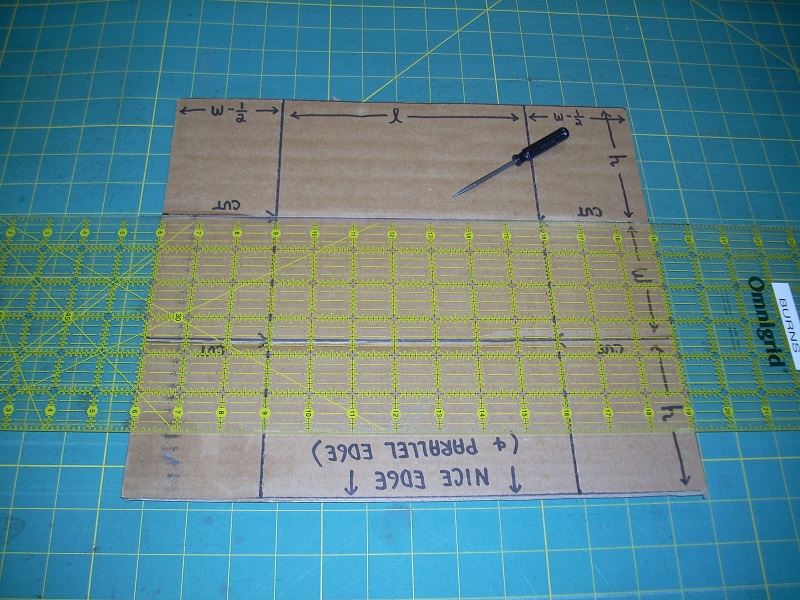 cut and label a template if you're making more than one box |
 you can now see how it turns into an open-top box |
|
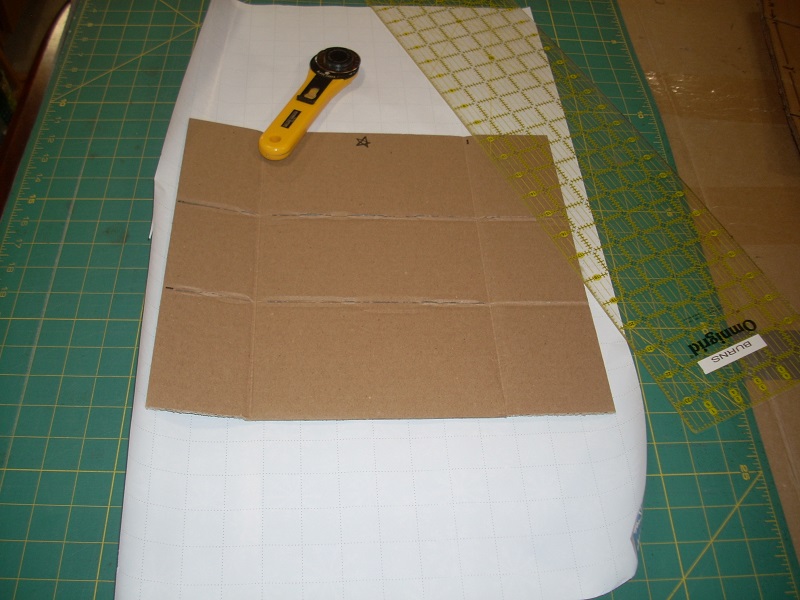
(3) CUT ALL CARDBOARD PIECES: Trace around your template on cardboard from (say) old boxes; try to avoid existing fold lines, as much as possible. Use a rotary cutter and quilting ruler to make the cuts. You may need to go over each cut more than once, depending upon the cardboard thickness. |
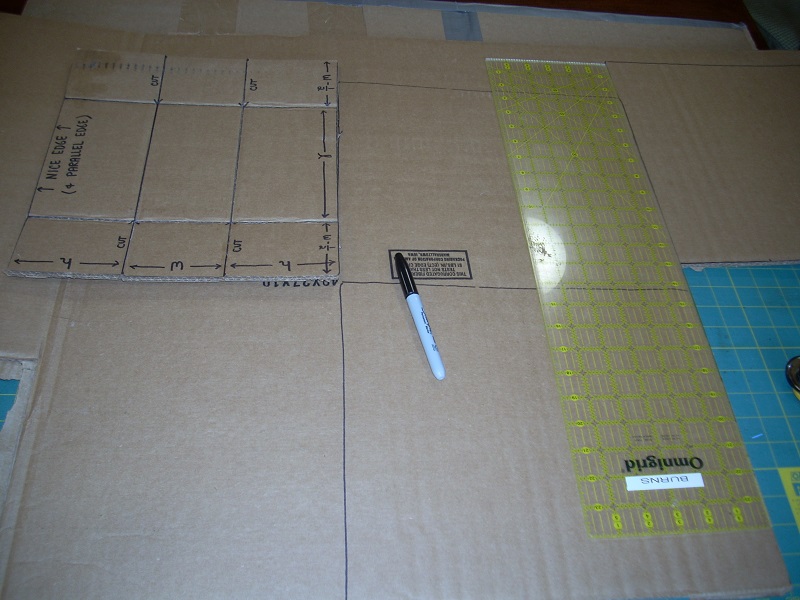 trace around template on cardboard from (say) old boxes; use a rotary cutter and quilting ruler to make the cuts |
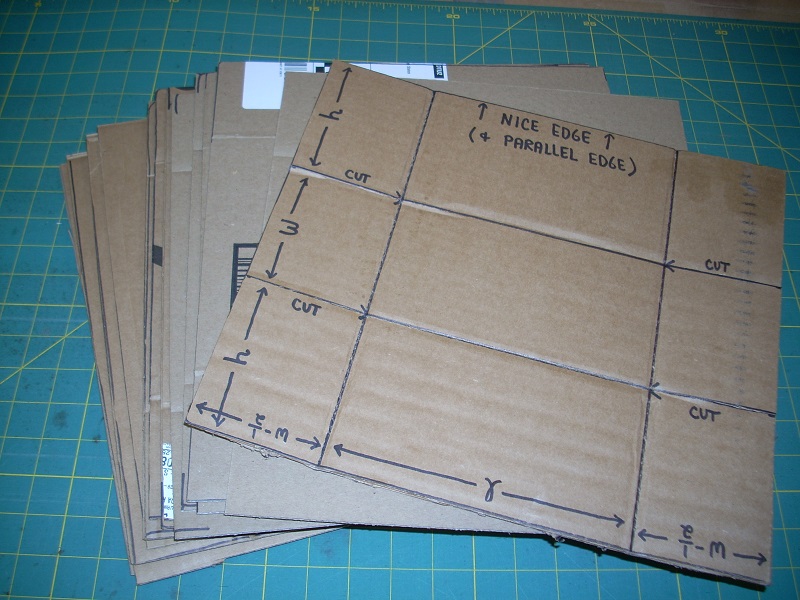 cut one piece for each desired box |
|
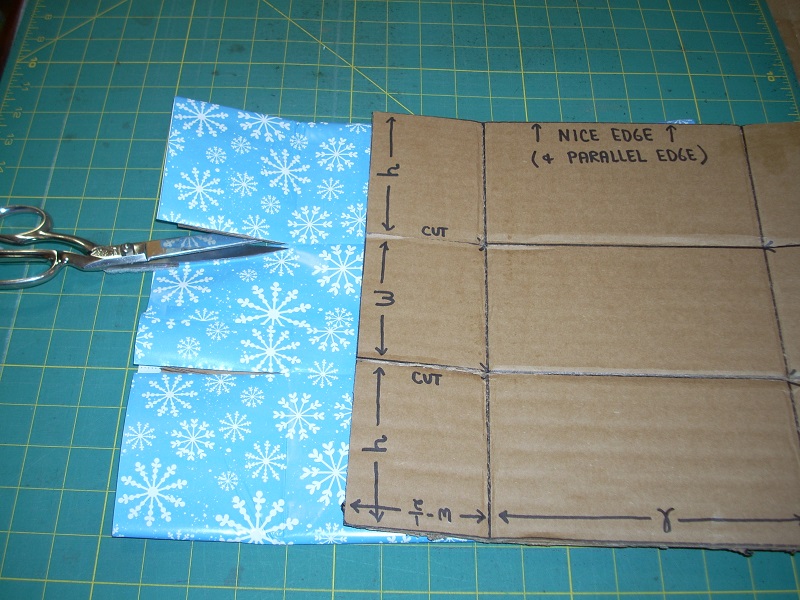
(4) SCORE AND FOLD ALONG FOLD/CUT LINES: Using your template, mark the fold/cut lines on two adjacent sides. Also, put a mark (like a star) along the ‘nice edge’. Using an awl and a quilting ruler, lightly score all fold/cut lines. Fold along each fold/cut line. Do not cut along the cutting lines (yet)! |
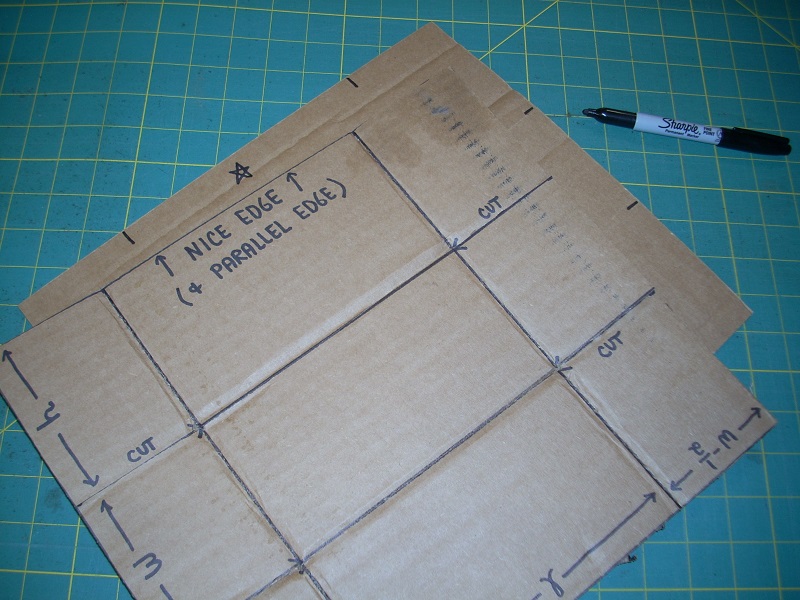 use your template to mark the fold/cut lines on two adjacent sides; also put a star along the ‘nice edge’ |
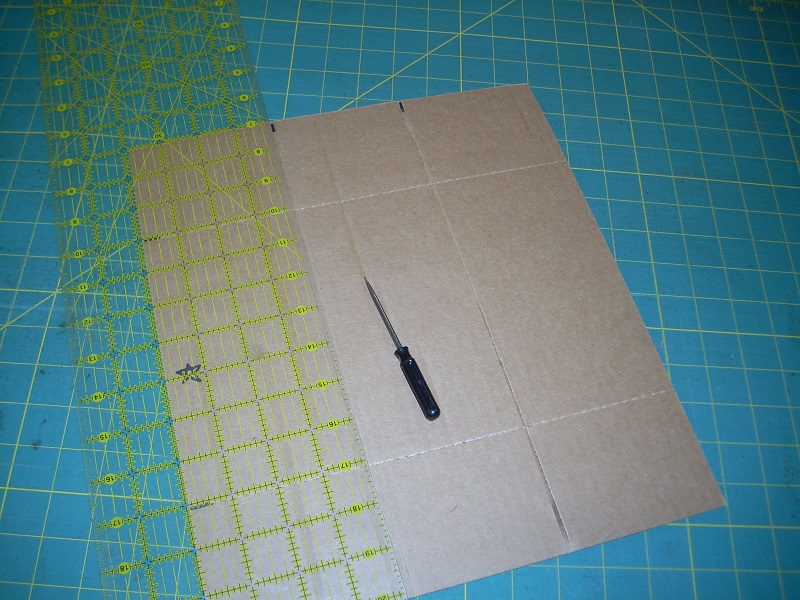 use an awl and quilting ruler to lightly score all fold/cut lines |
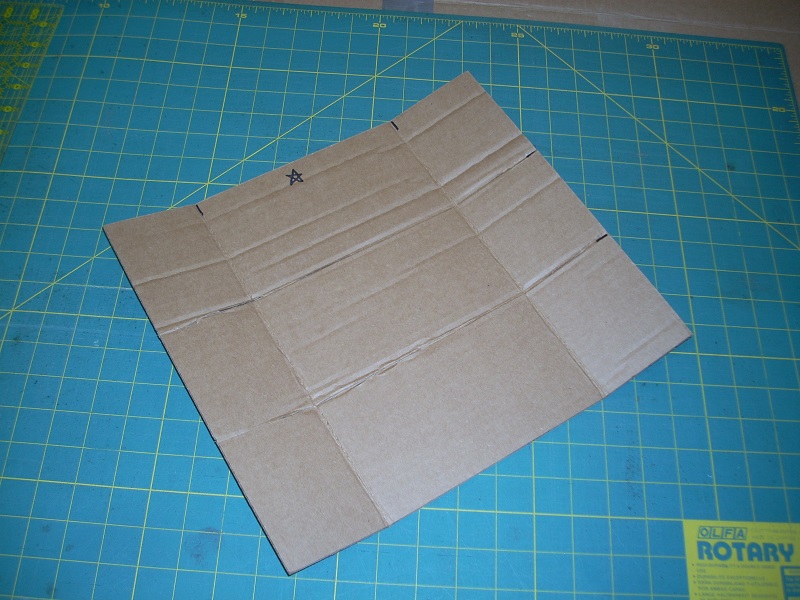 fold along each fold/cut line; do not cut along the cutting lines (yet!) |
|
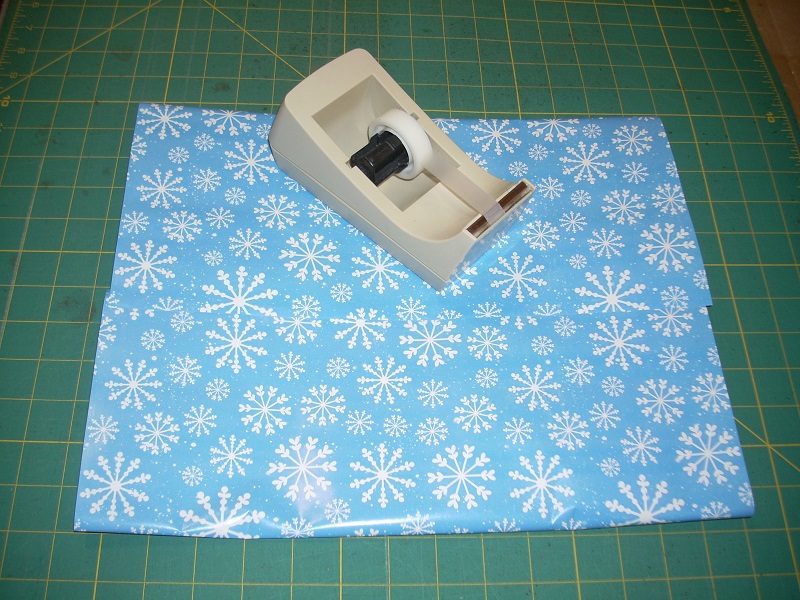
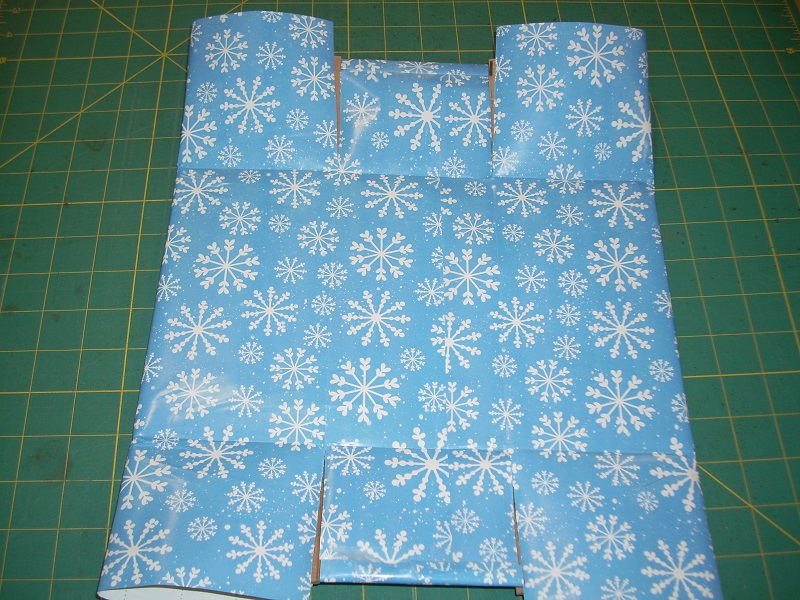
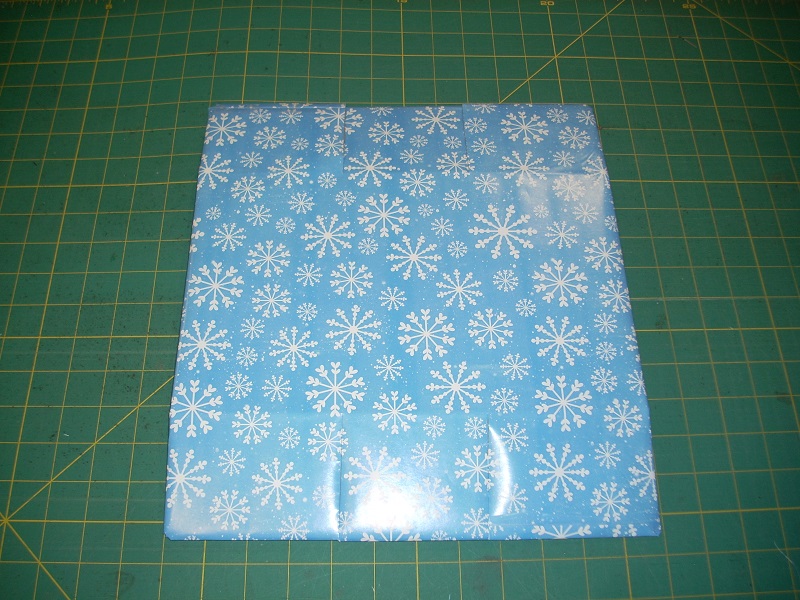
(5) COVER CARDBOARD WITH WRAPPING PAPER: For each box, cut a rectangular piece of wrapping paper with these dimensions:
Fold the wrapping paper around the cardboard, and tape the center seam. Carefully re-fold along all fold lines, so that the wrapping paper now has all the same folds as the cardboard. |
 cut a piece of wrapping paper: the ‘star’ side, plus 2 inches by twice the non-star side, plus 1 inch Center cardboard on paper, as shown. |
 wrap the cardboard; tape the center seam |
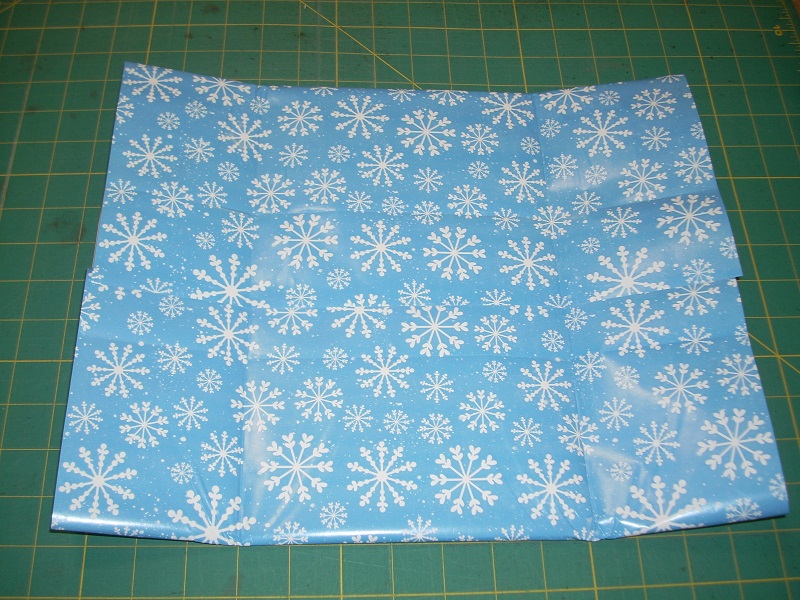 carefully re-fold along all fold lines |
|
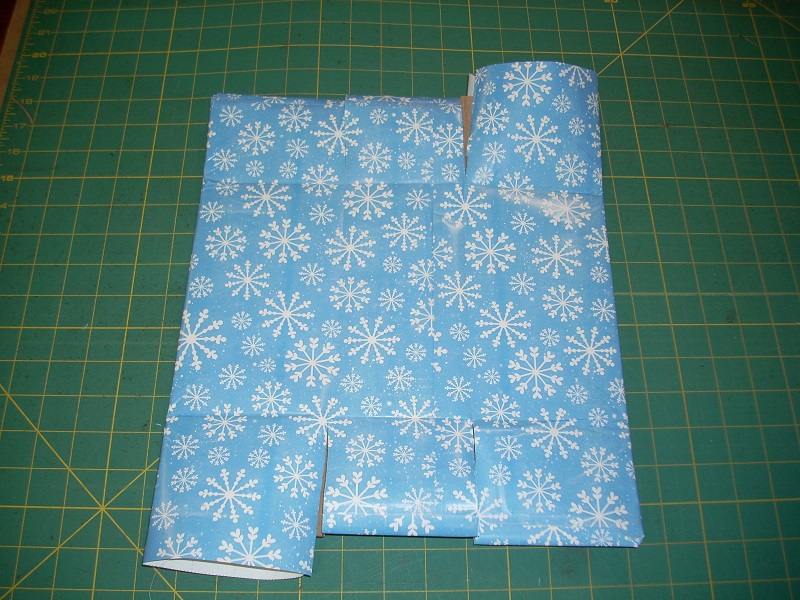
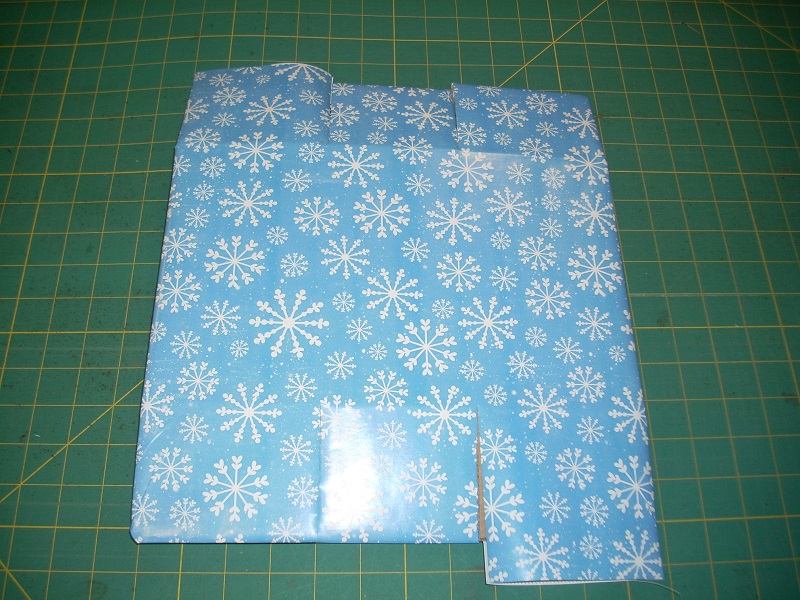
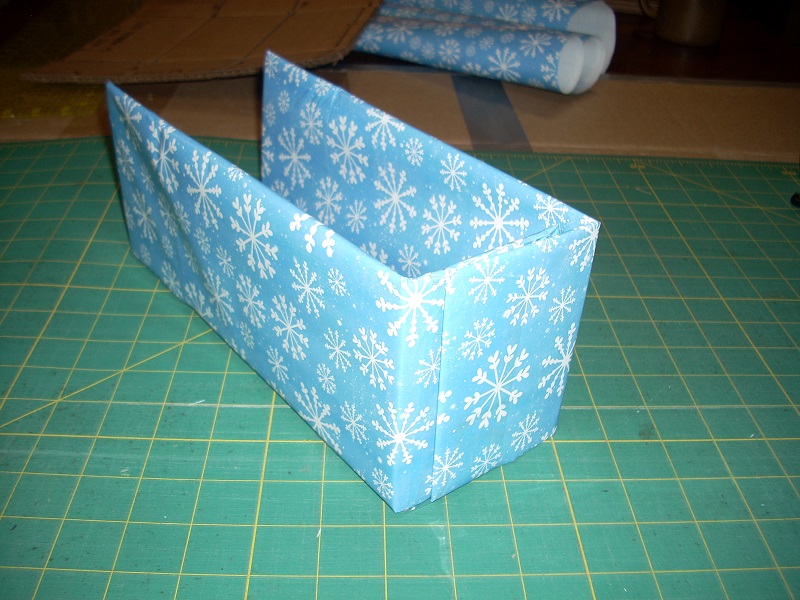
(6) MAKE FOUR CUTS; EDGE-FINISH CENTER TABS: Using the template and fold lines as your guide, make the four cuts. Cut through both the wrapping paper and cardboard at the same time. There is one inch of extra wrapping paper on each cut side, which is used to finish the edges. On each ‘center tab’, fold the outer edge about one-half inch up, then one-half inch up again (to seal the raw edge). Tape completely across. |
 make the four cuts (through wrapping paper and cardboard at the same time) |
 center tabs: fold outer edge up ½", then ½" again; tape completely across |
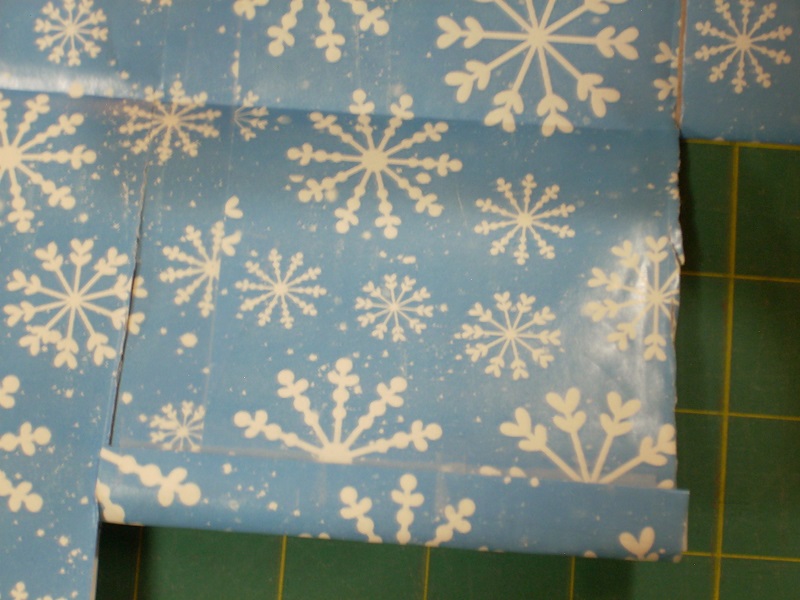 close up of finished center tab edge |
|
(7) EDGE-FINISH TWO CORNER TABS: There are four corner tabs remaining to edge-finish. One tab on each end is finished towards the inside of the box (UP); the other is finished DOWN. Do one corner tab on each end as follows:
|
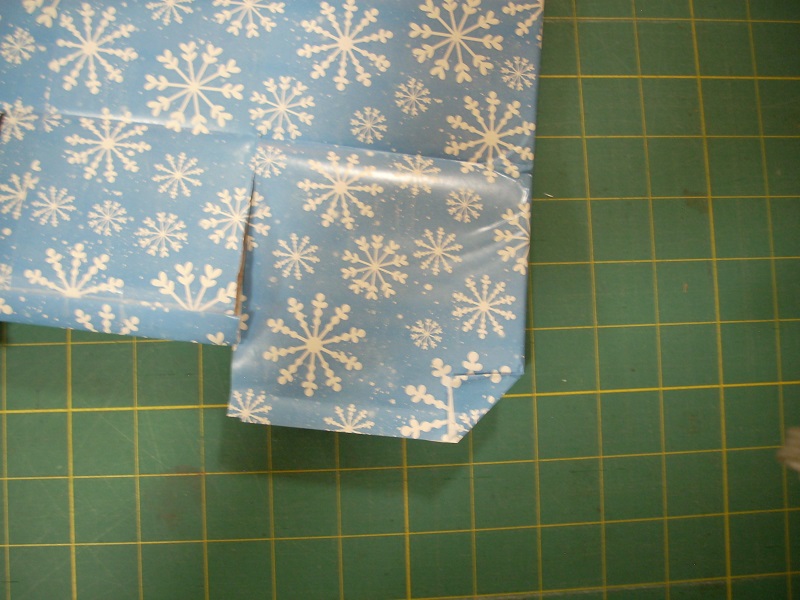 (A) fold outer corner in diagonally |
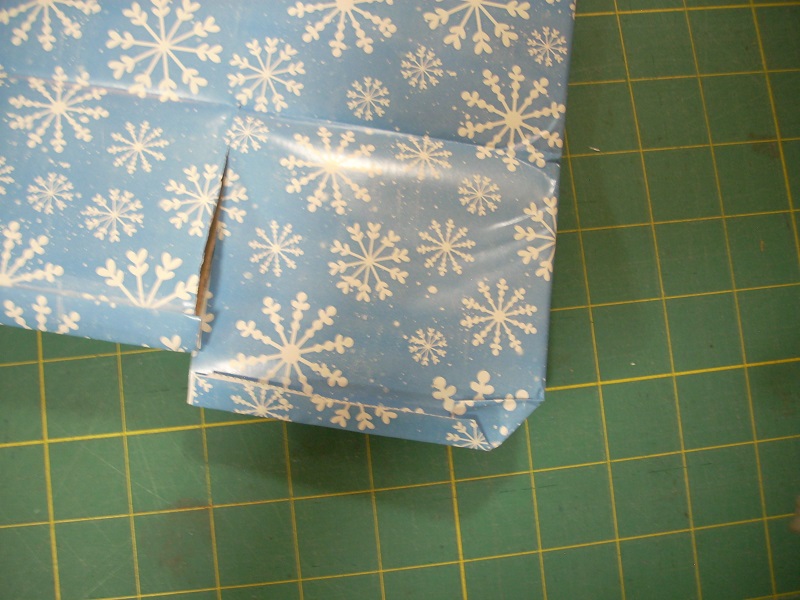 (B) fold in ½" |
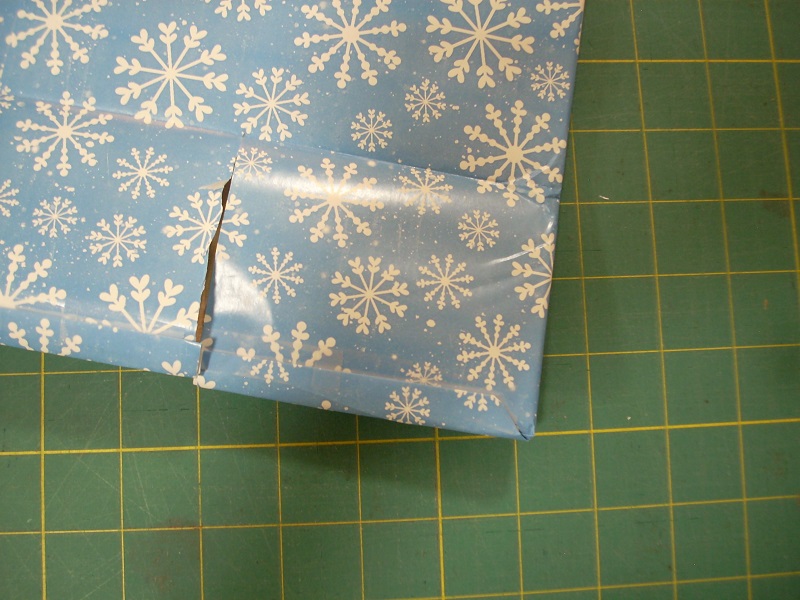 (C) fold in ½" again, and tape |
 the current situation; only two corner tabs still need to be edge-finished |
|
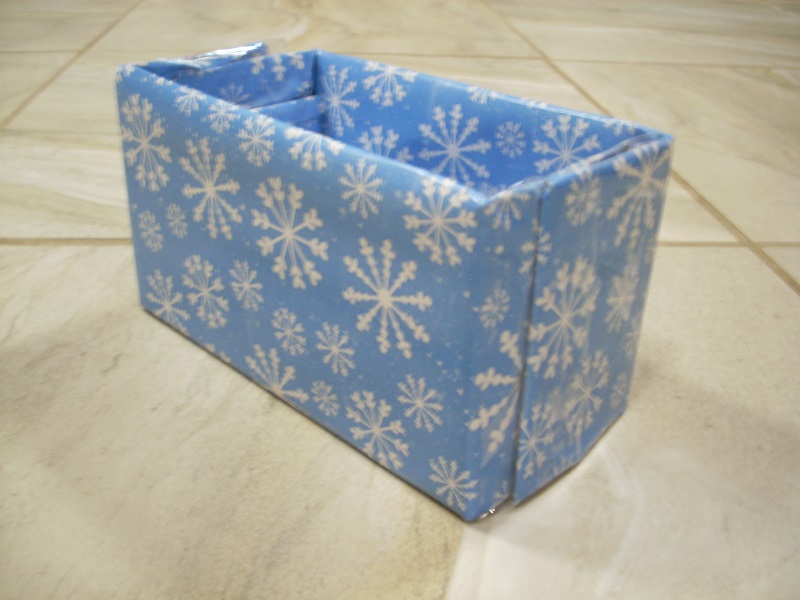
(8) EDGE-FINISH LAST TWO CORNER TABS AND MAKE INTO A BOX: Flip over the wrapped cardboard unit. Edge-finish the last two corner tabs, as in (7). Get four pieces of packing tape at-the-ready on (say) the back of a chair. Fold center tab up, then fold two corner tabs in (with no-seam-showing tab on outside). Tape to secure. |
 flip over the wrapped cardboard unit |
 edge-finish the last two corner tabs |
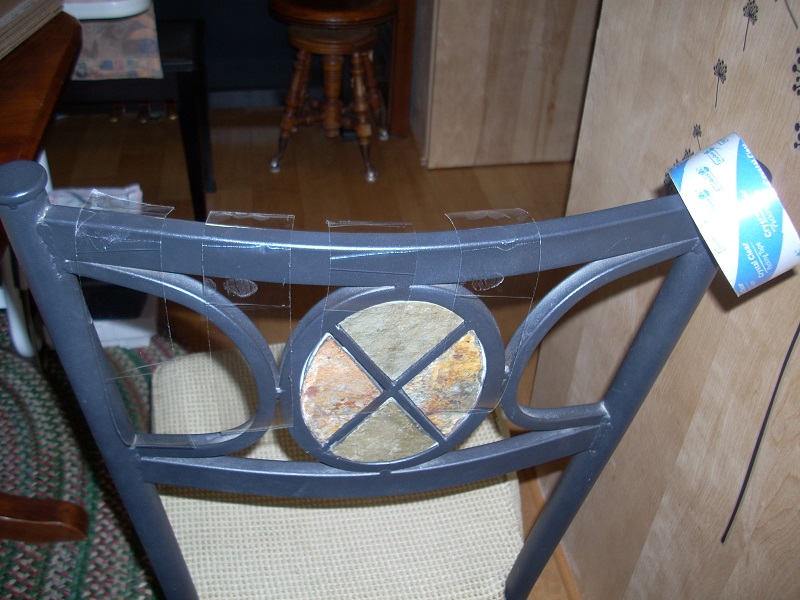 have four pieces of packing tape ready |
 fold ends in; tape to secure |