Monthly Craft:
April 2025
‘Peek Through’ Card
This ‘peek through’ card has a cut-out on the front that shows part of the inside design. It's absolutely fine if the part showing through doesn't make complete sense—you might not know exactly what you're looking at—this adds to the intrigue! Open the card to reveal the full story!
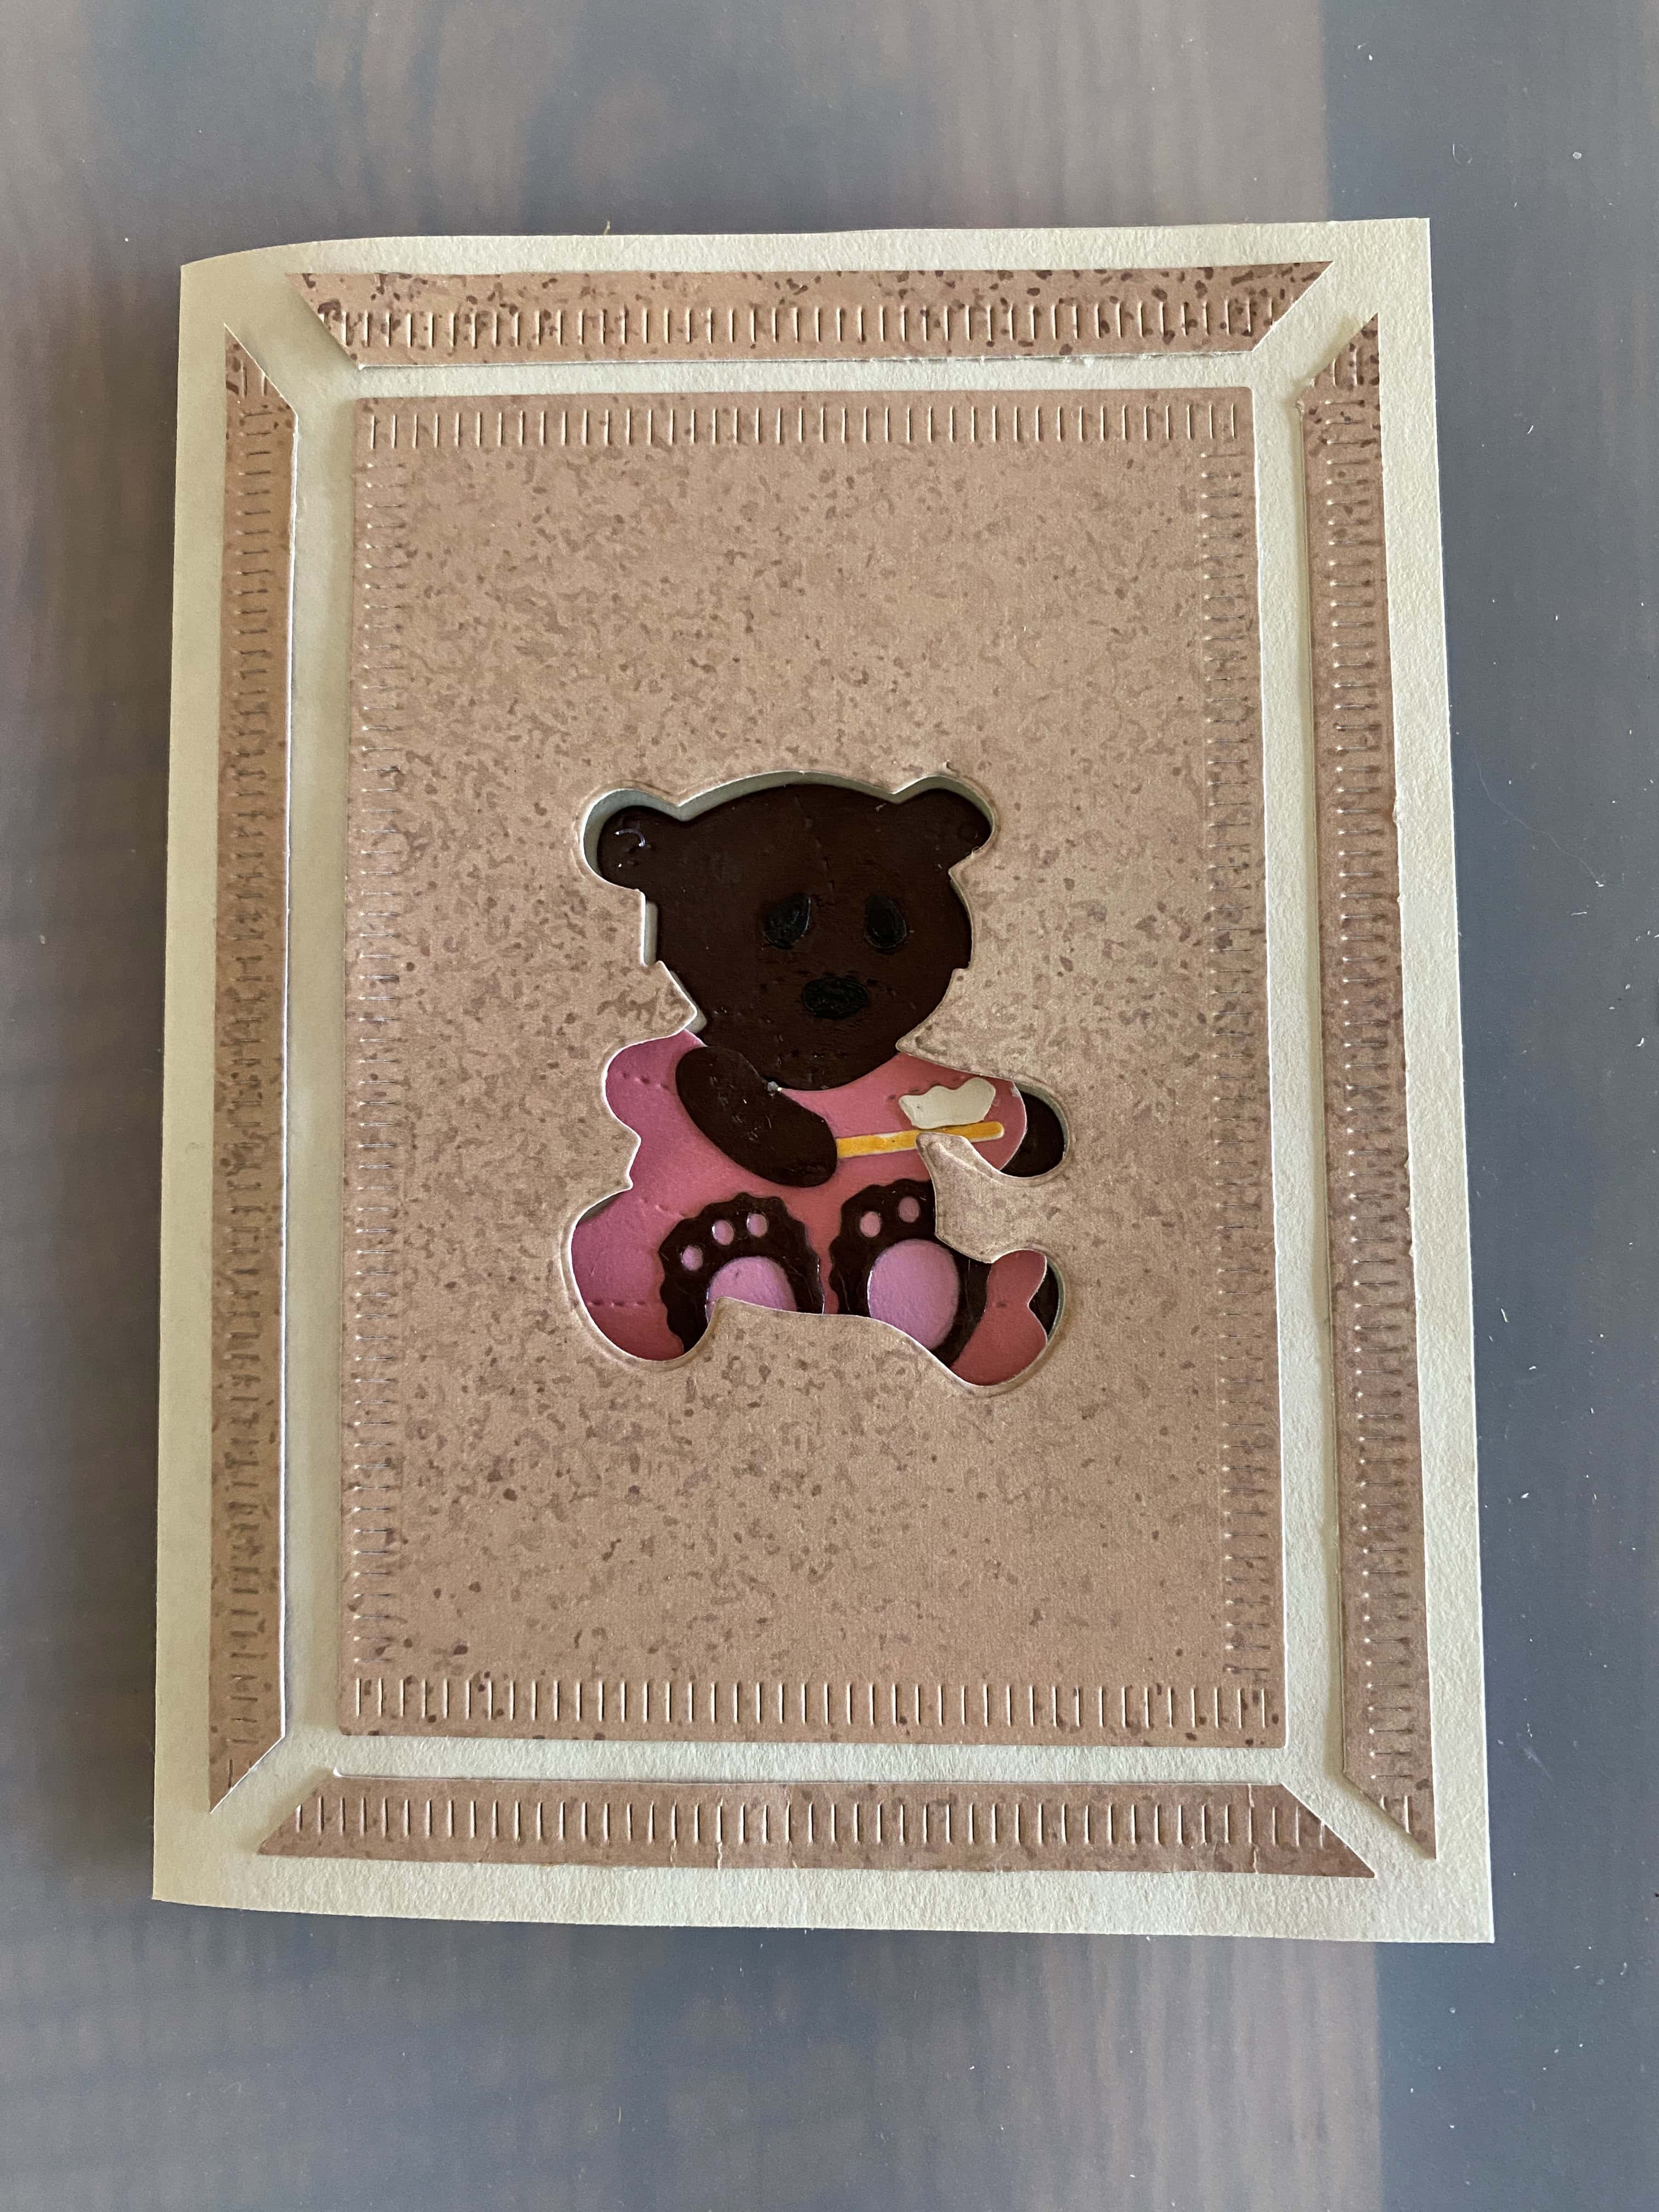
The cut-out is a bear ... but what's going on with that pink stuff?
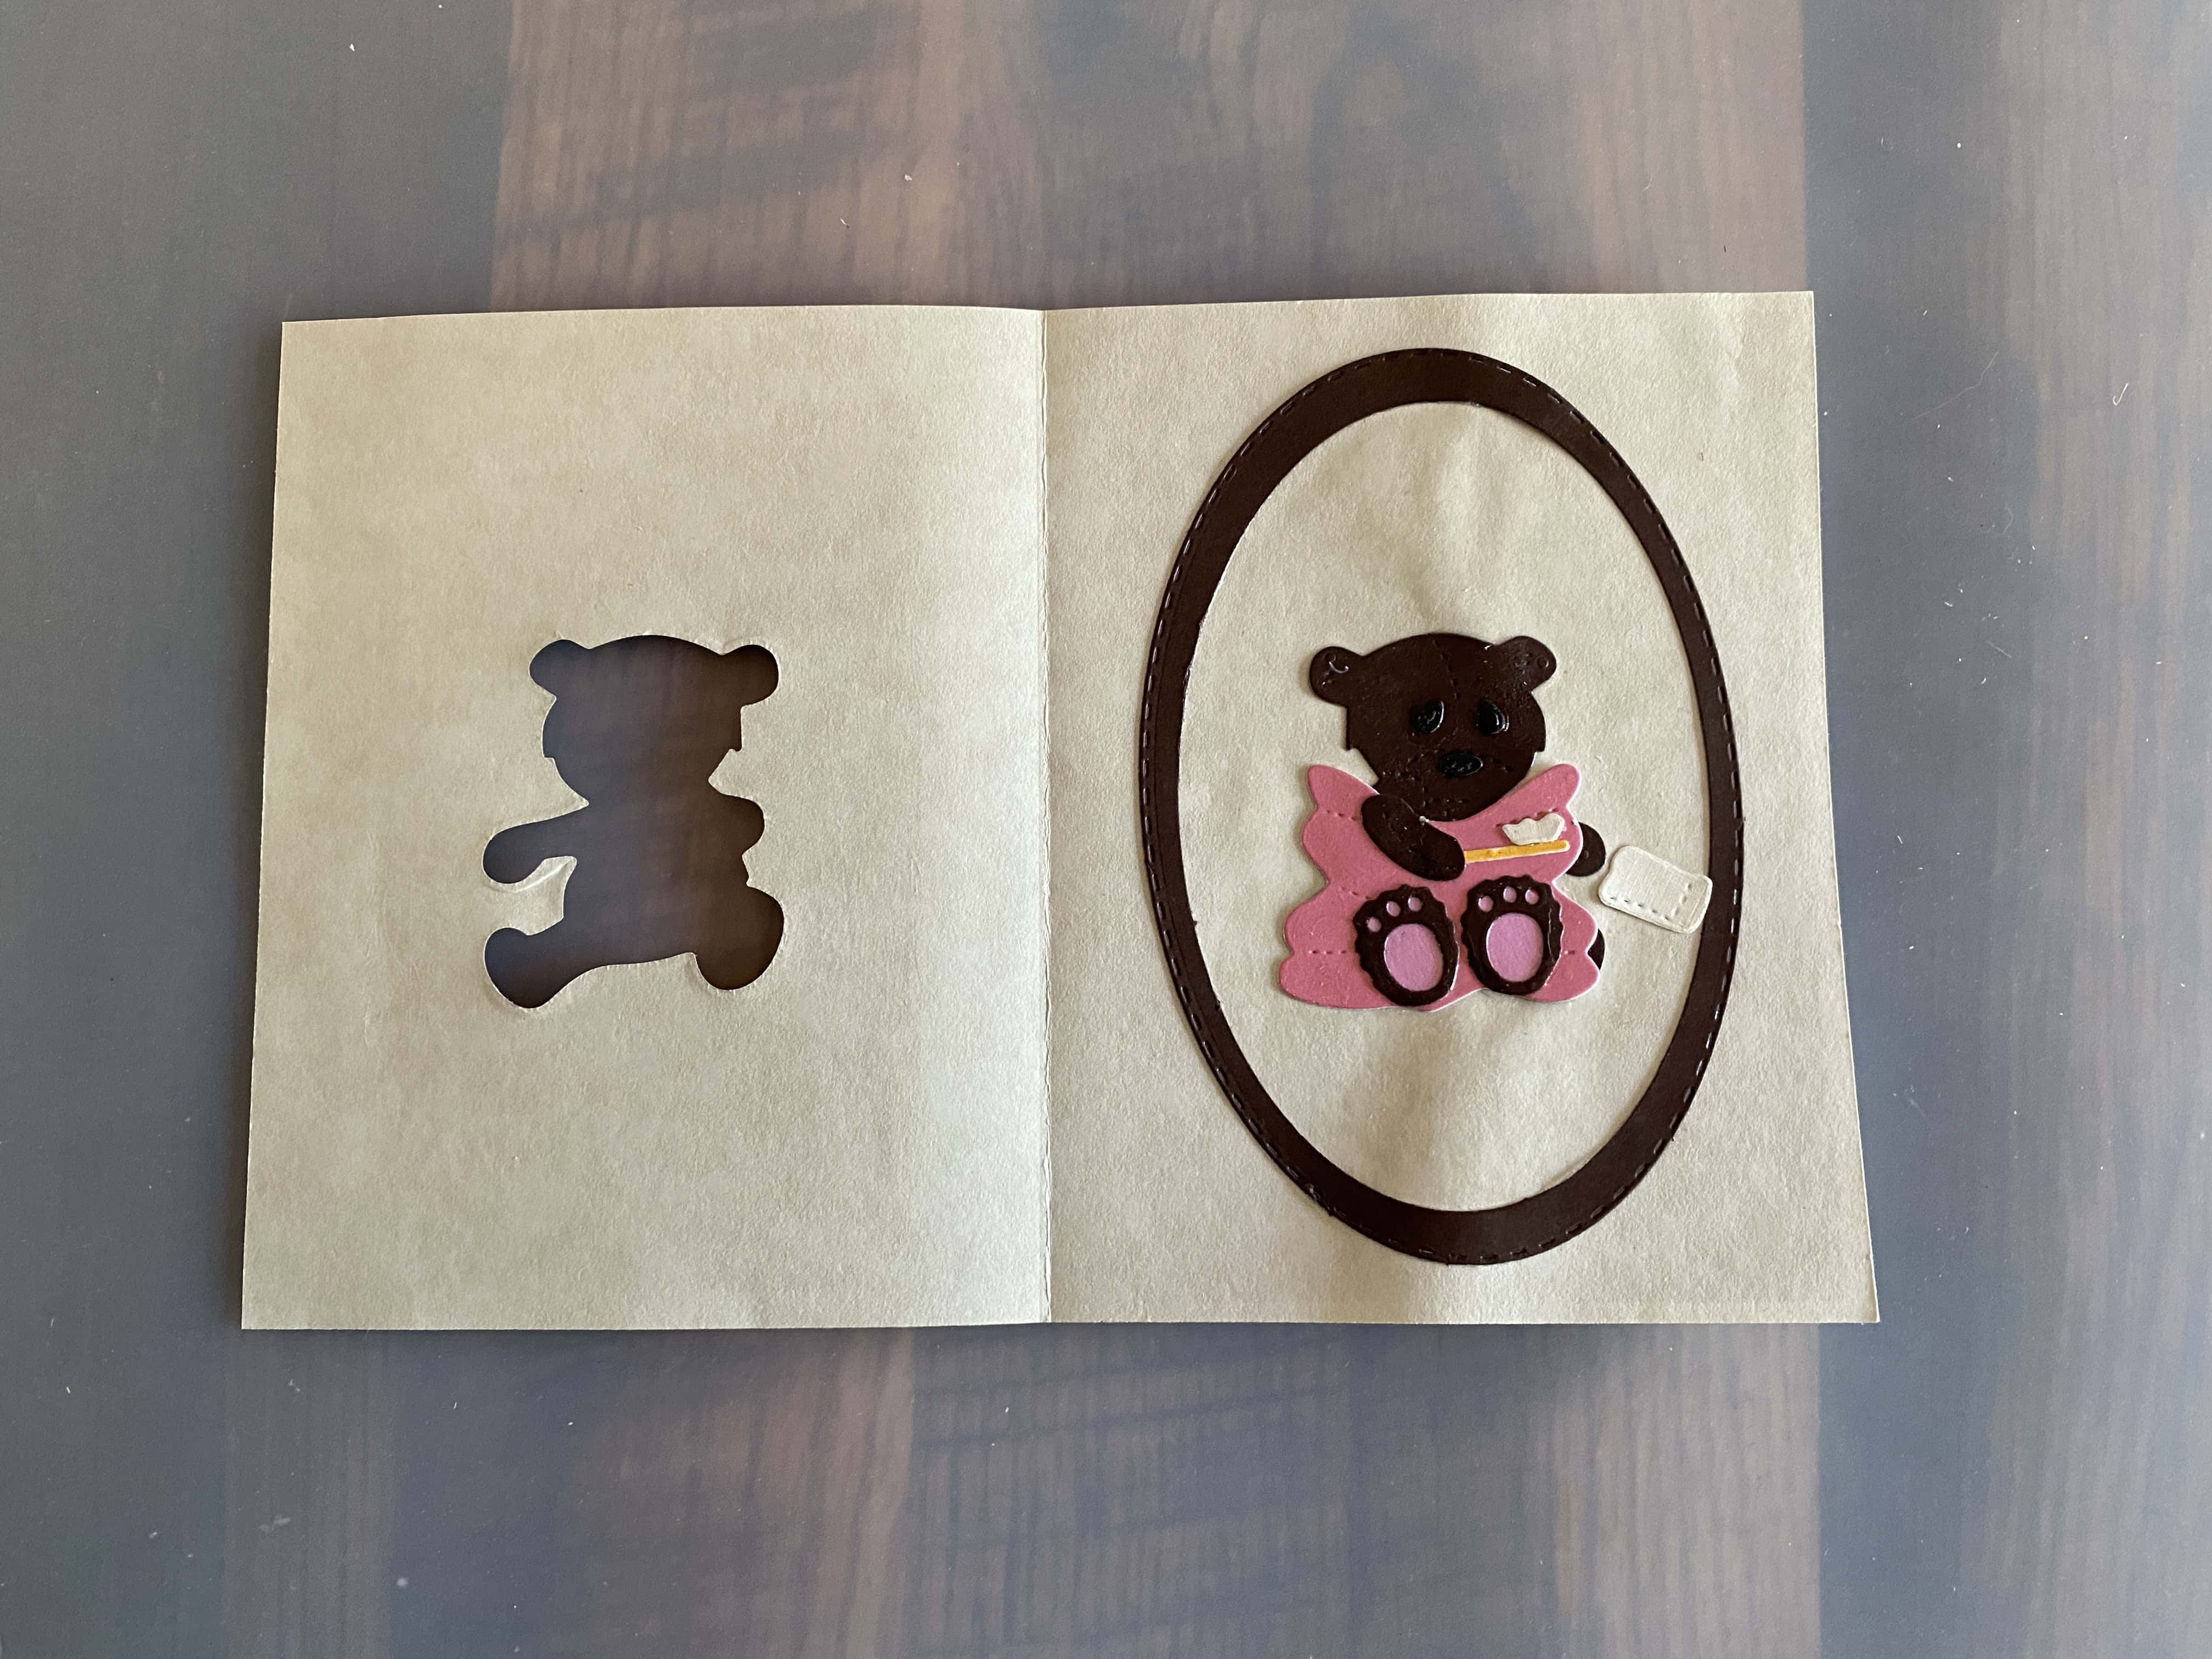
Oh! It's a bear swaddled in a towel at bath-time!
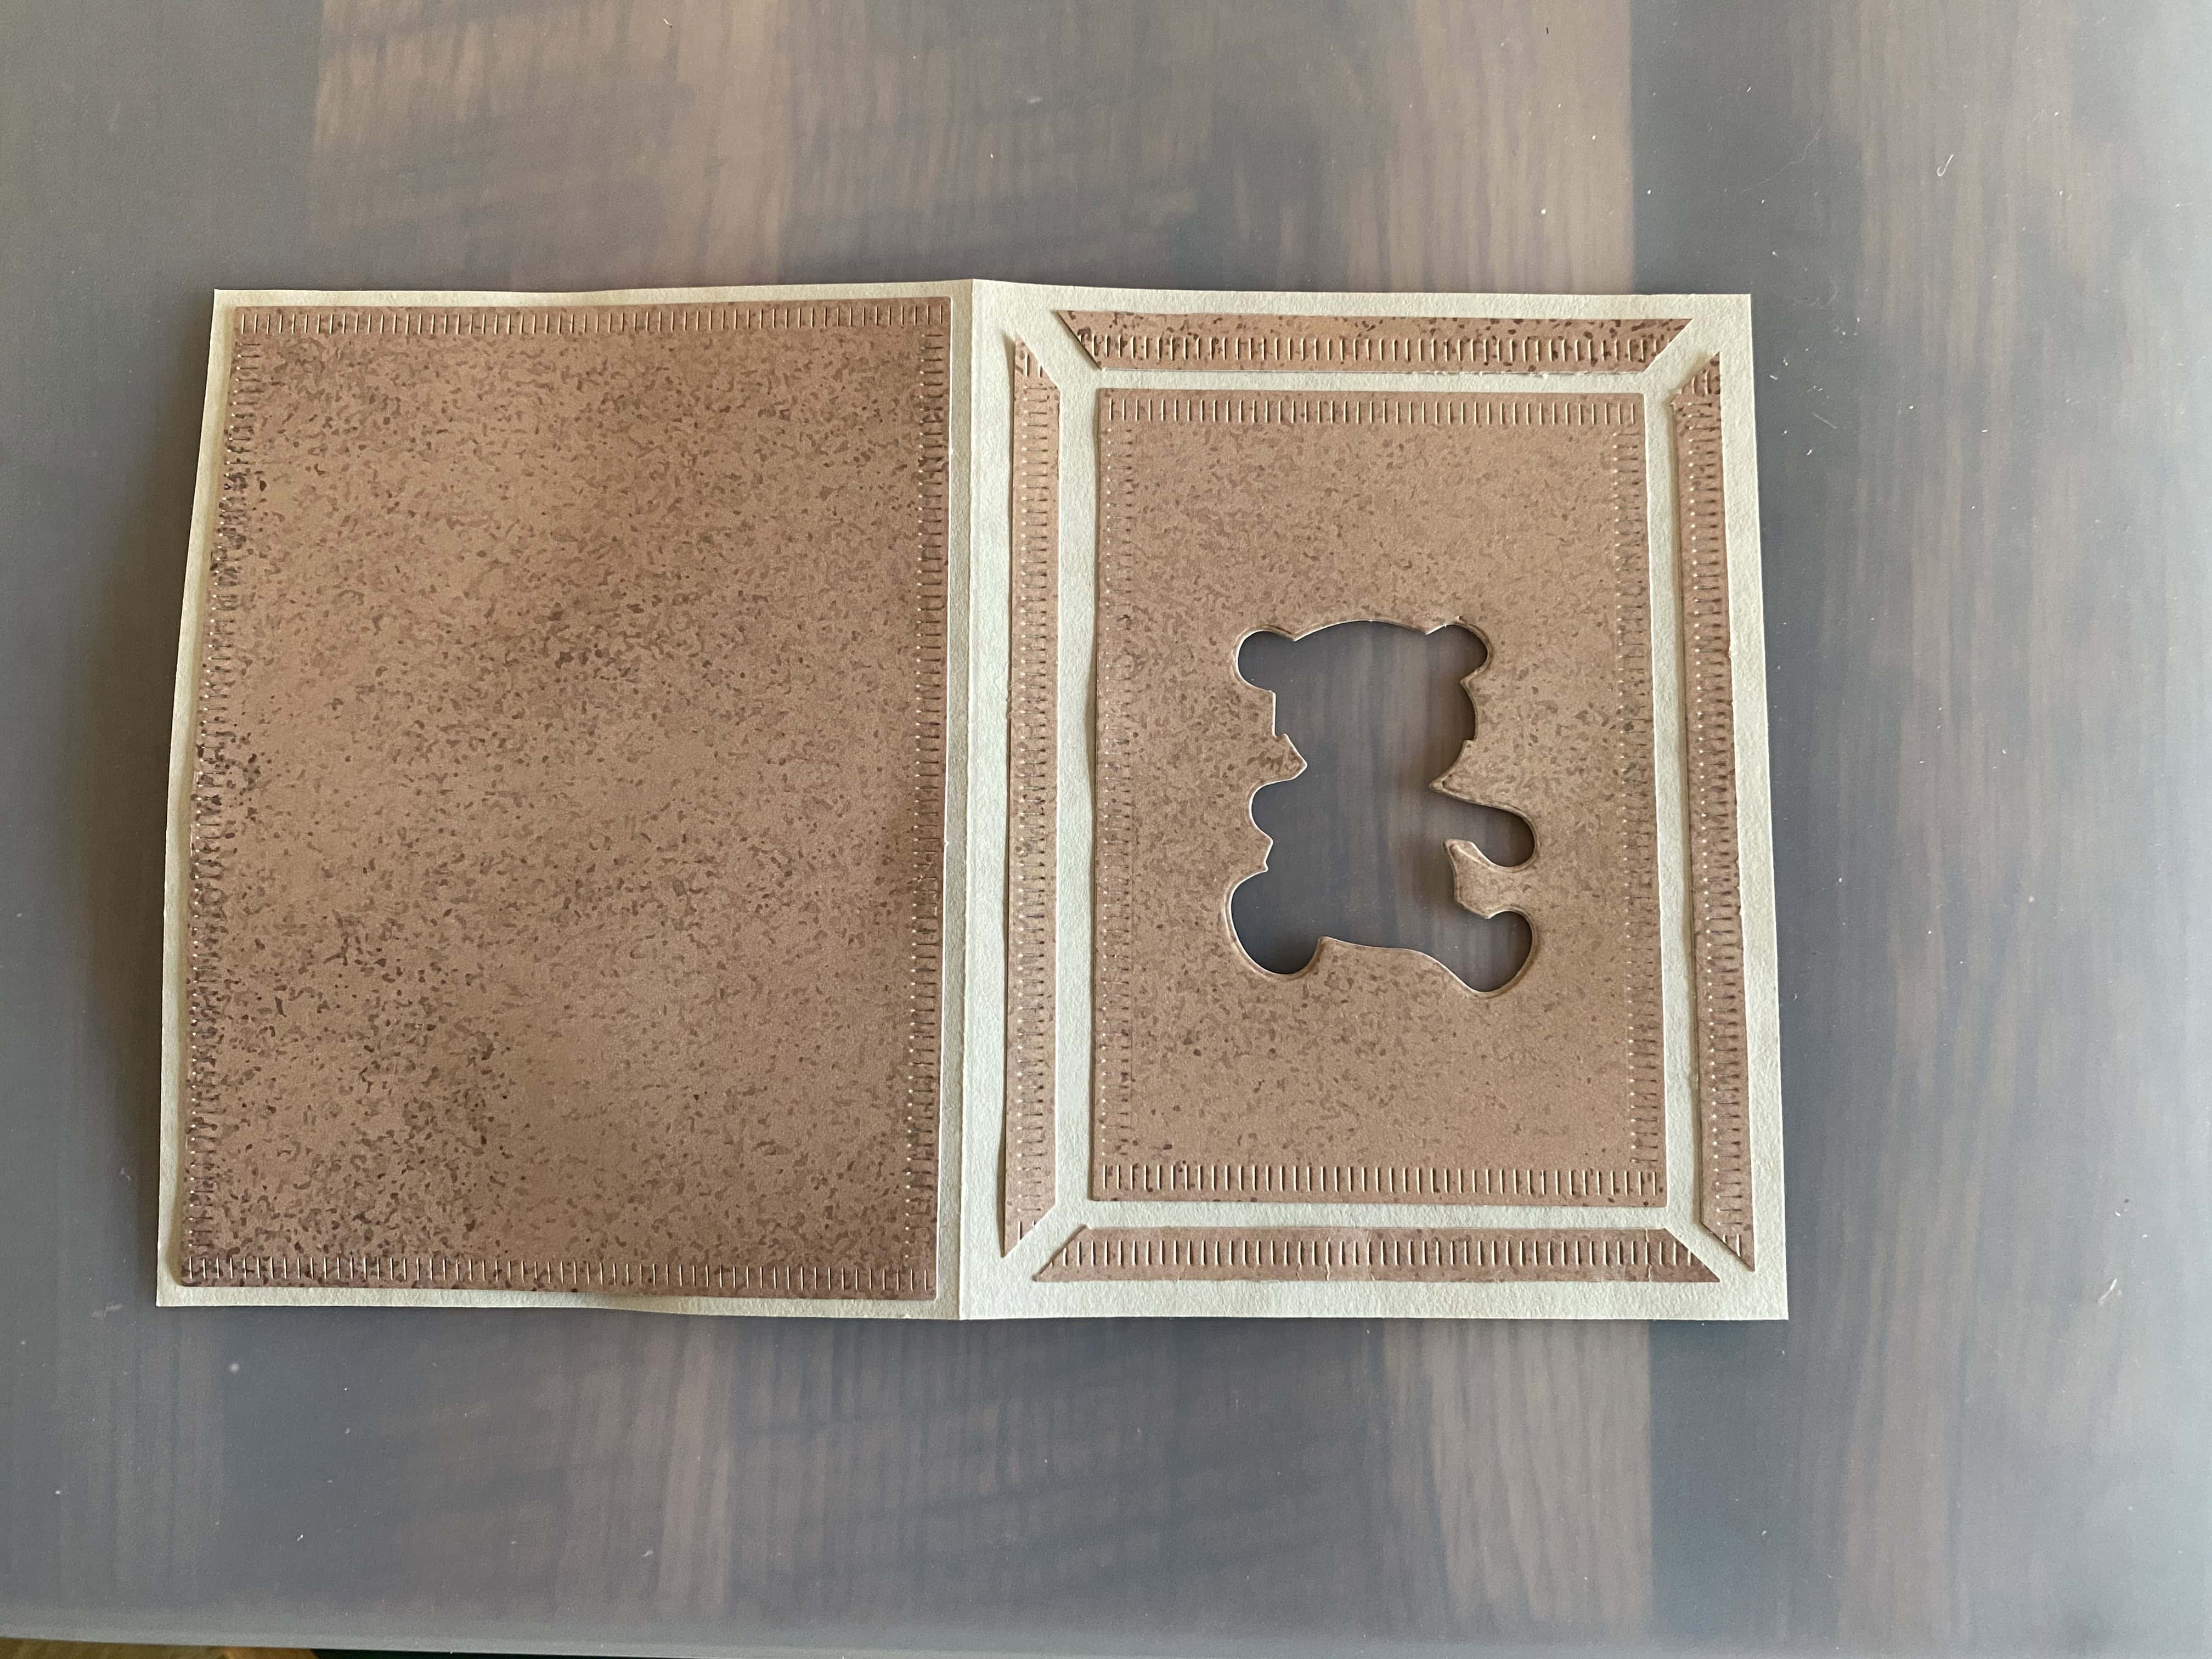
The layered rectangles/frames add dimension and interest
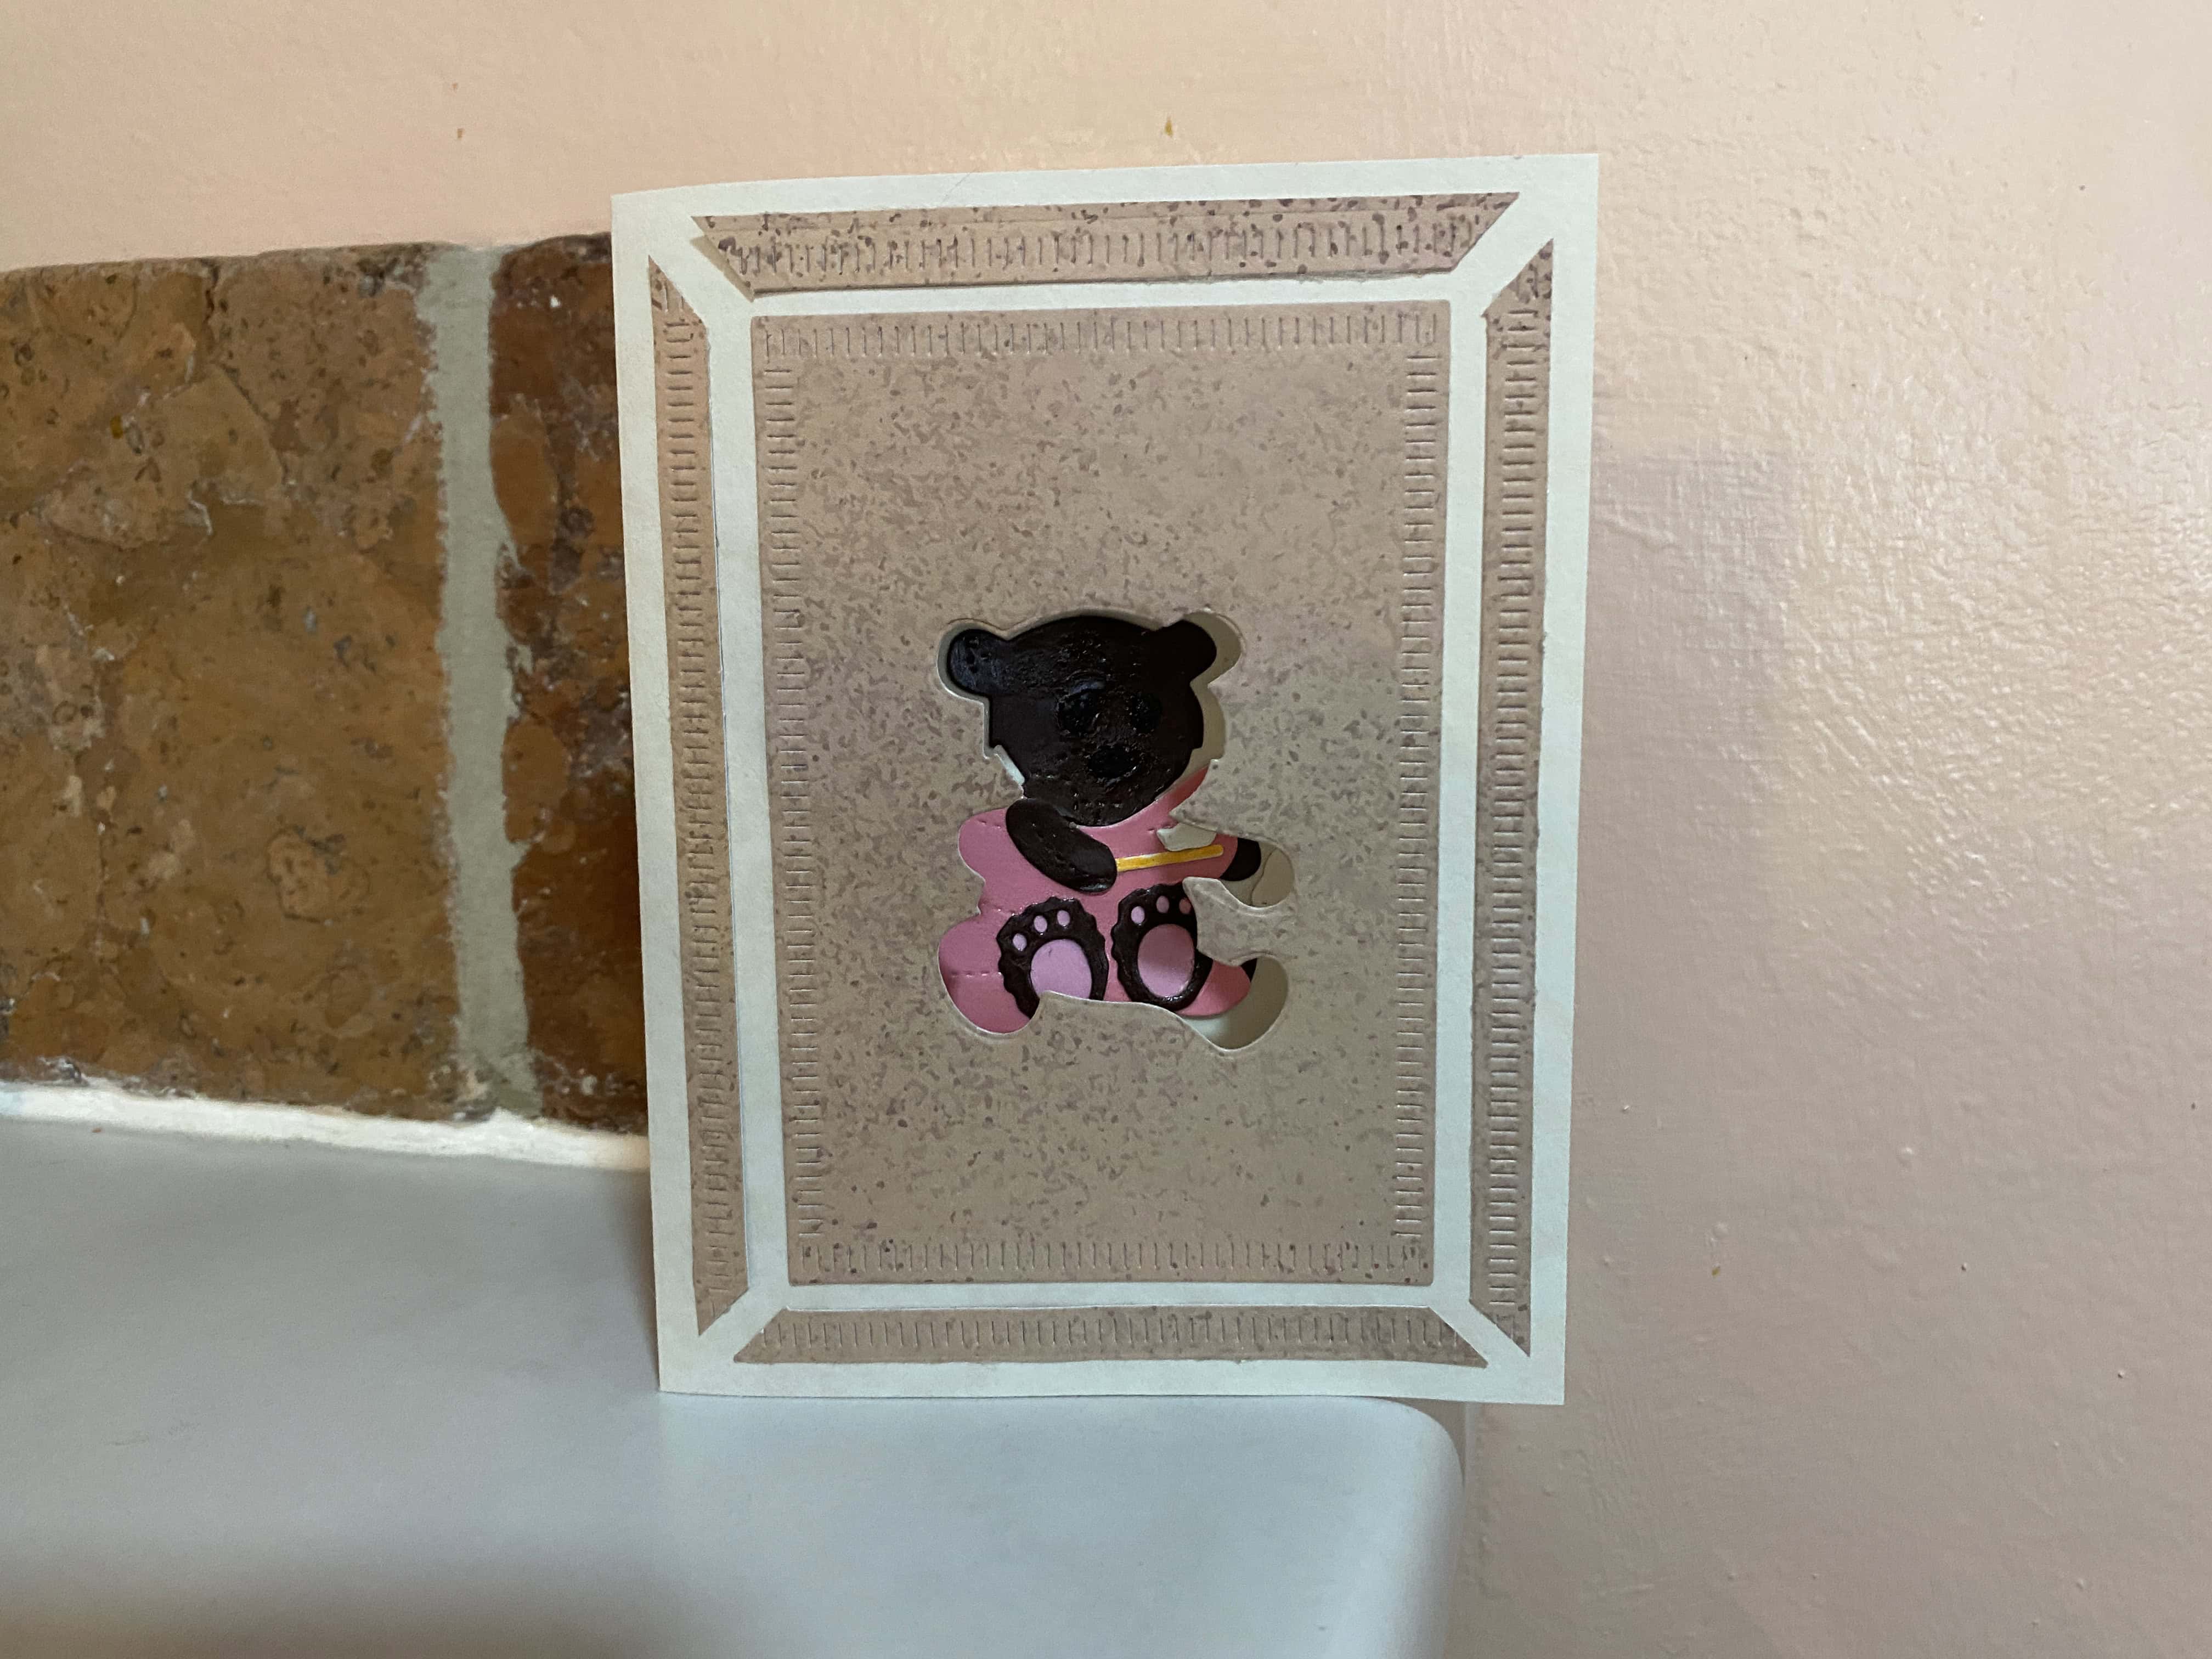
When the card stands up, slightly open, the peek-through effect is even more fun
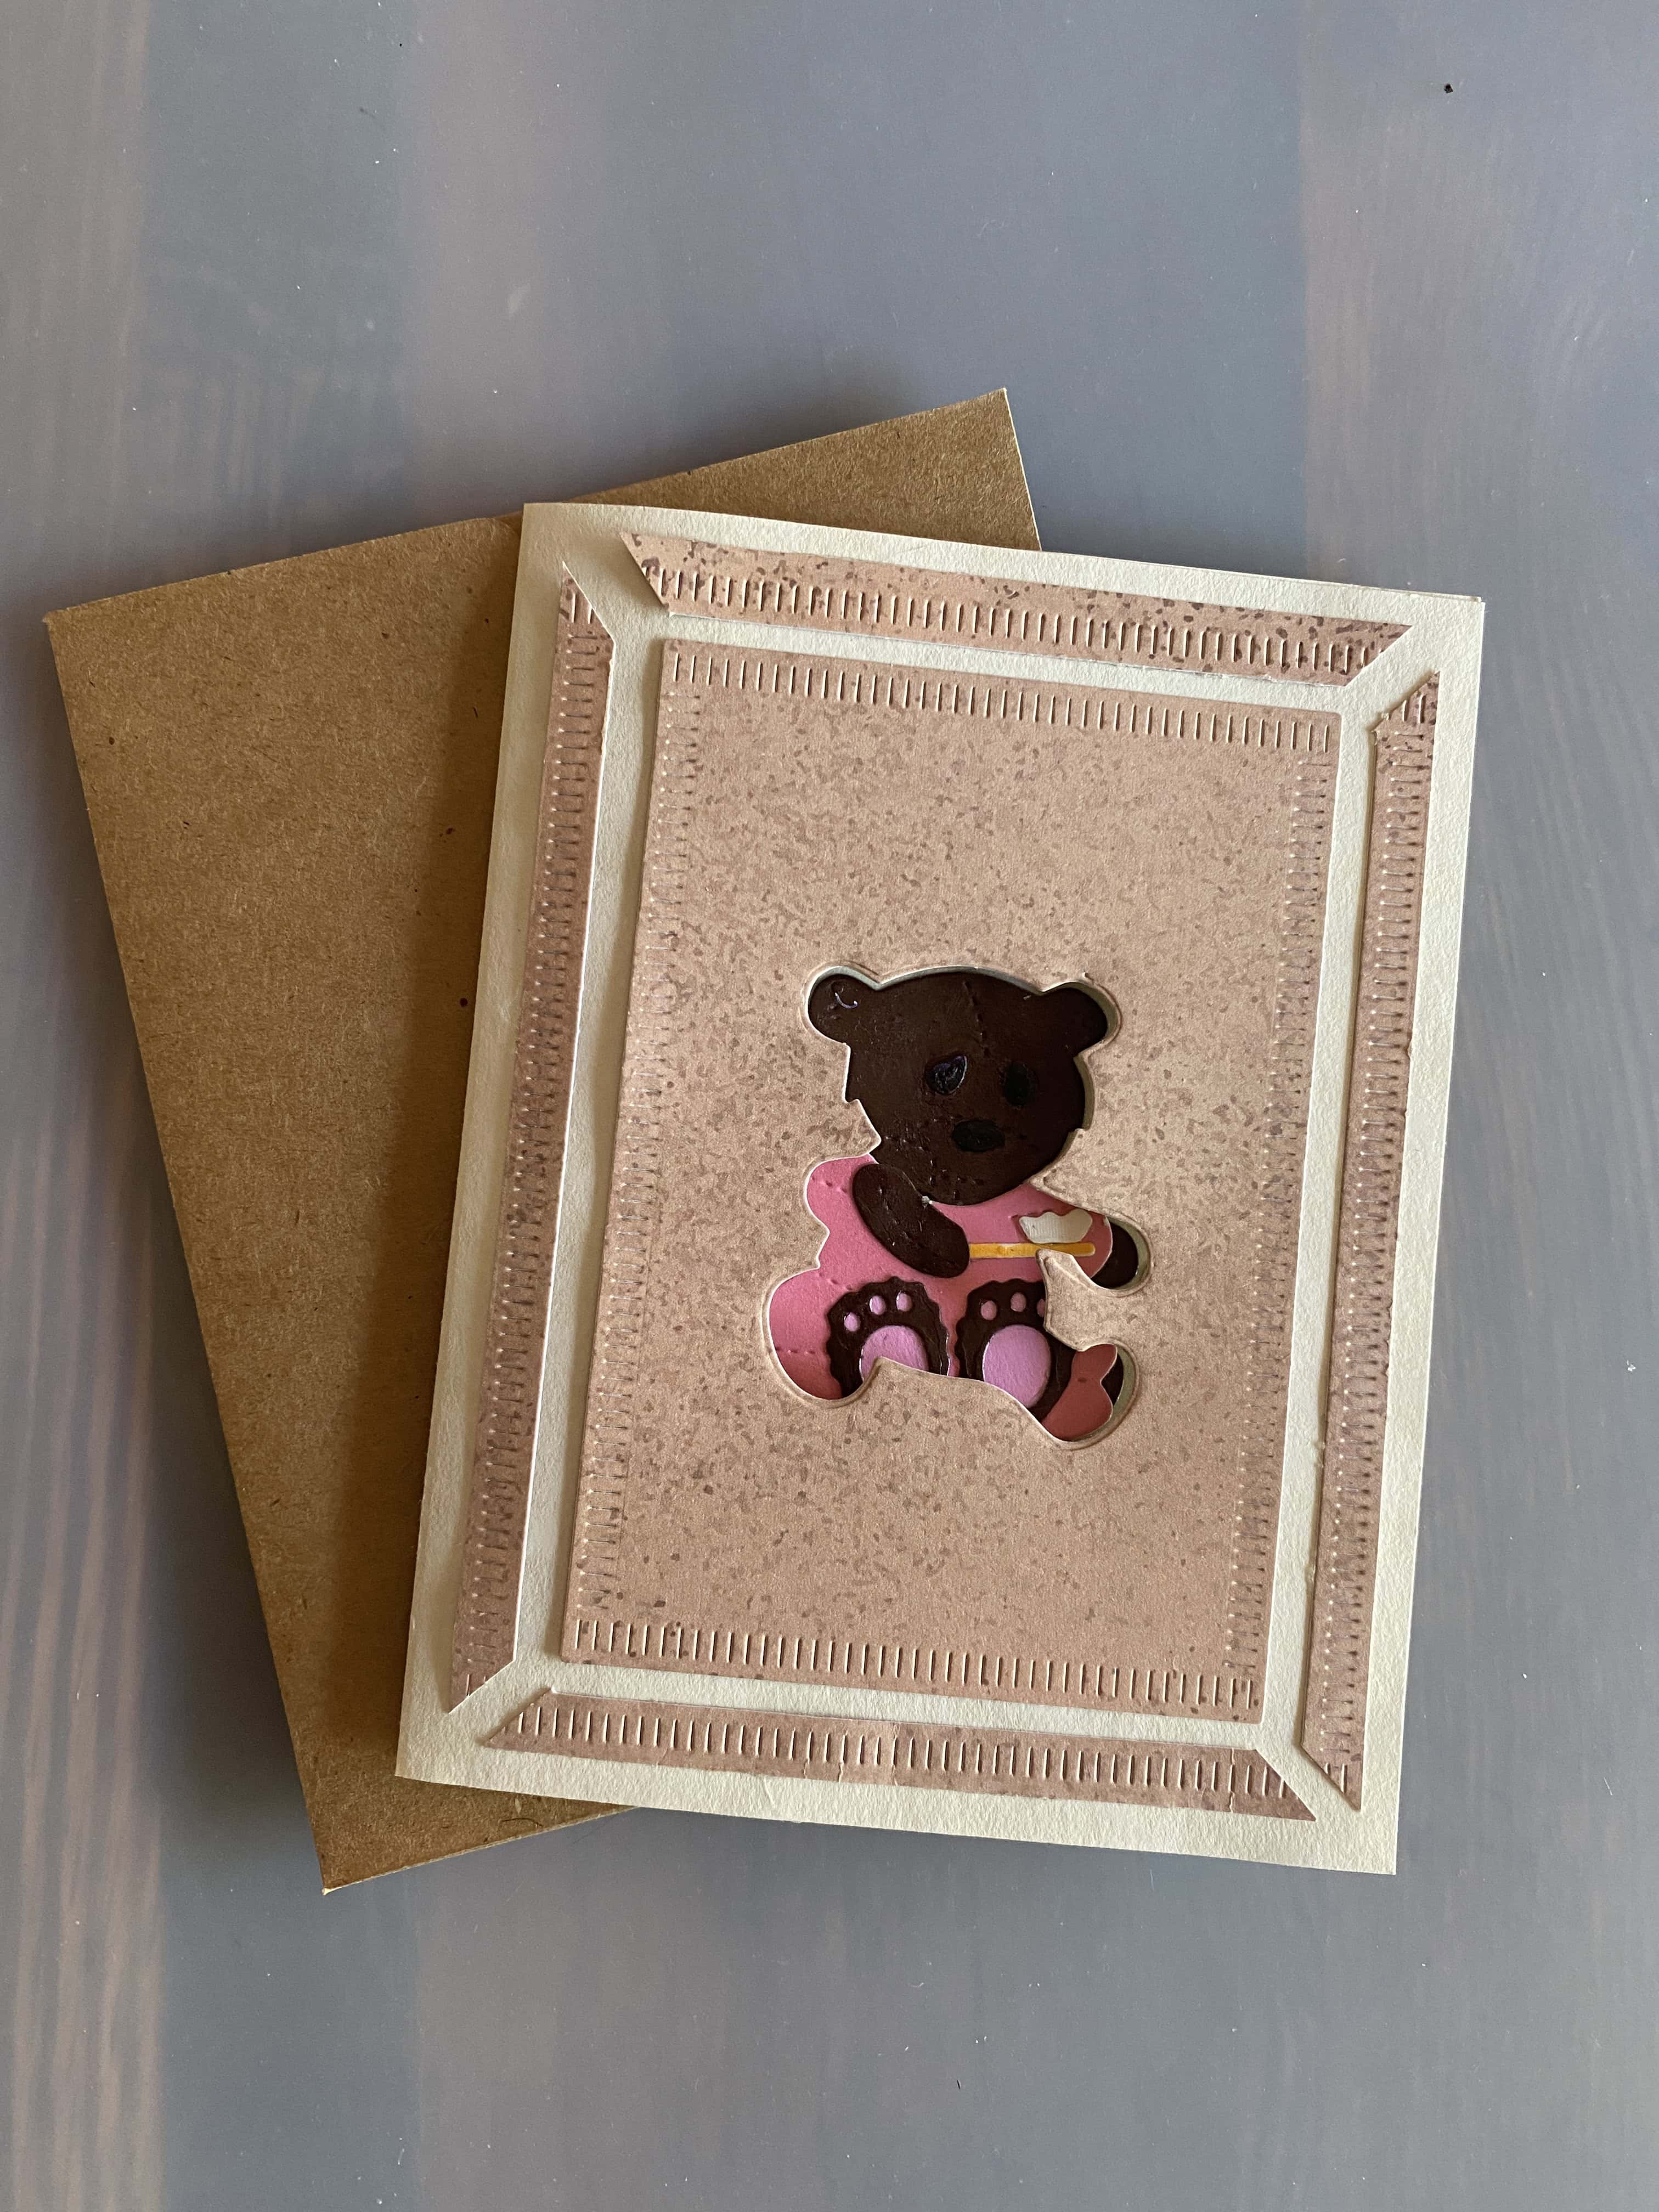
The finished card is $\,4\frac 14\text{in}\times 5\frac 12\text{in}\,,$ and fits in a standard A2 envelope
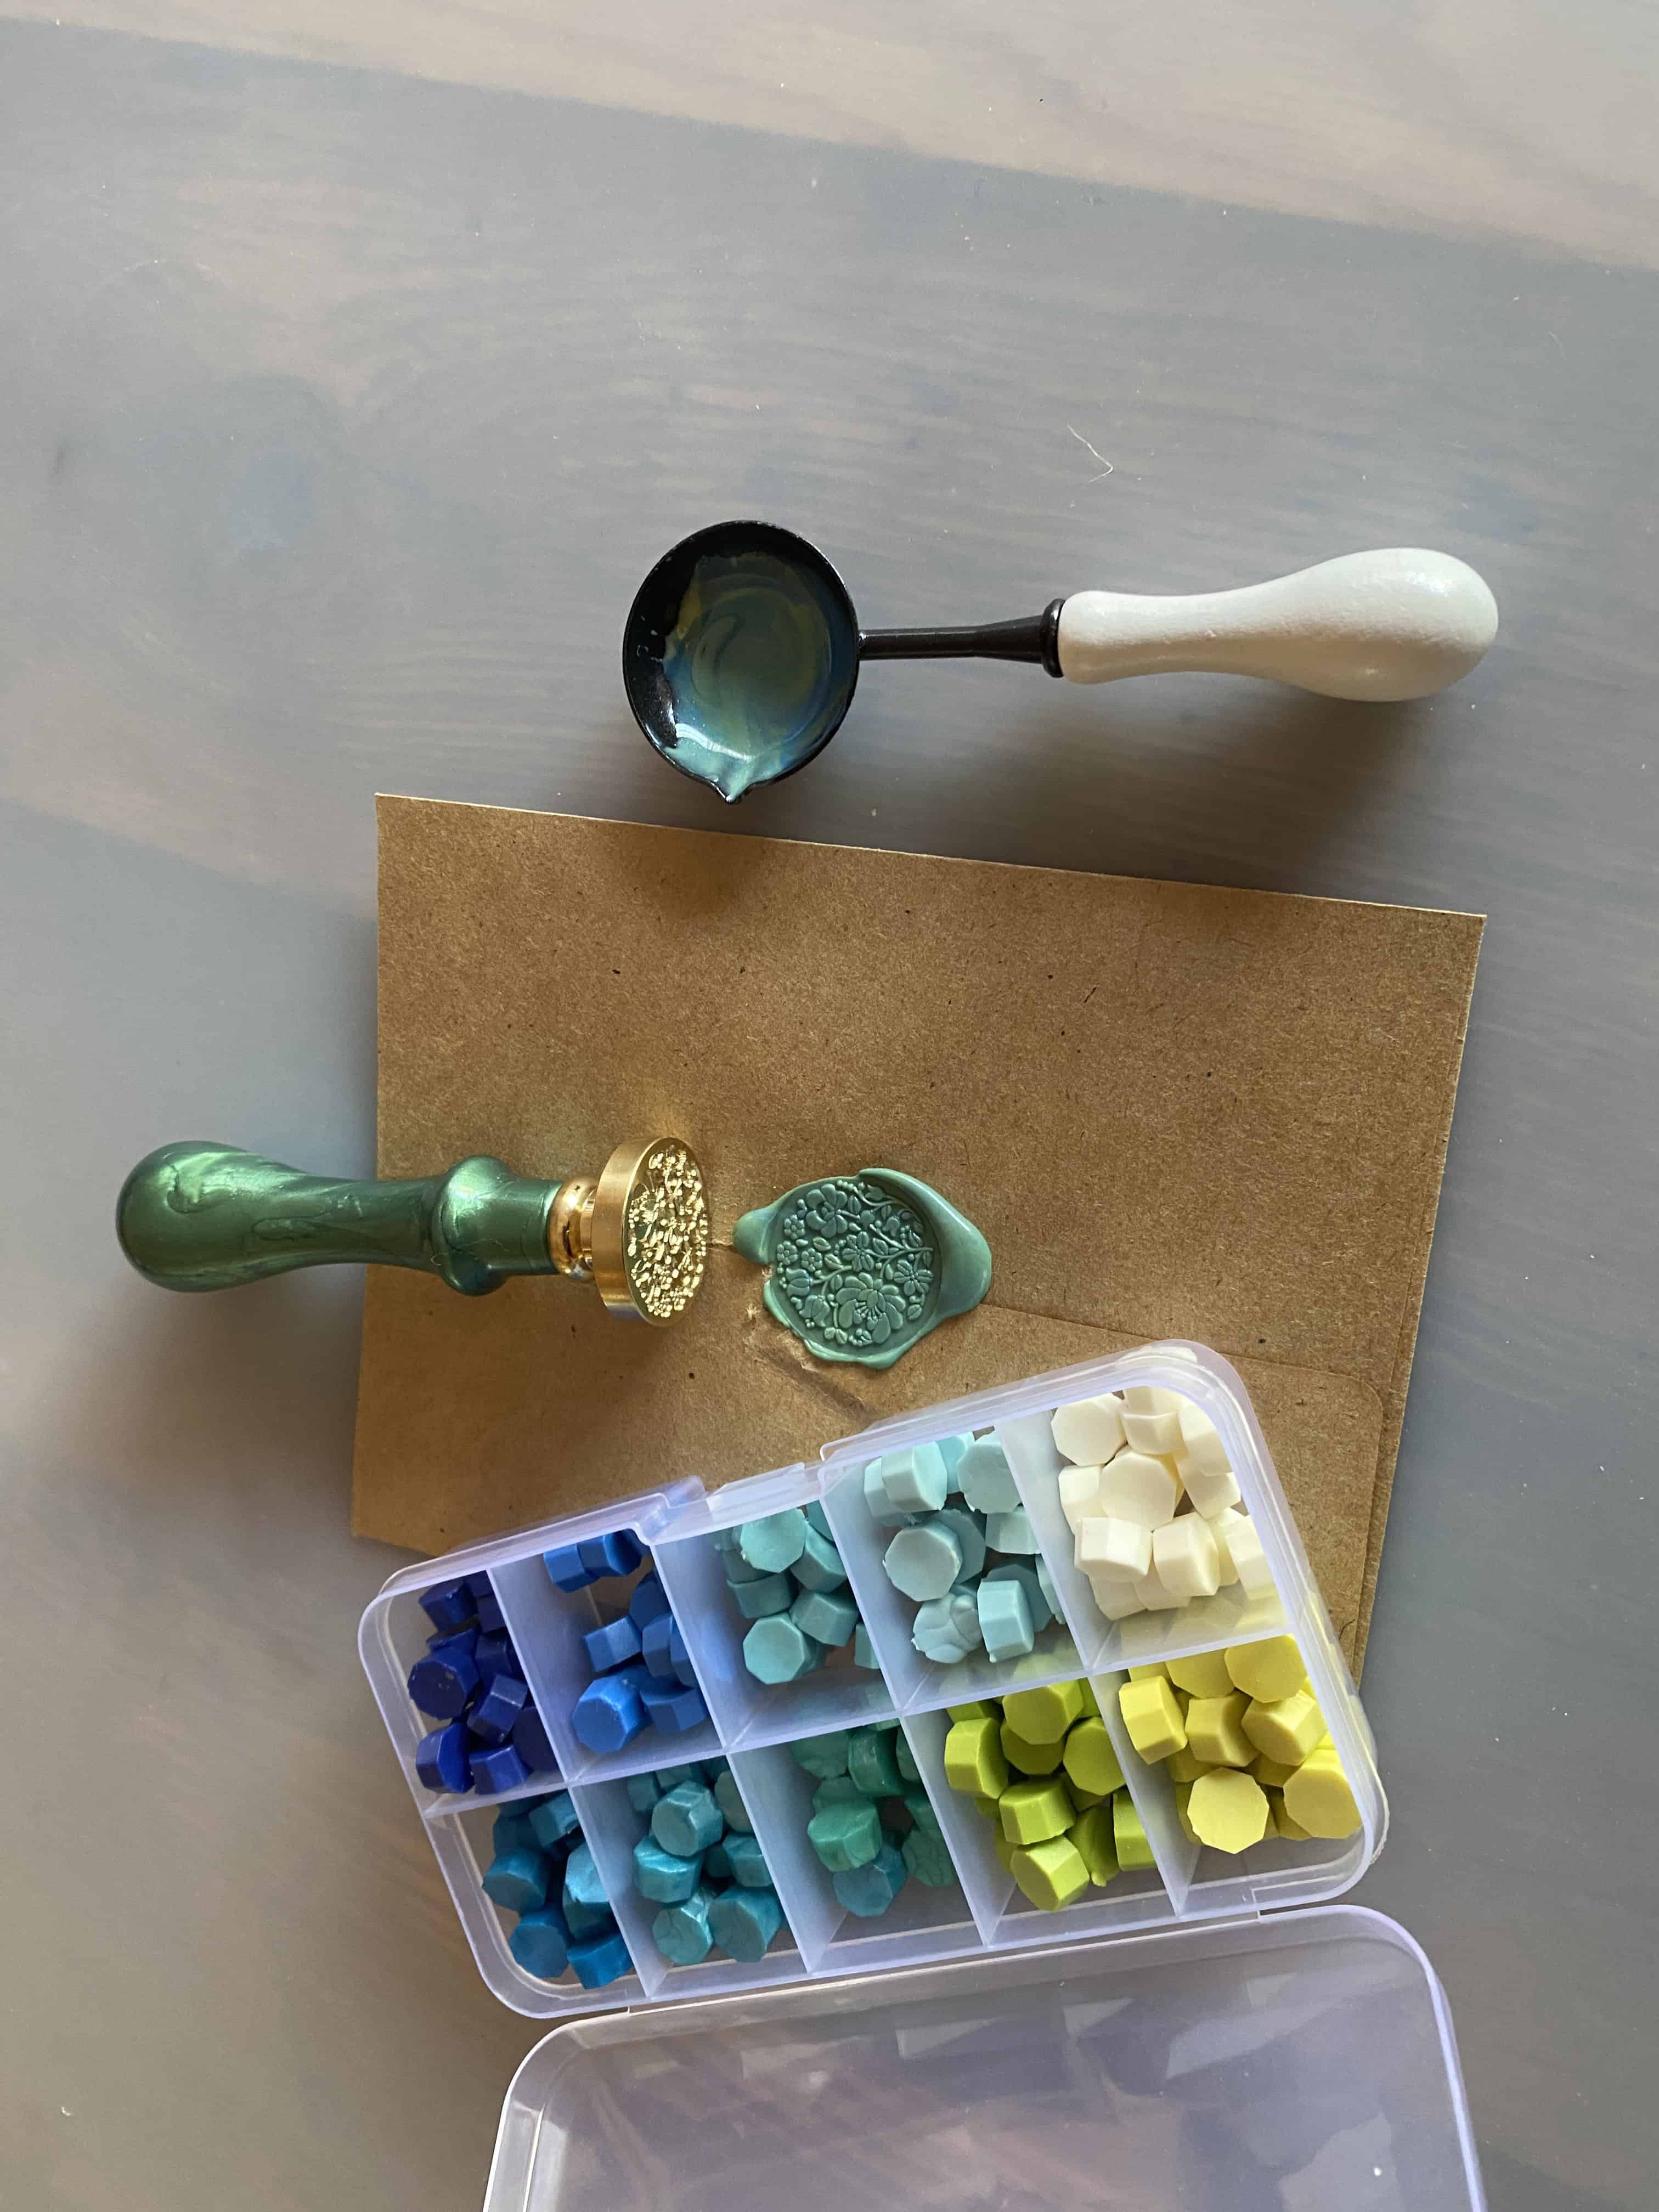
A wax seal on the envelope makes it super special (and kids have a lot of fun with this)!
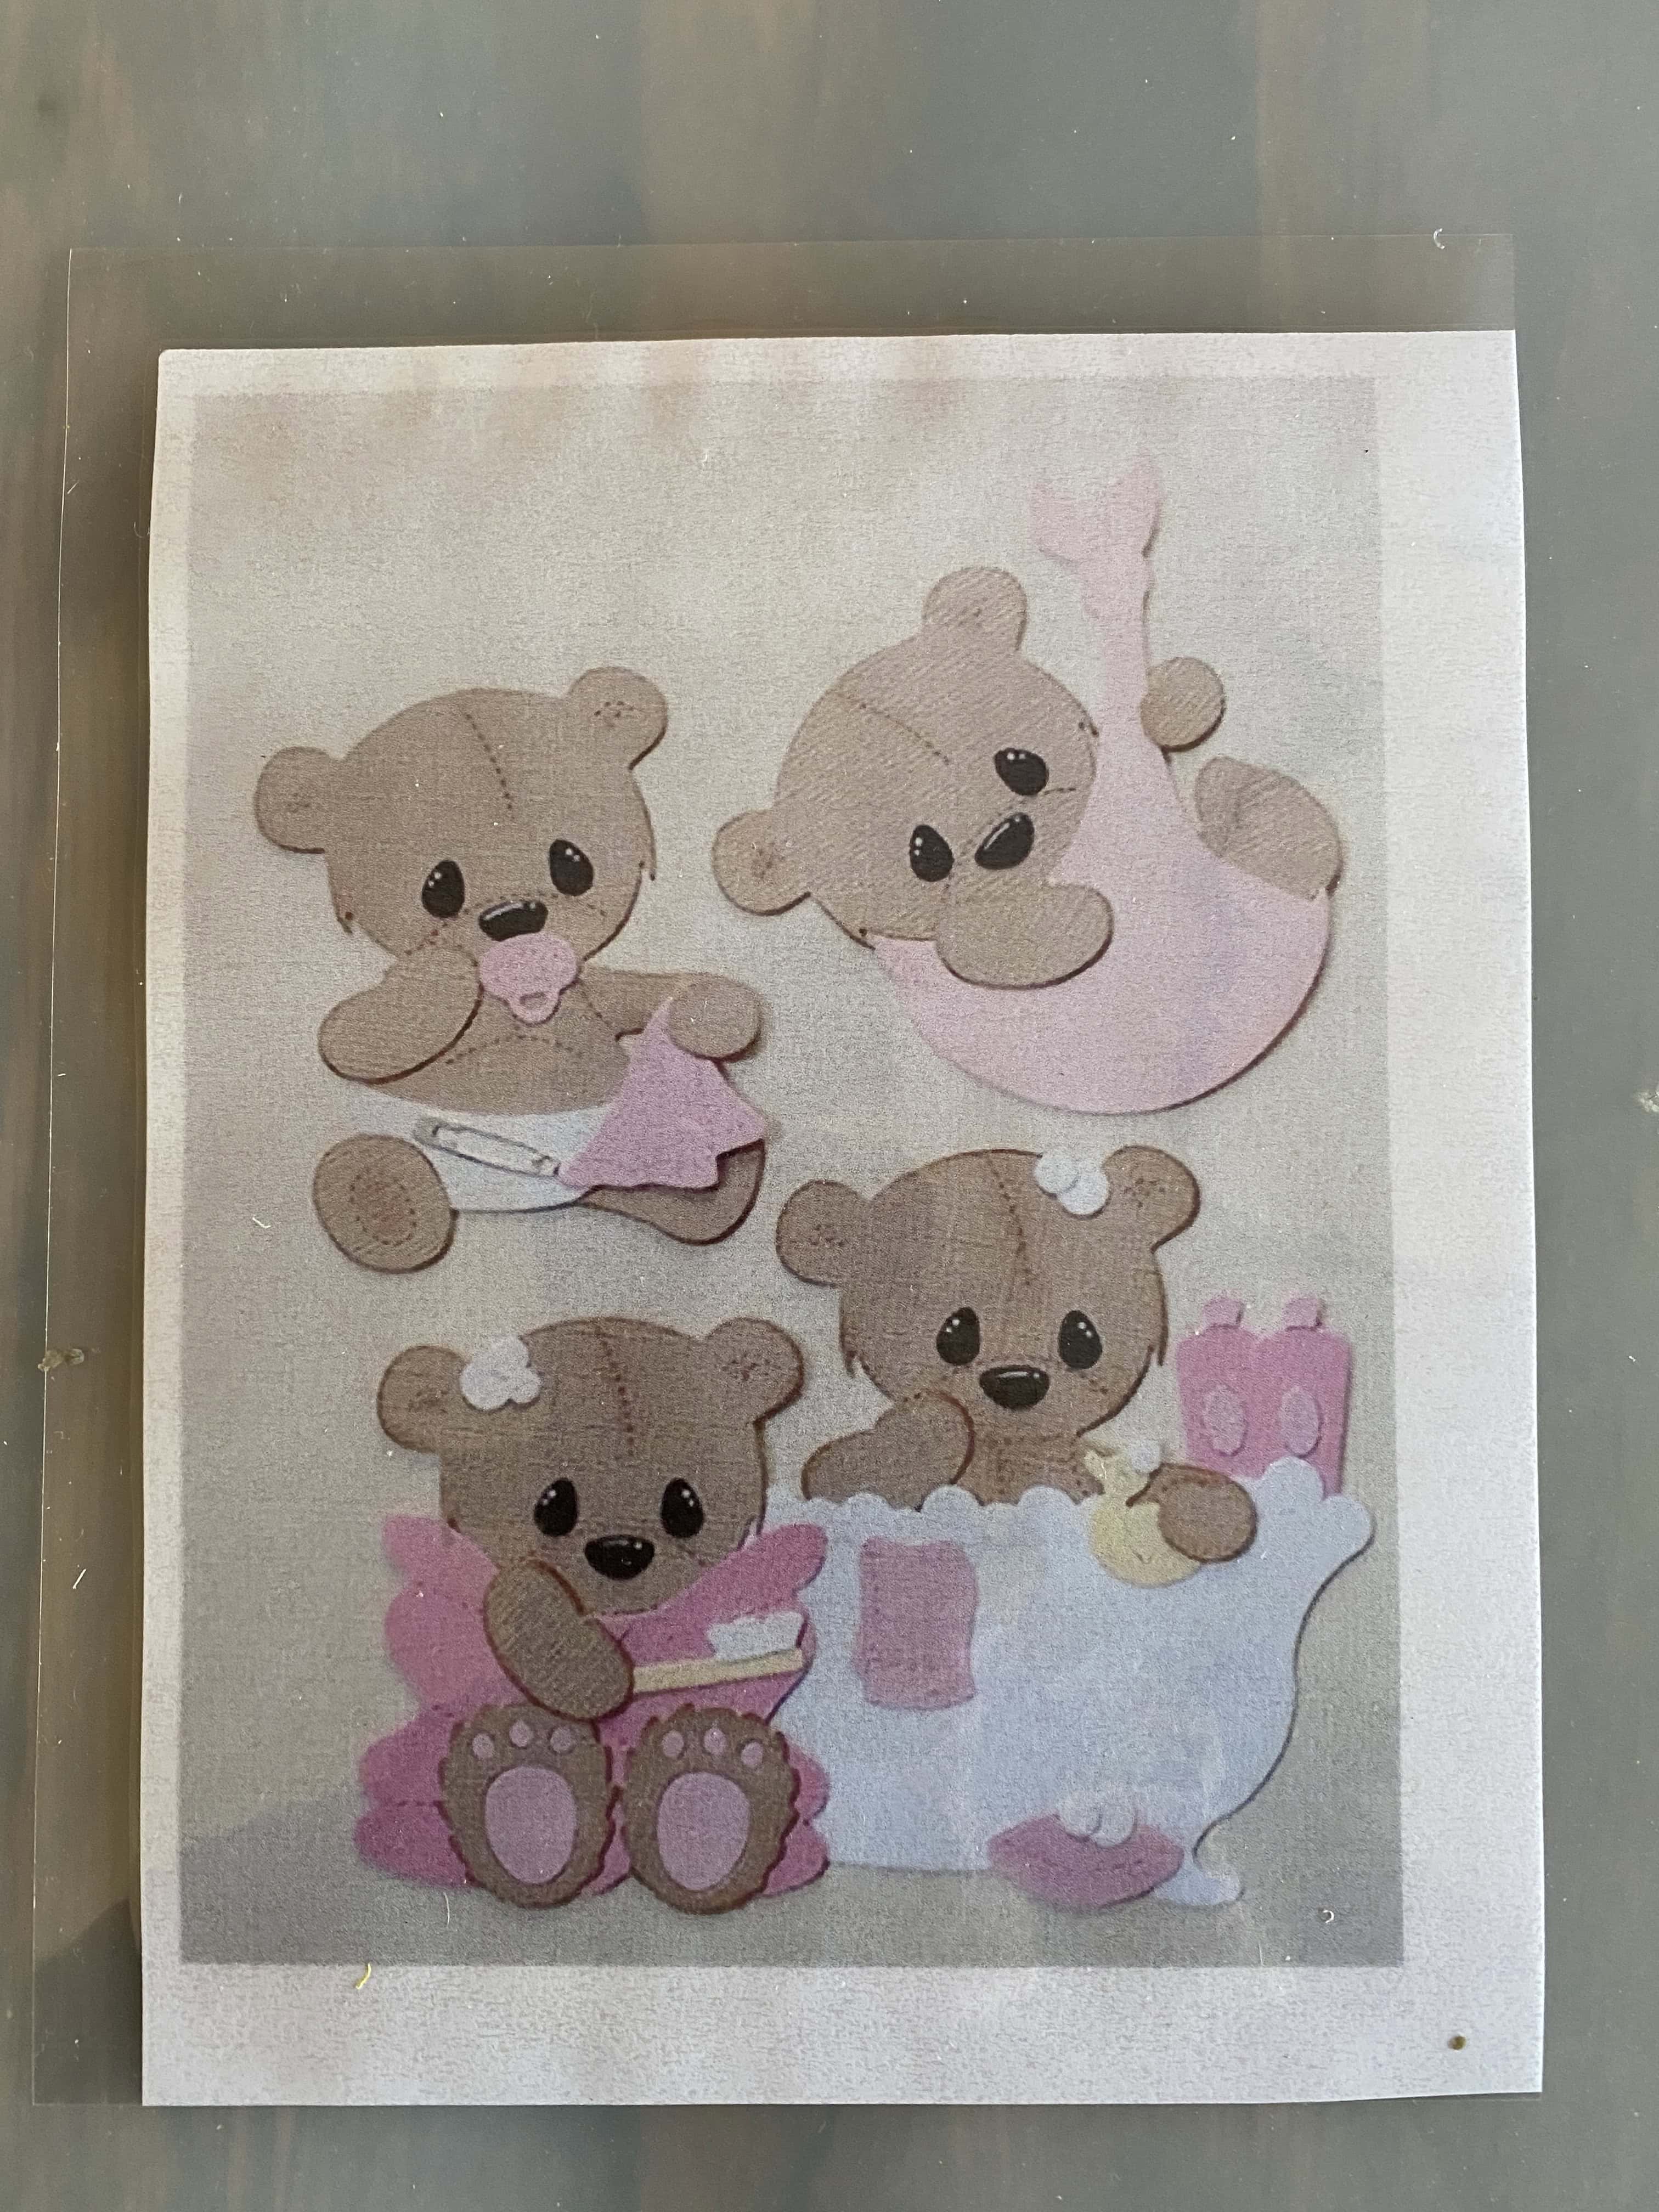
I used the Baby Bear embossing dies (below) for a ‘new baby’ card. However, any dies that have a ‘basic shape’ (like a bear cut-out on the front) that gets enlarged to a ‘bigger shape’ (like an inside bear swaddled in a towel) will work!
For example, you could create a Spring Theme card with a single large flower cut-out, opening up to reveal a full flower garden or bouquet.
The instructions on this page use the bear in bathtub as the inside image. Here's the finished card:
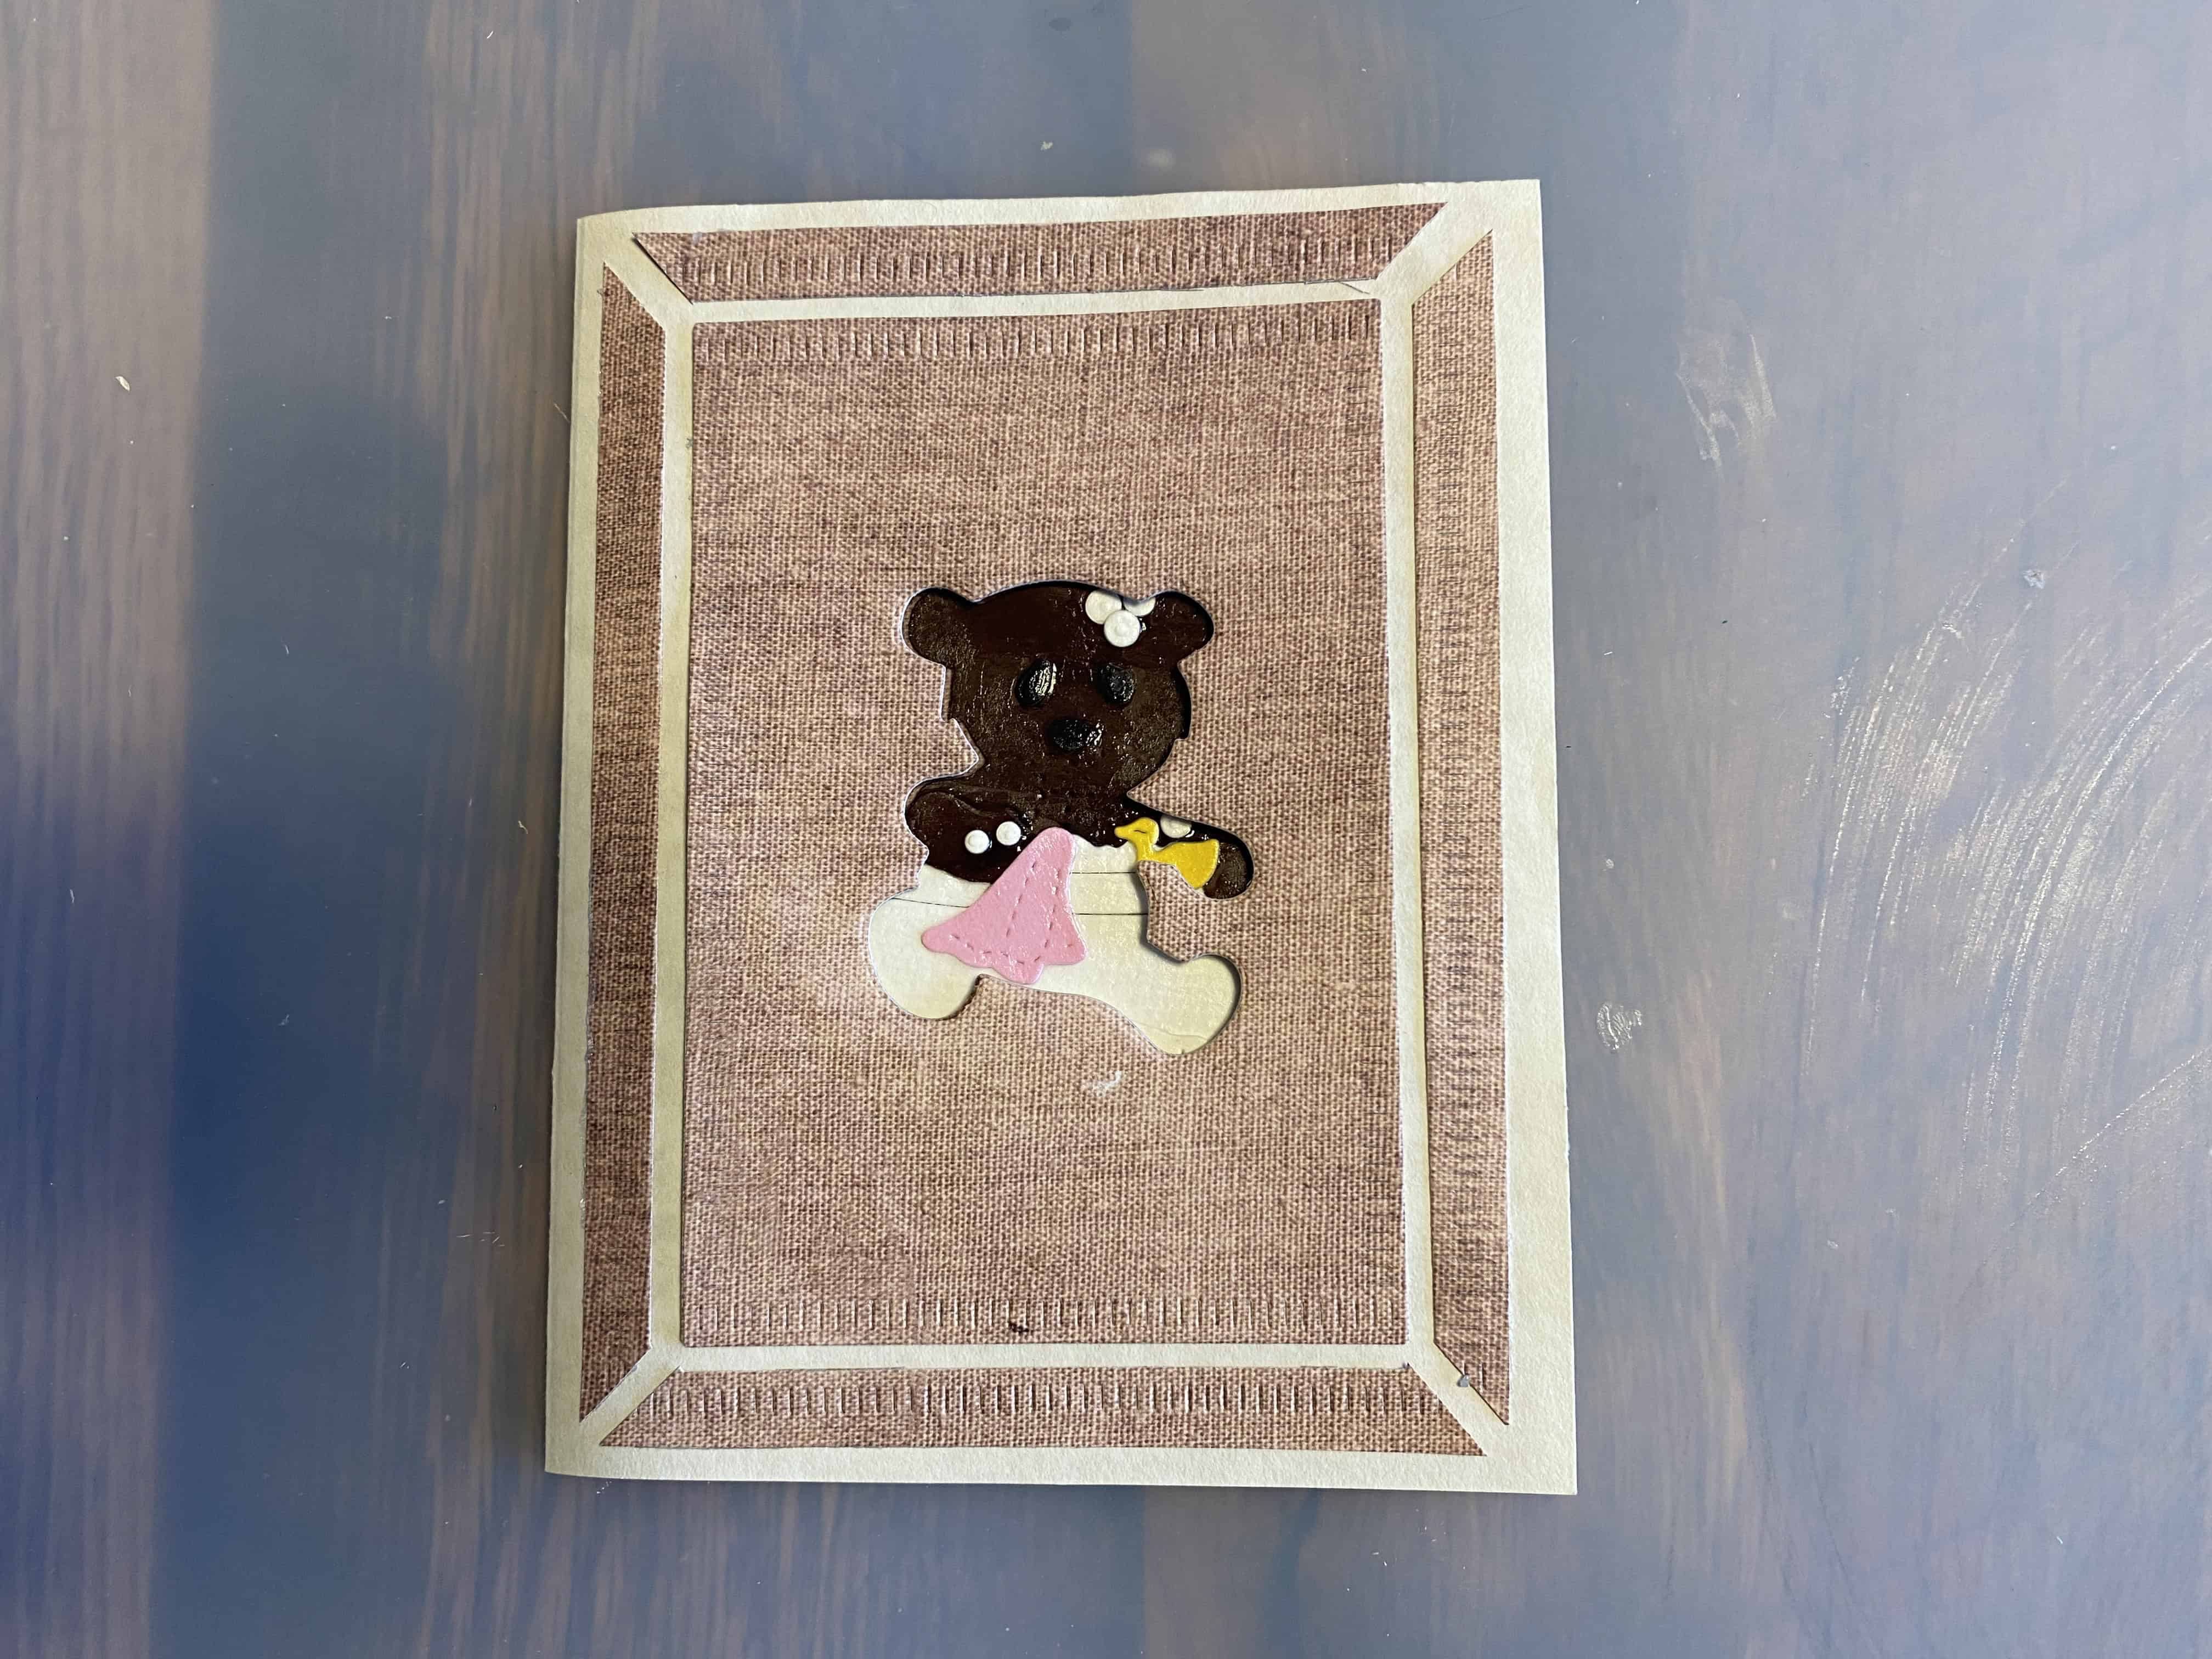
The peek-through ...
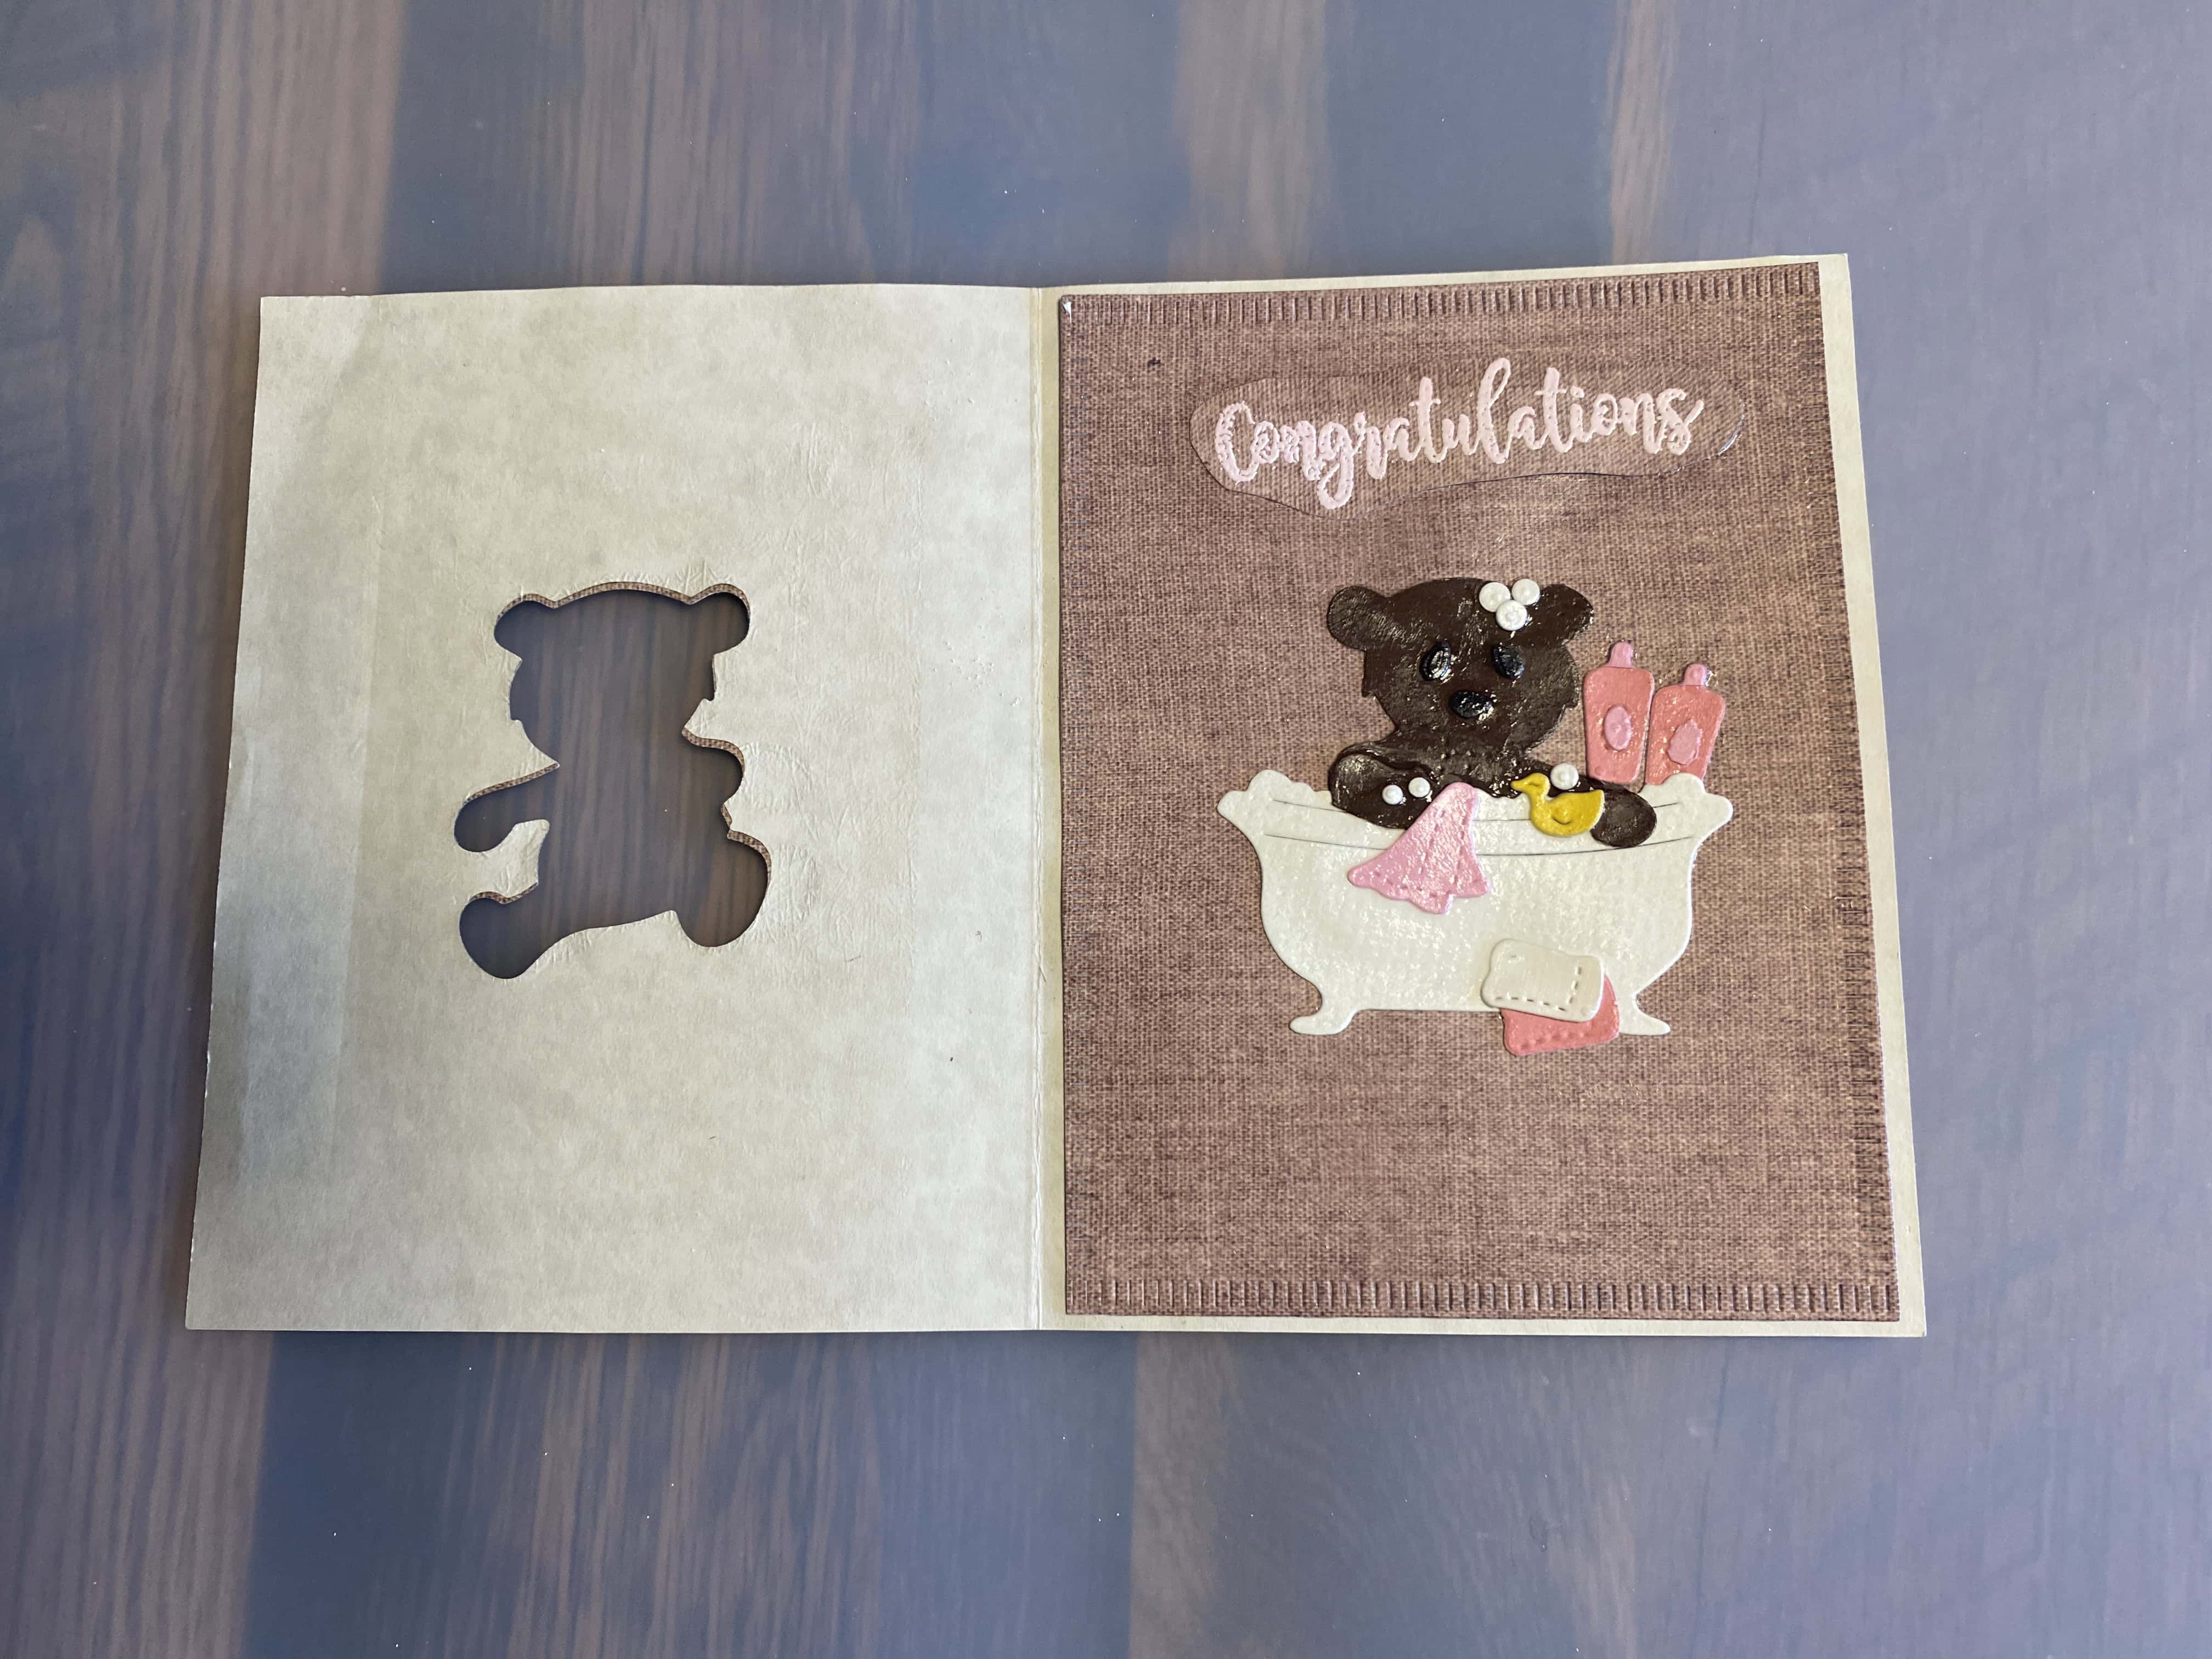
... to the bear in the tub!
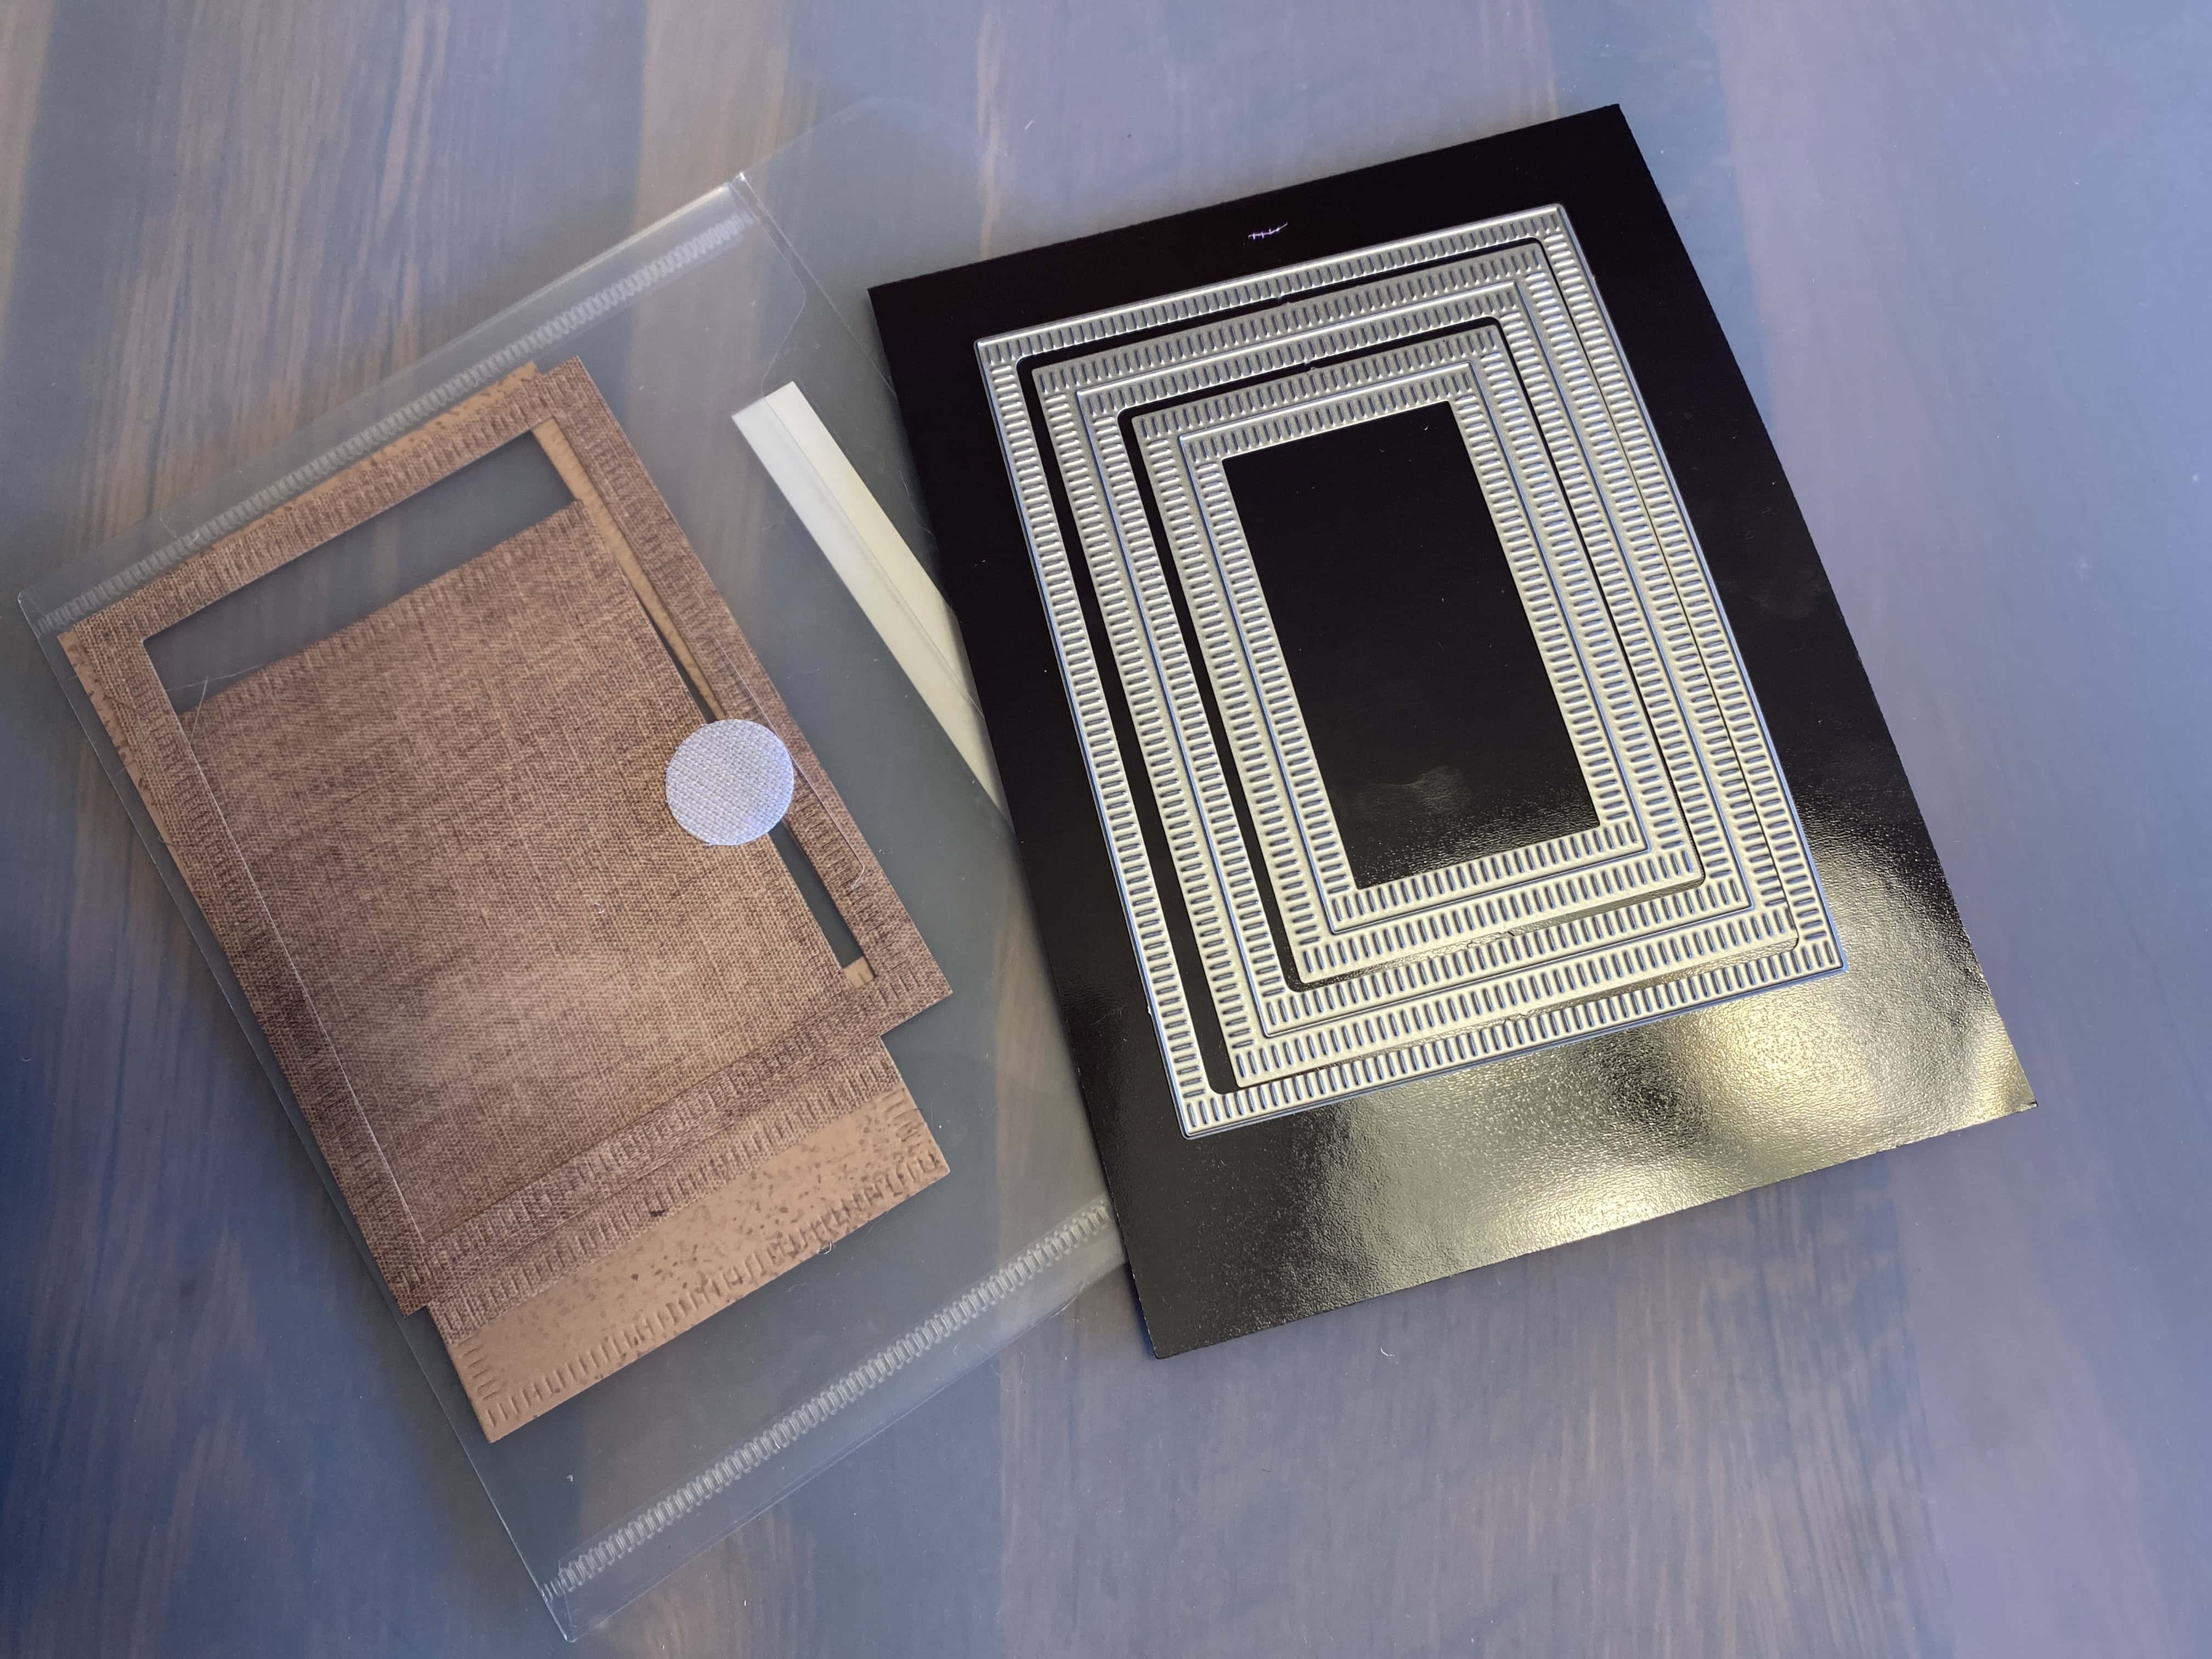
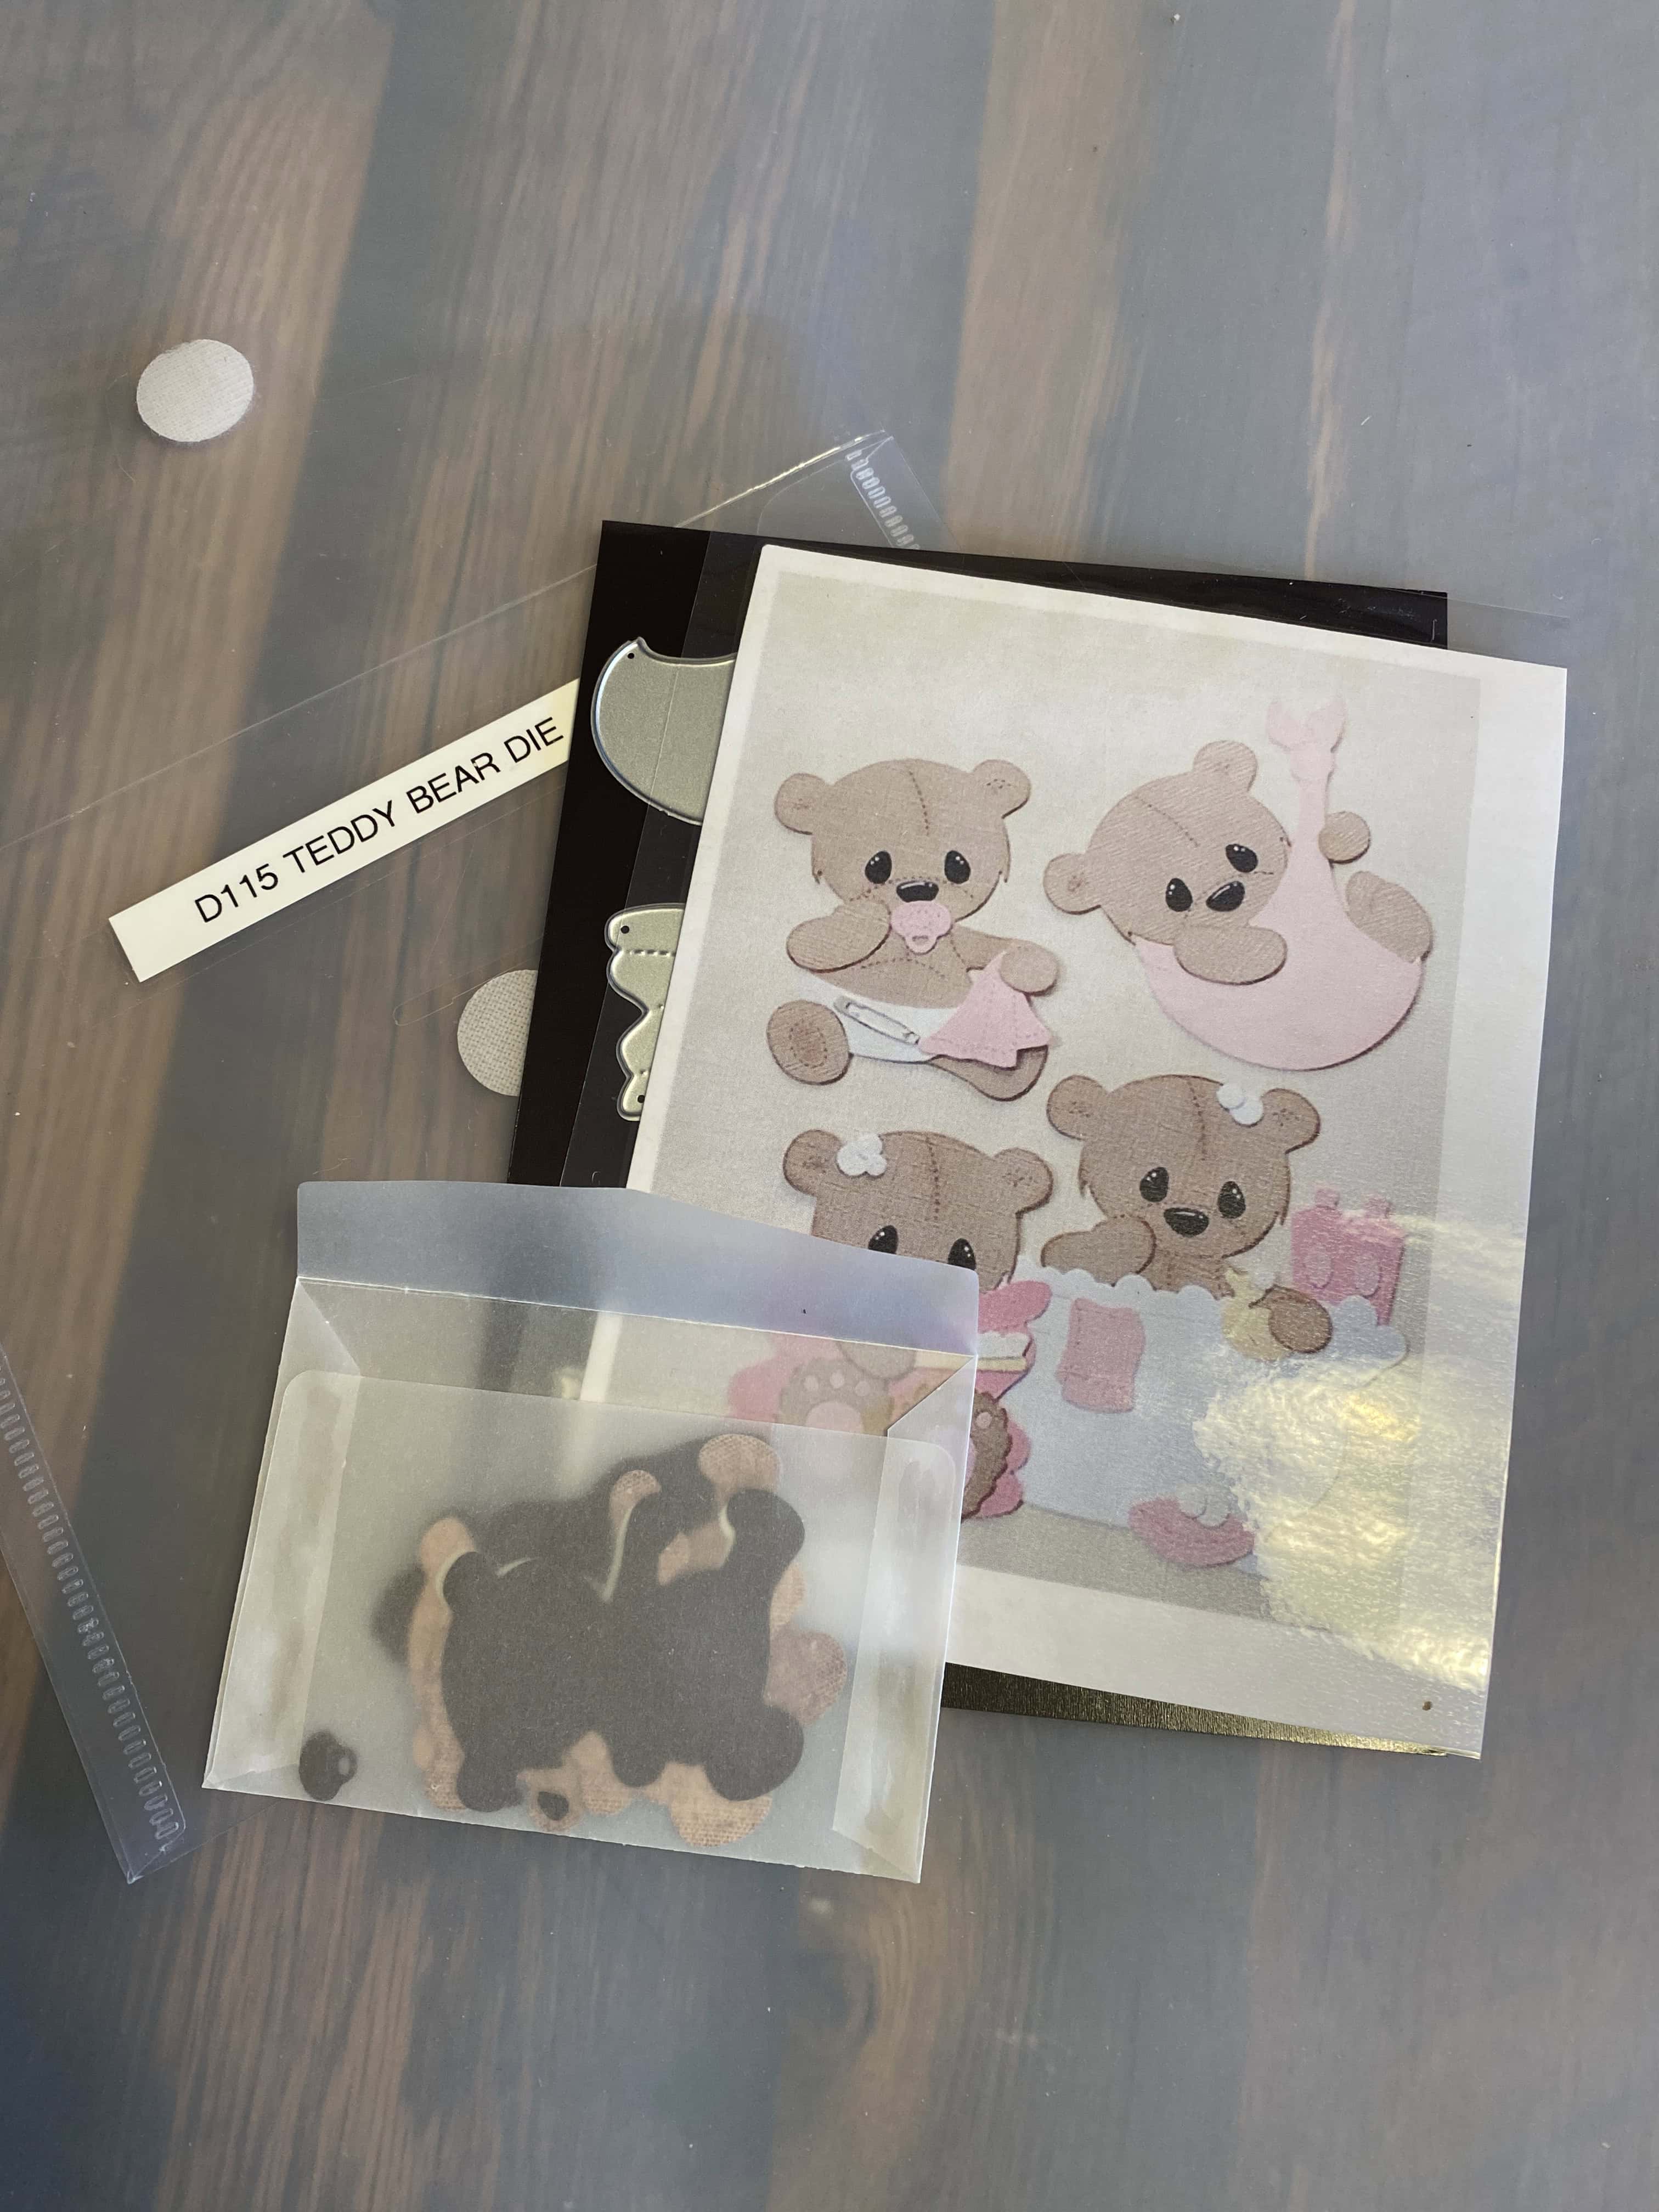
Step 1: Choose Materials: Coordinate Peek-Through Design, Card Base, Inside Rectangles/Frames
Decide on your basic card design; choose your papers/colors/dies. Things might change as the card emerges, but it helps to have a game plan.
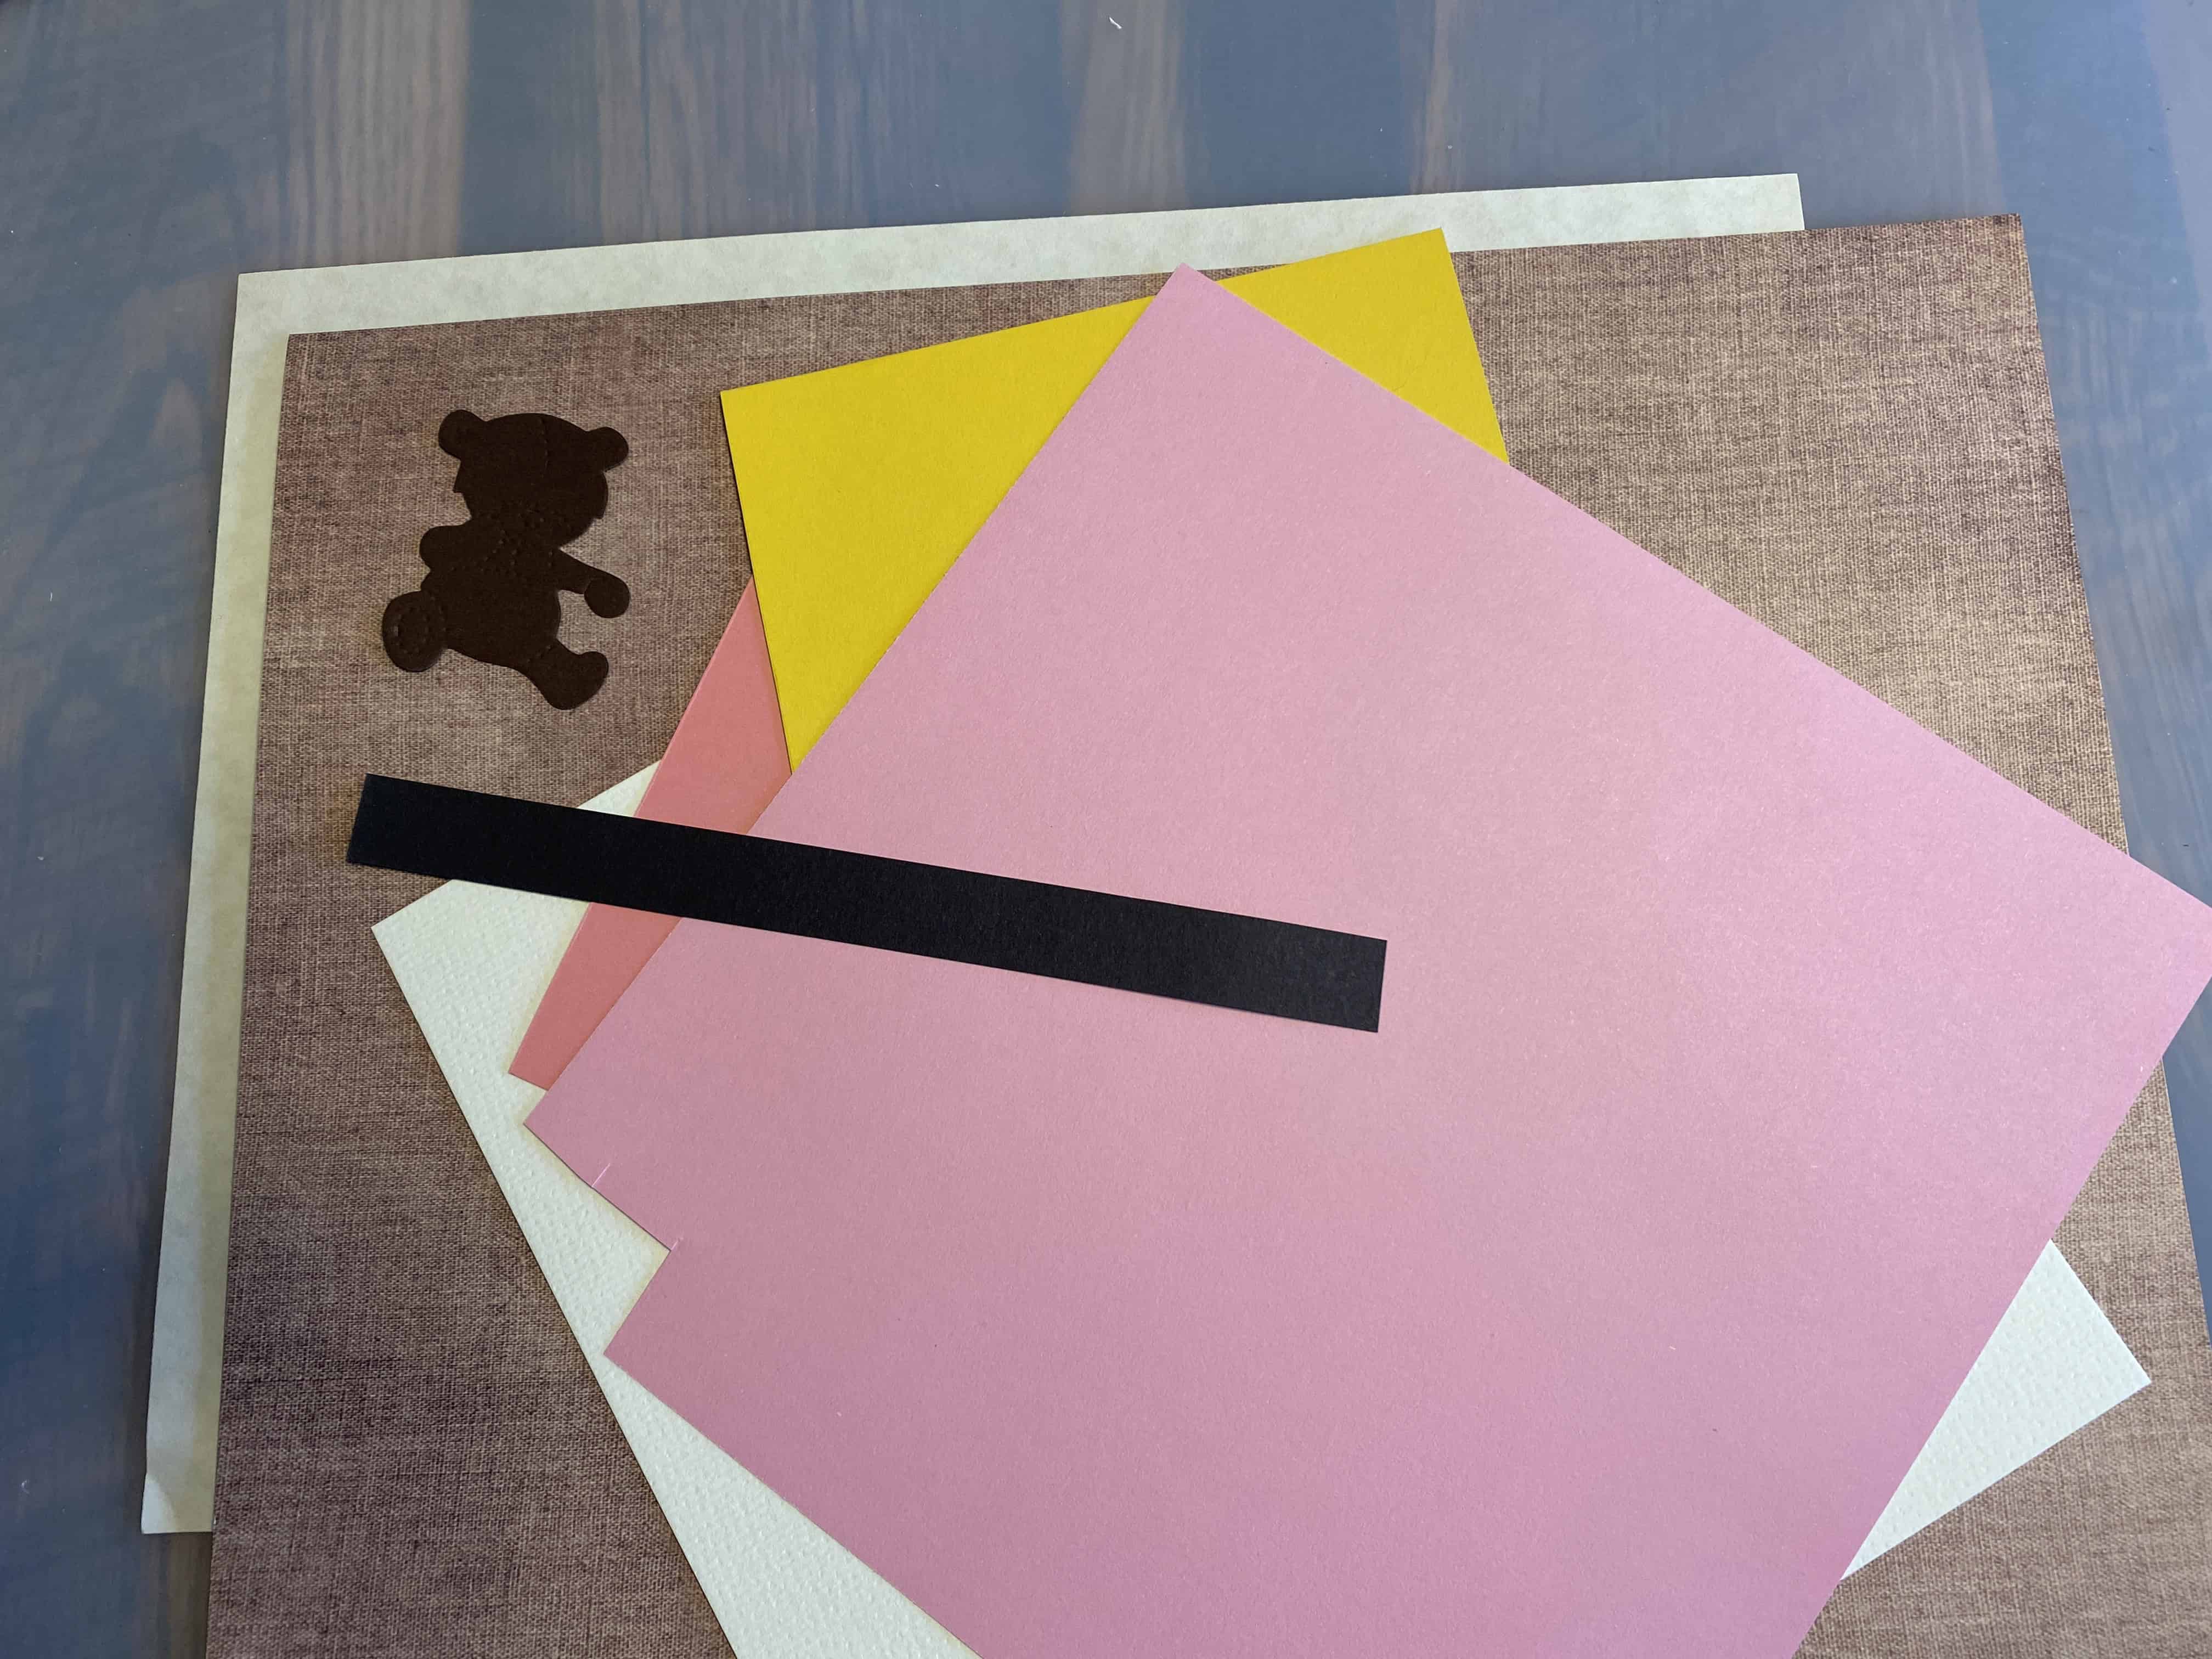
Choosing papers/colors for card and bear-in-tub; I used an earthy textured cardstock for the layered rectangles
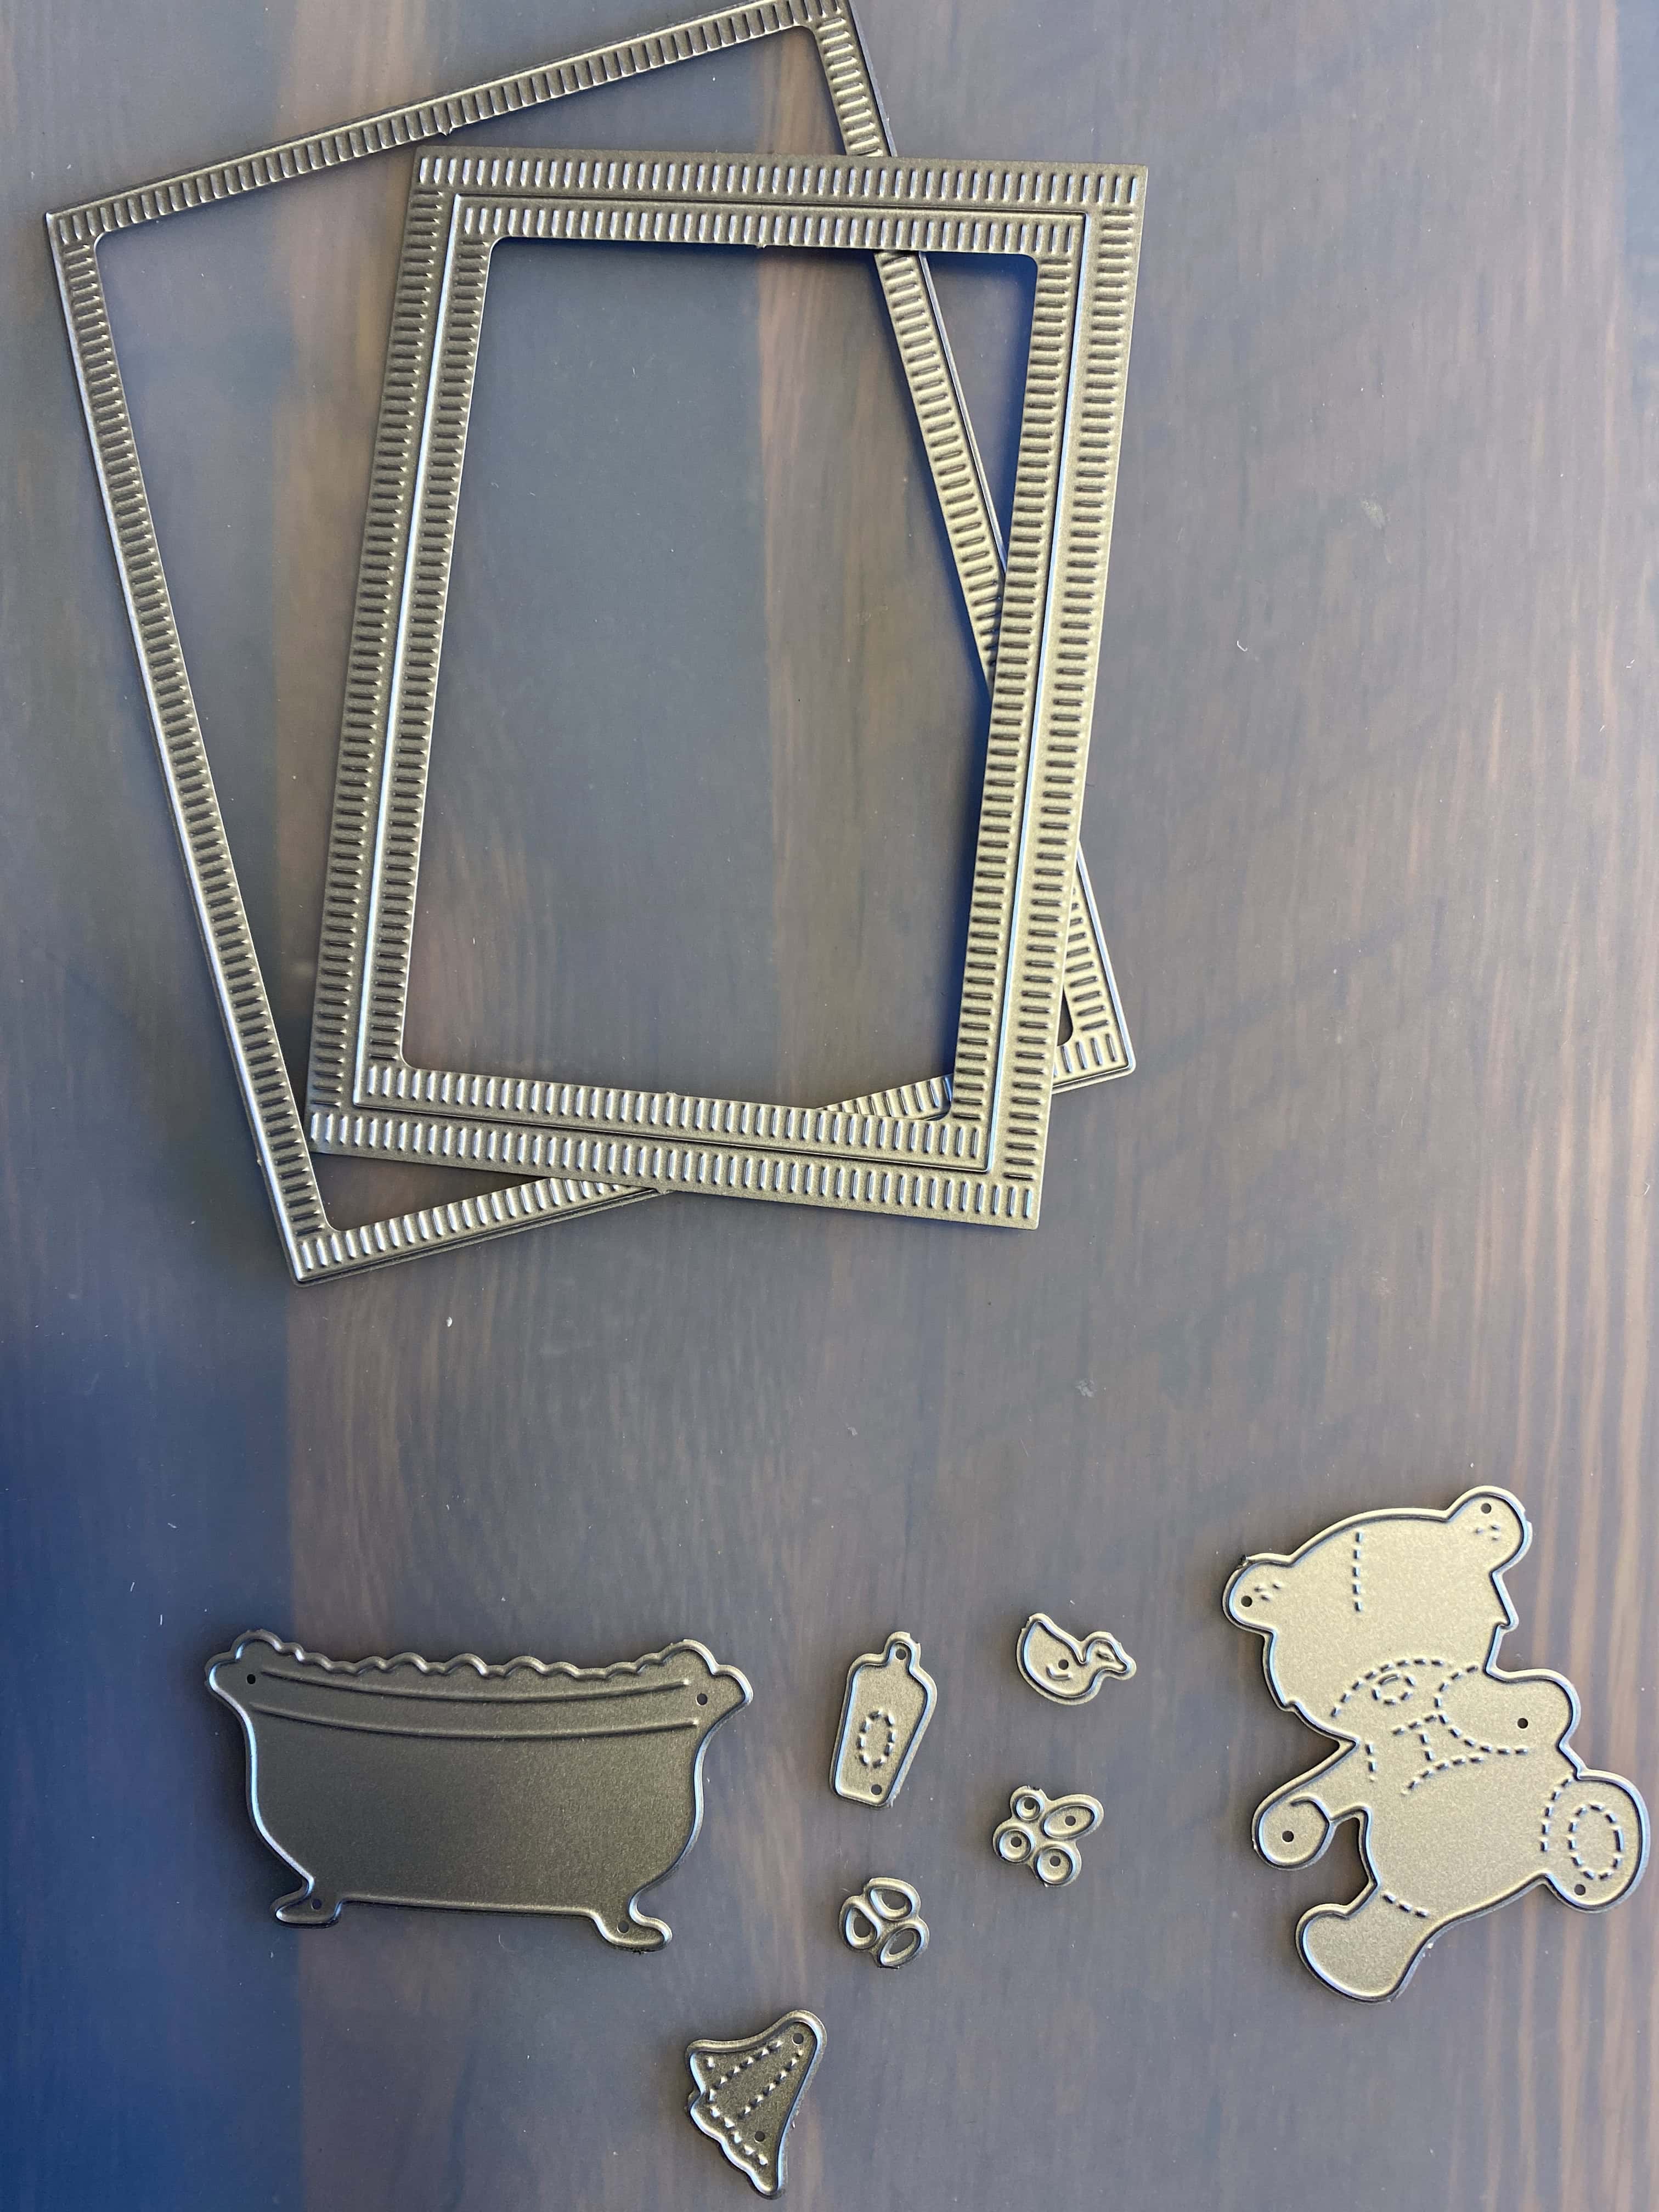
Dies needed for bear-in-tub and layering rectangles/frame
Step 2: Cut/Score/Fold Card Base
The card base is $\,8\frac12\text{in}\times 5\frac12\text{in}$ (which is half of a standard-size $\,8\frac12\text{in}\times 11\text{in}\,$ sheet).
Score in half (at $\,4\frac 14\text{in}\,$), parallel to the shorter edge. After scoring, fold in half (away from you) along the scored line, and reinforce the crease with the scoring tool.
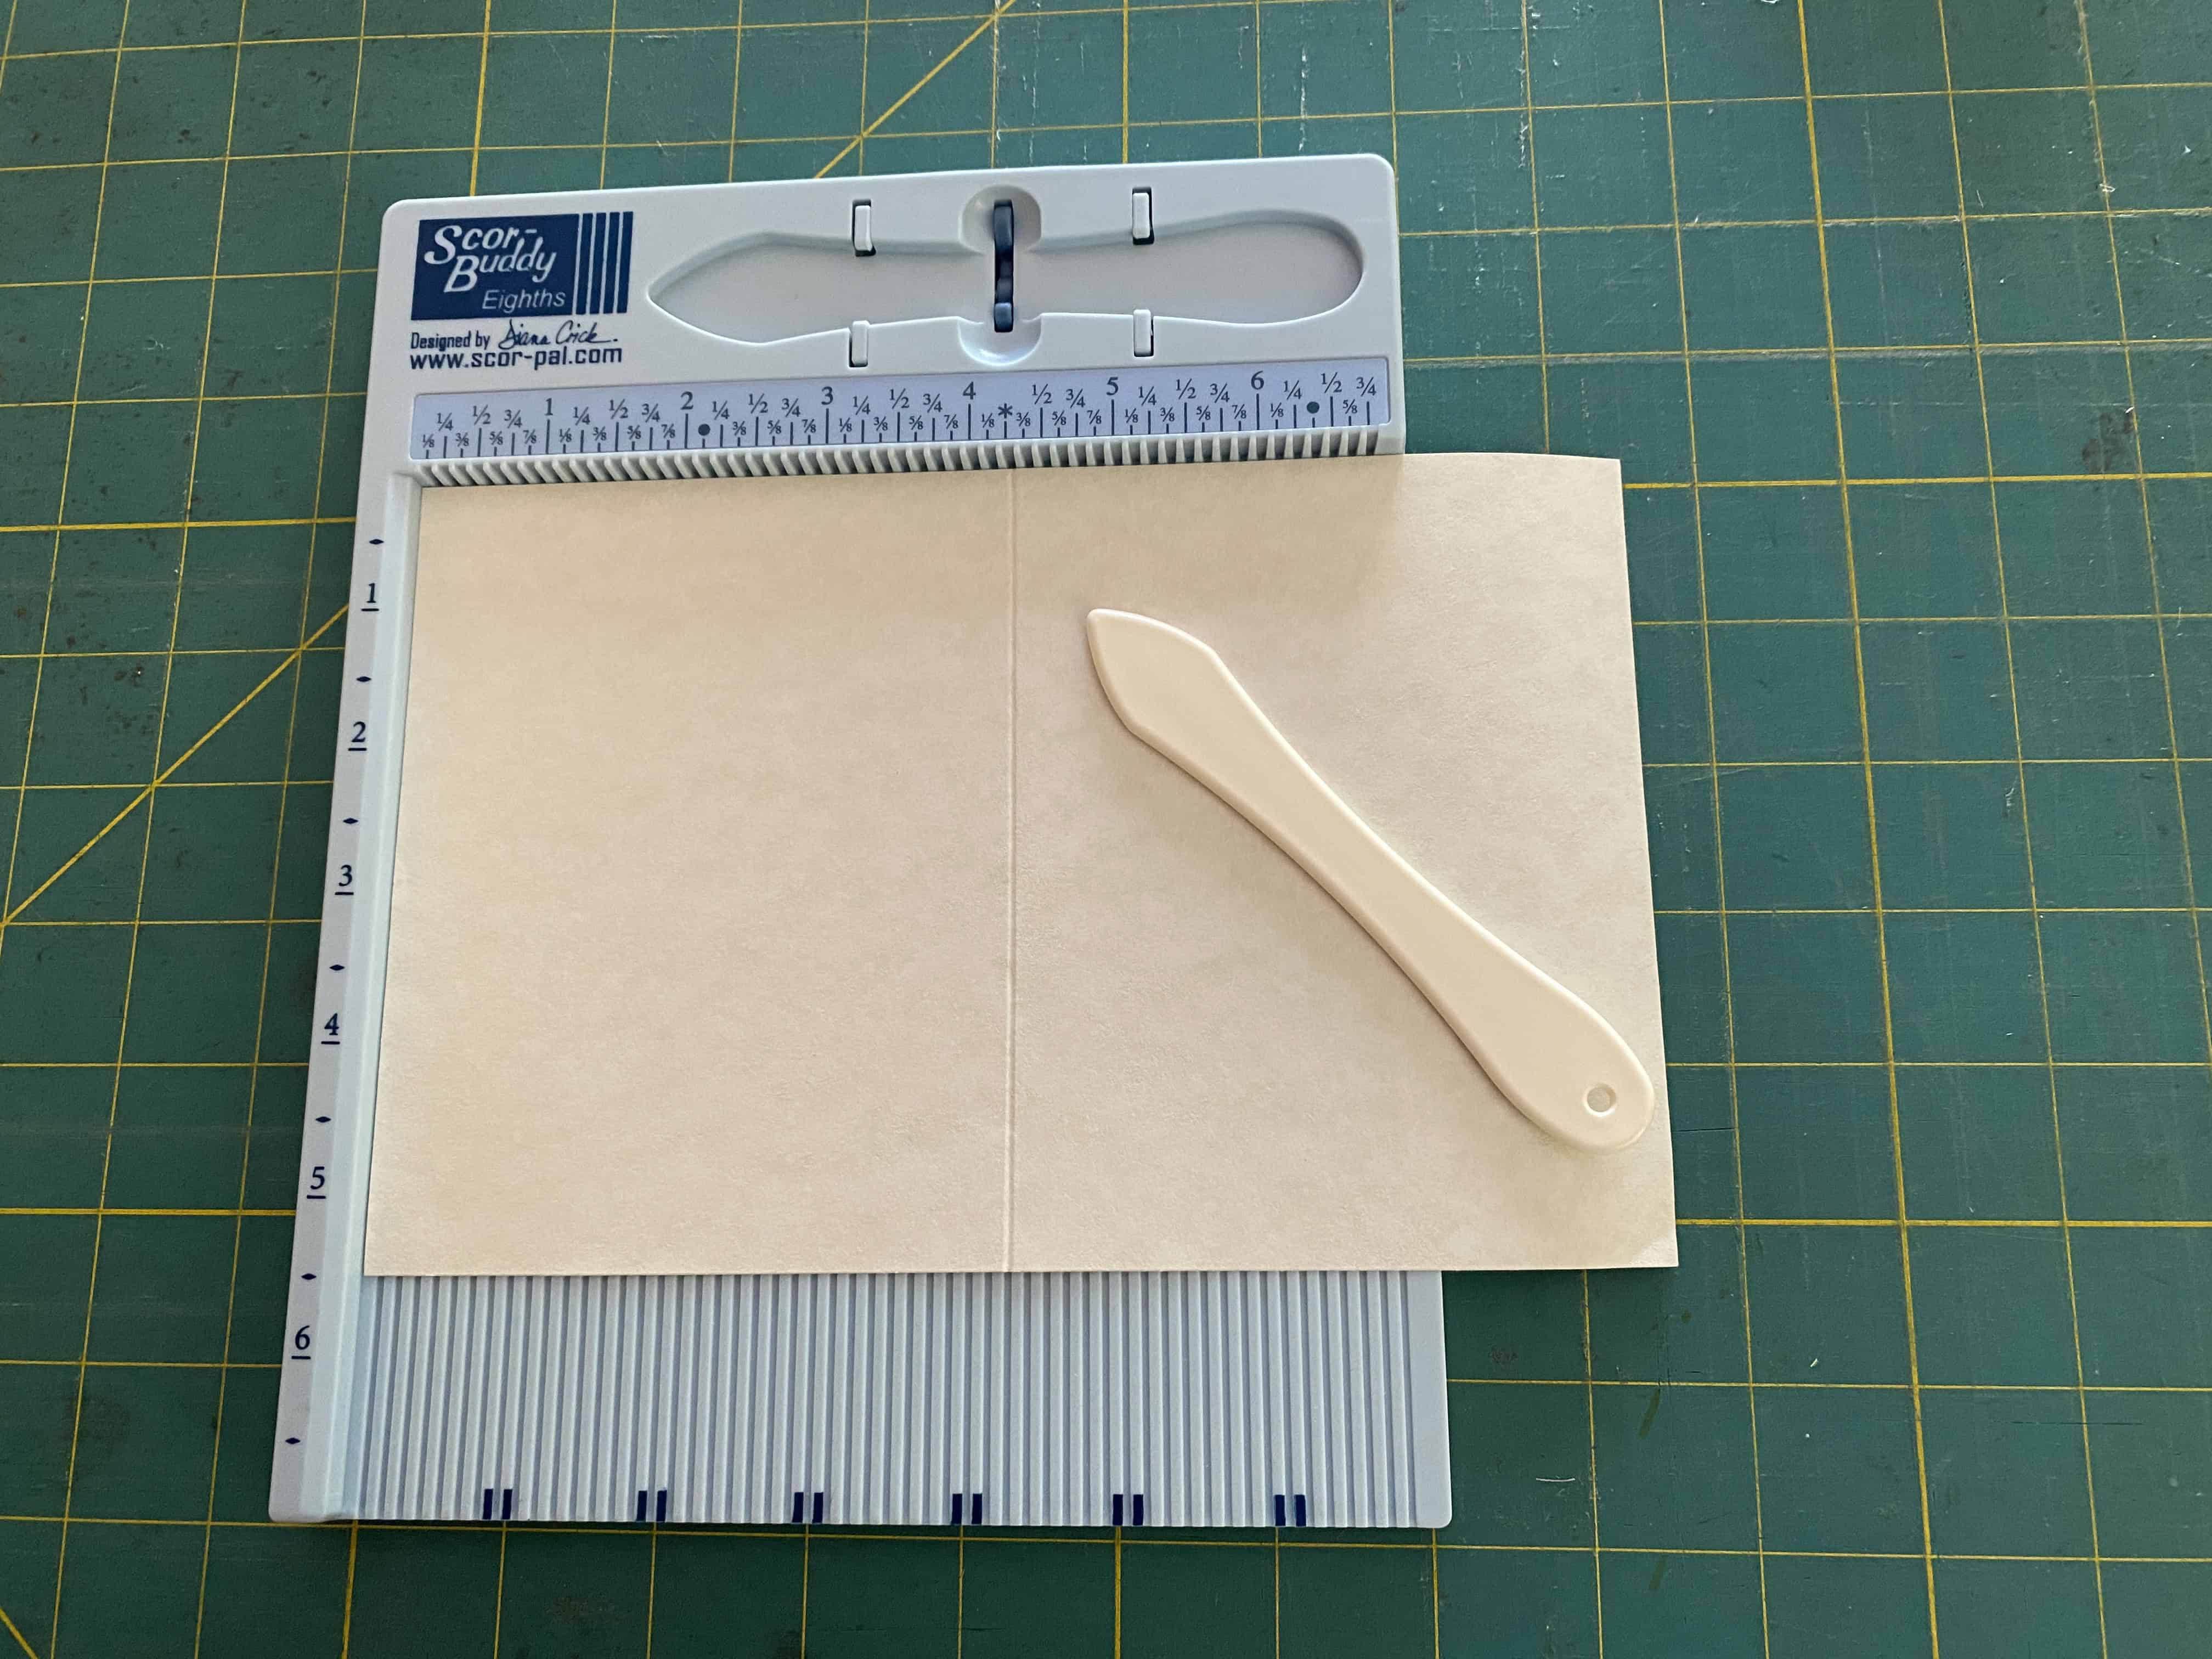
I use a Scor-pal for precise scoring and folding
Step 3: Cut/Attach Inside and Back Layered Rectangles
The largest rectangle die in the collection I have is about $\,4\frac14\text{in}\times 5\text{in}\,.$ I cut two of these rectangles: one for the back of the card; one for the inside right.
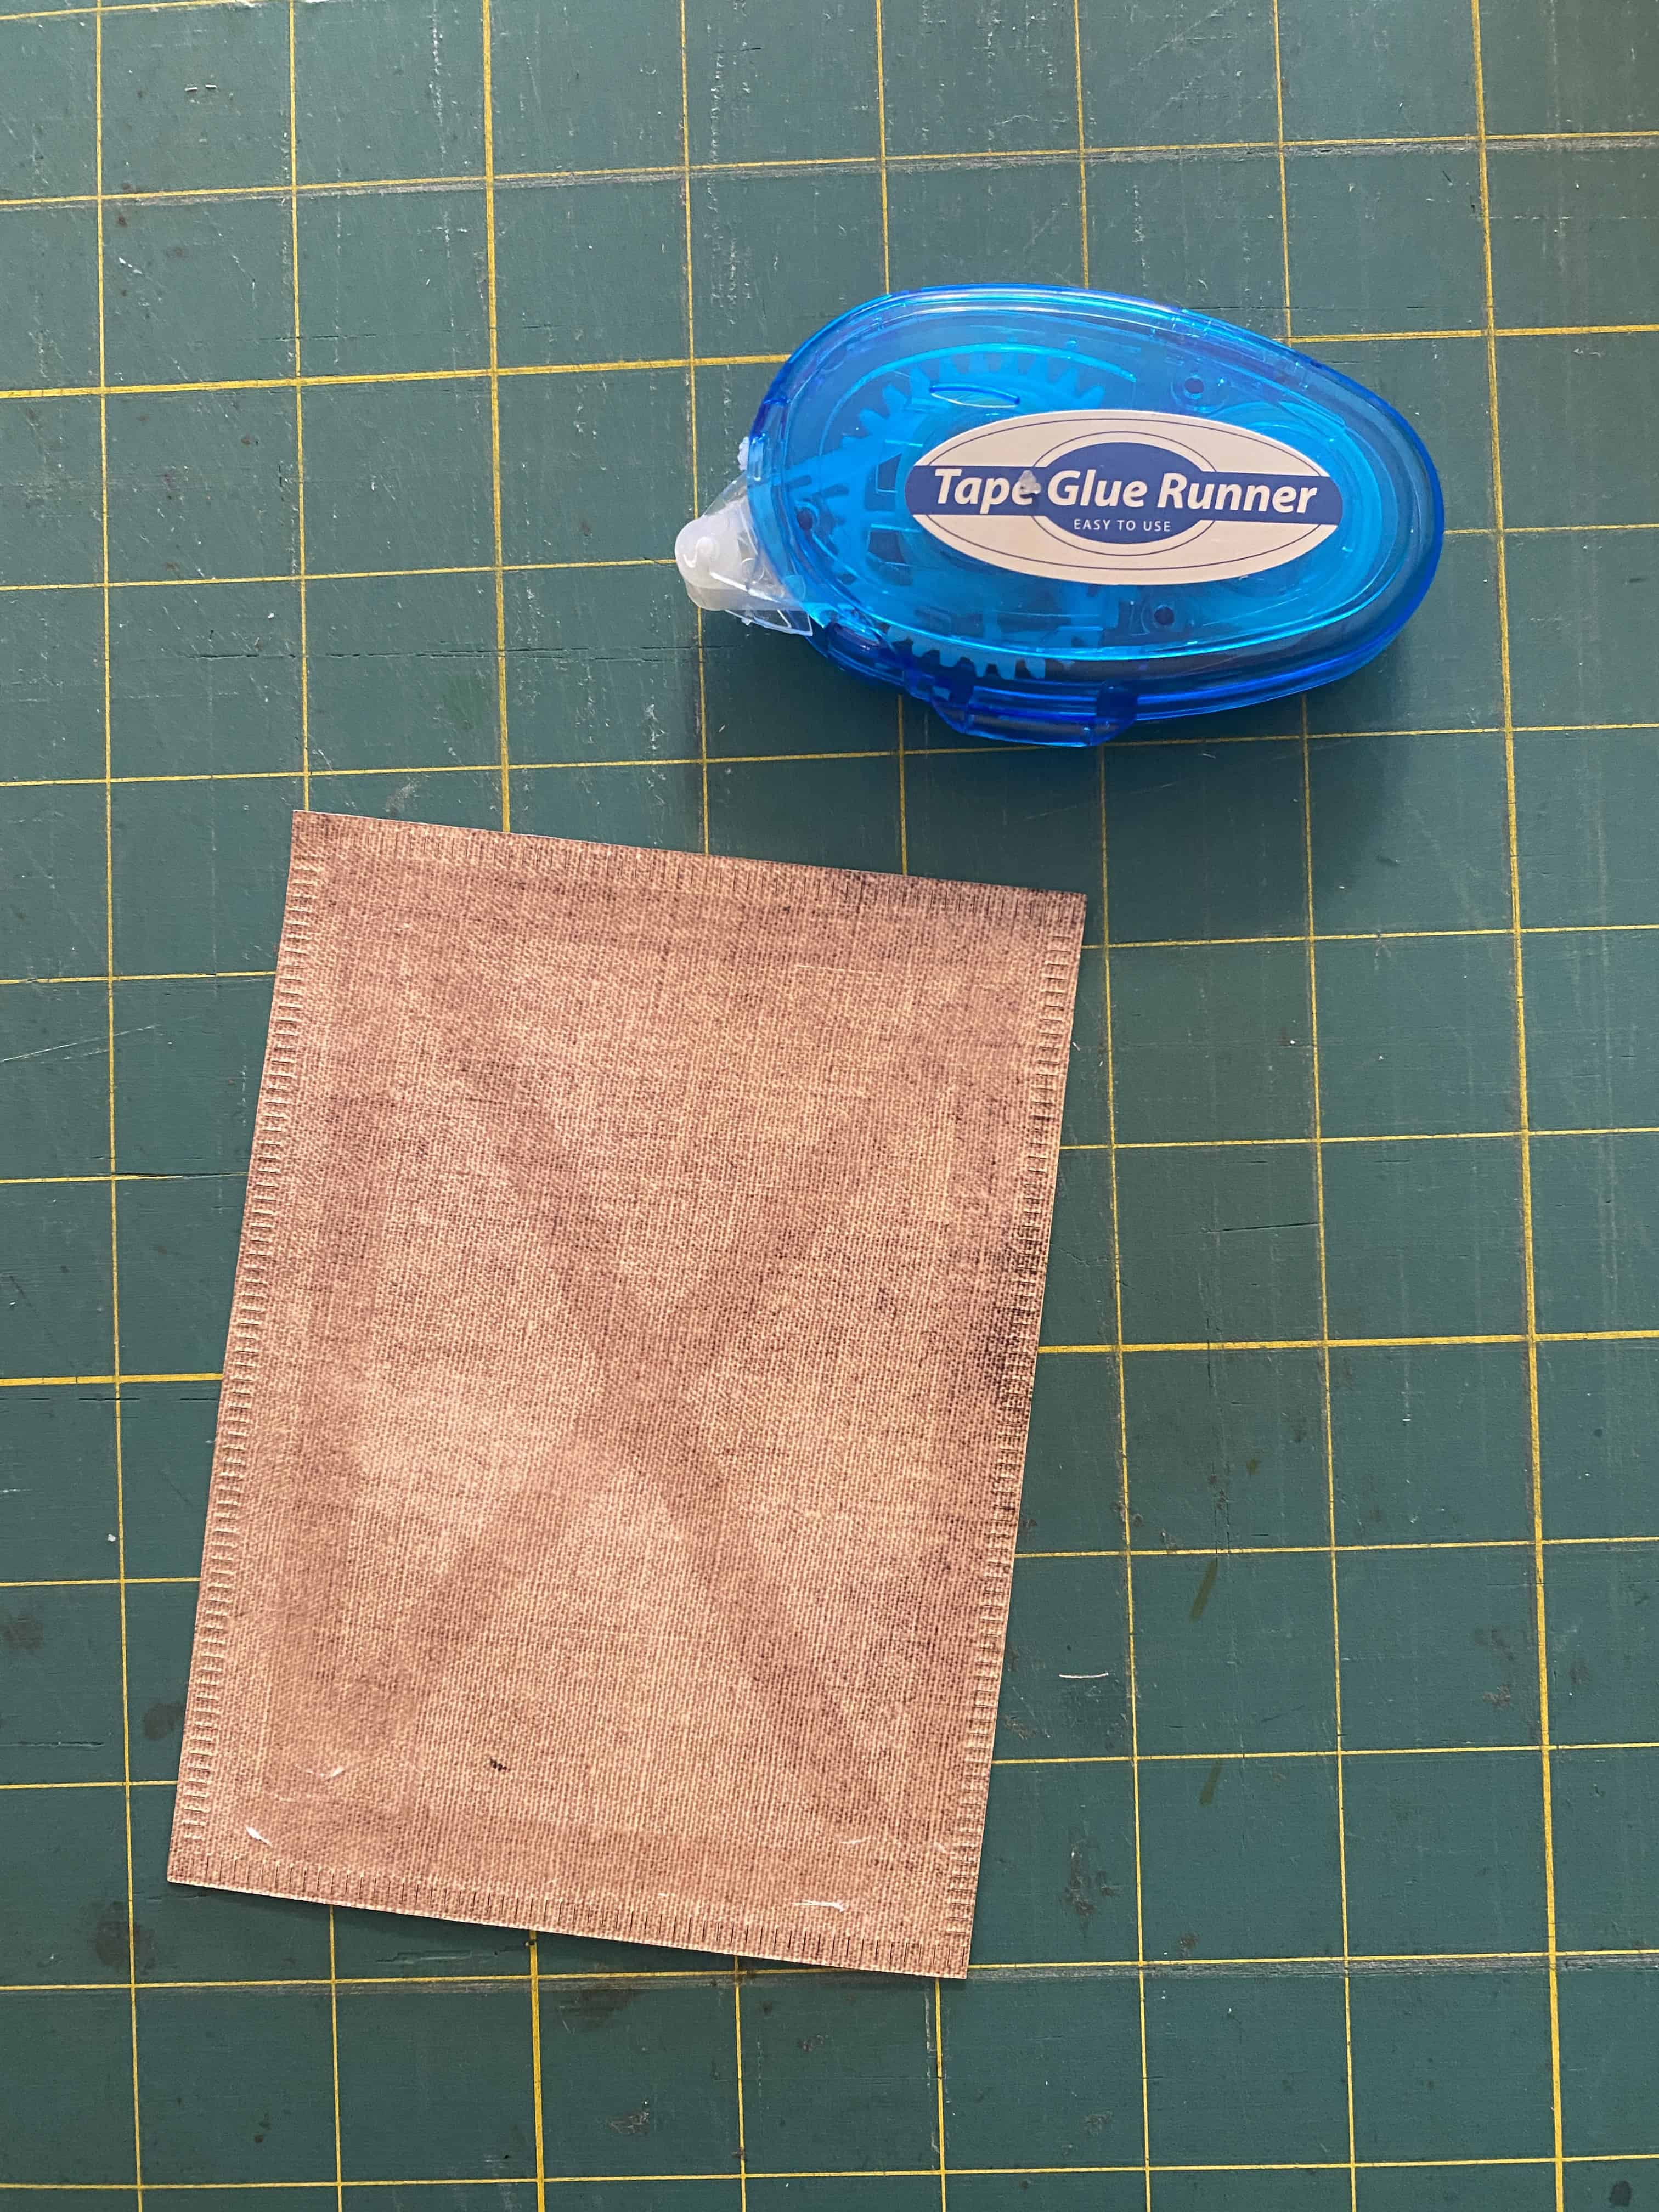
I use an adhesive tape roller: go around the perimeter, and make a large ‘X’
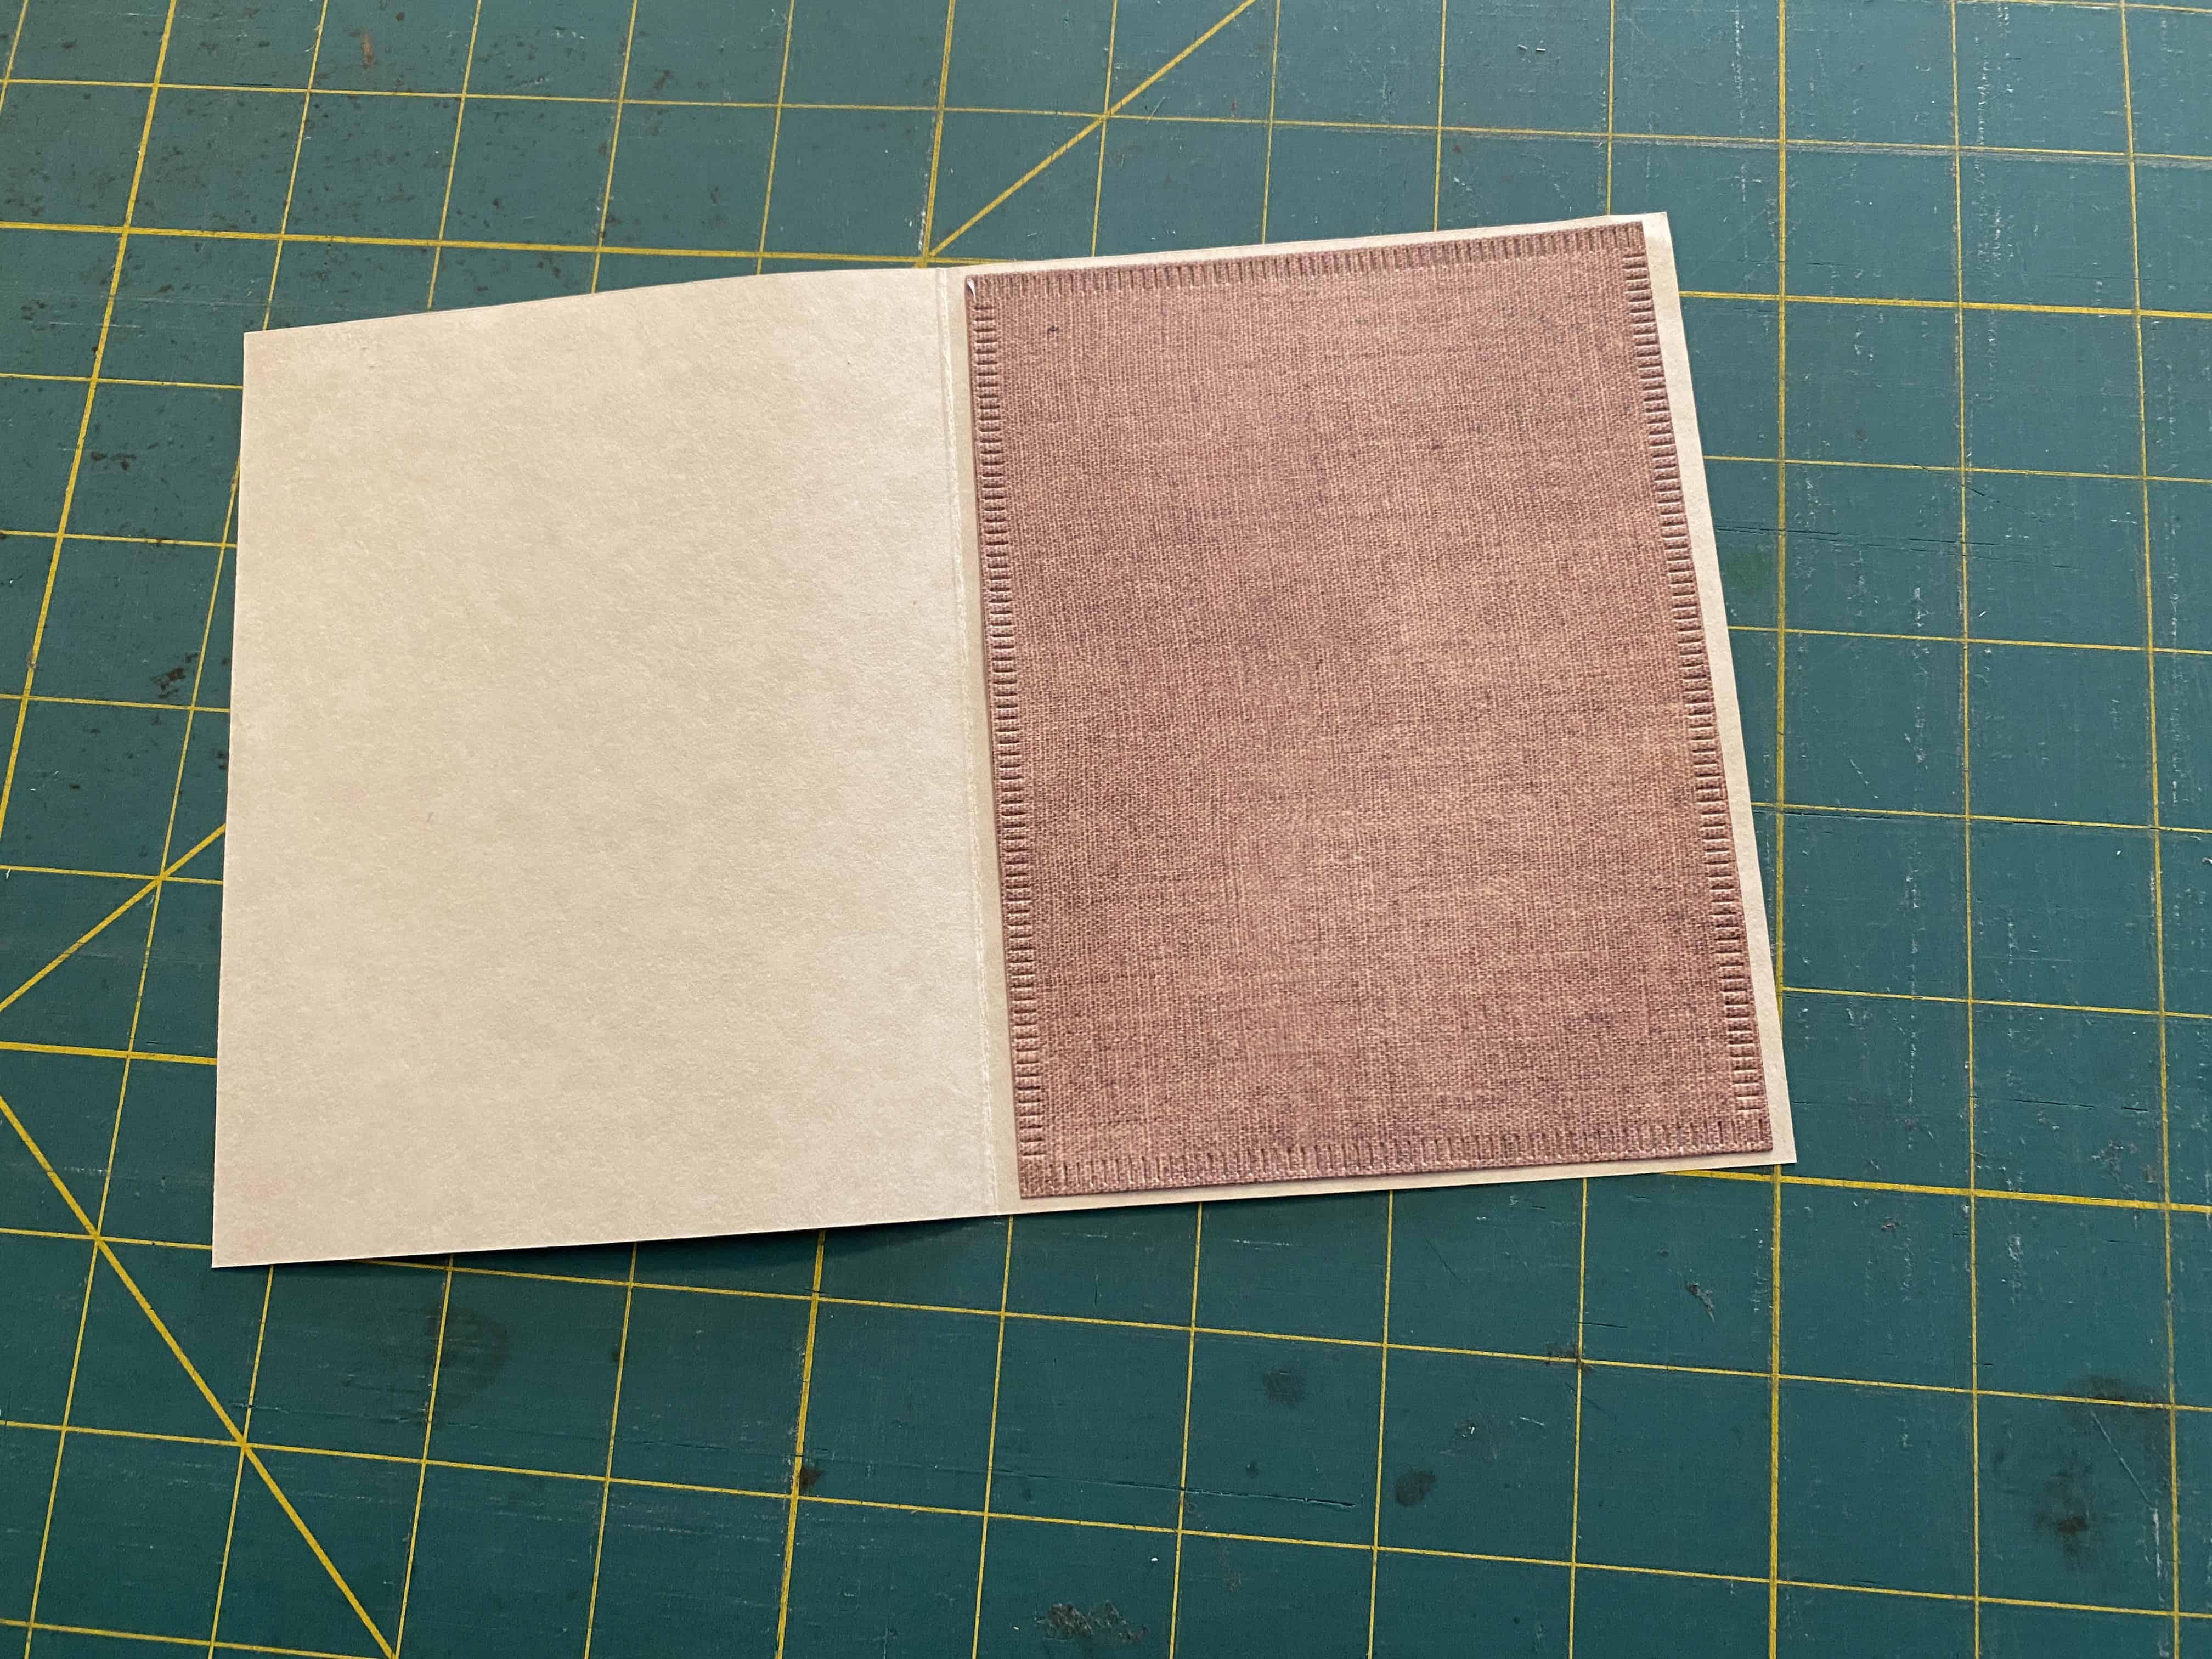
Attach rectangles to the inside right and back. A little bit of the card base peeks out from behind.
Step 4: Front Layered Rectangle
The next smaller rectangle die is a ‘double’ with outer dimensions about $\,3\frac12\text{in}\times 4\frac34\text{in}\,.$ After running it through your cutting machine (I use a Sizzix Big Shot), you'll get two pieces: a solid rectangle, and a frame/border.
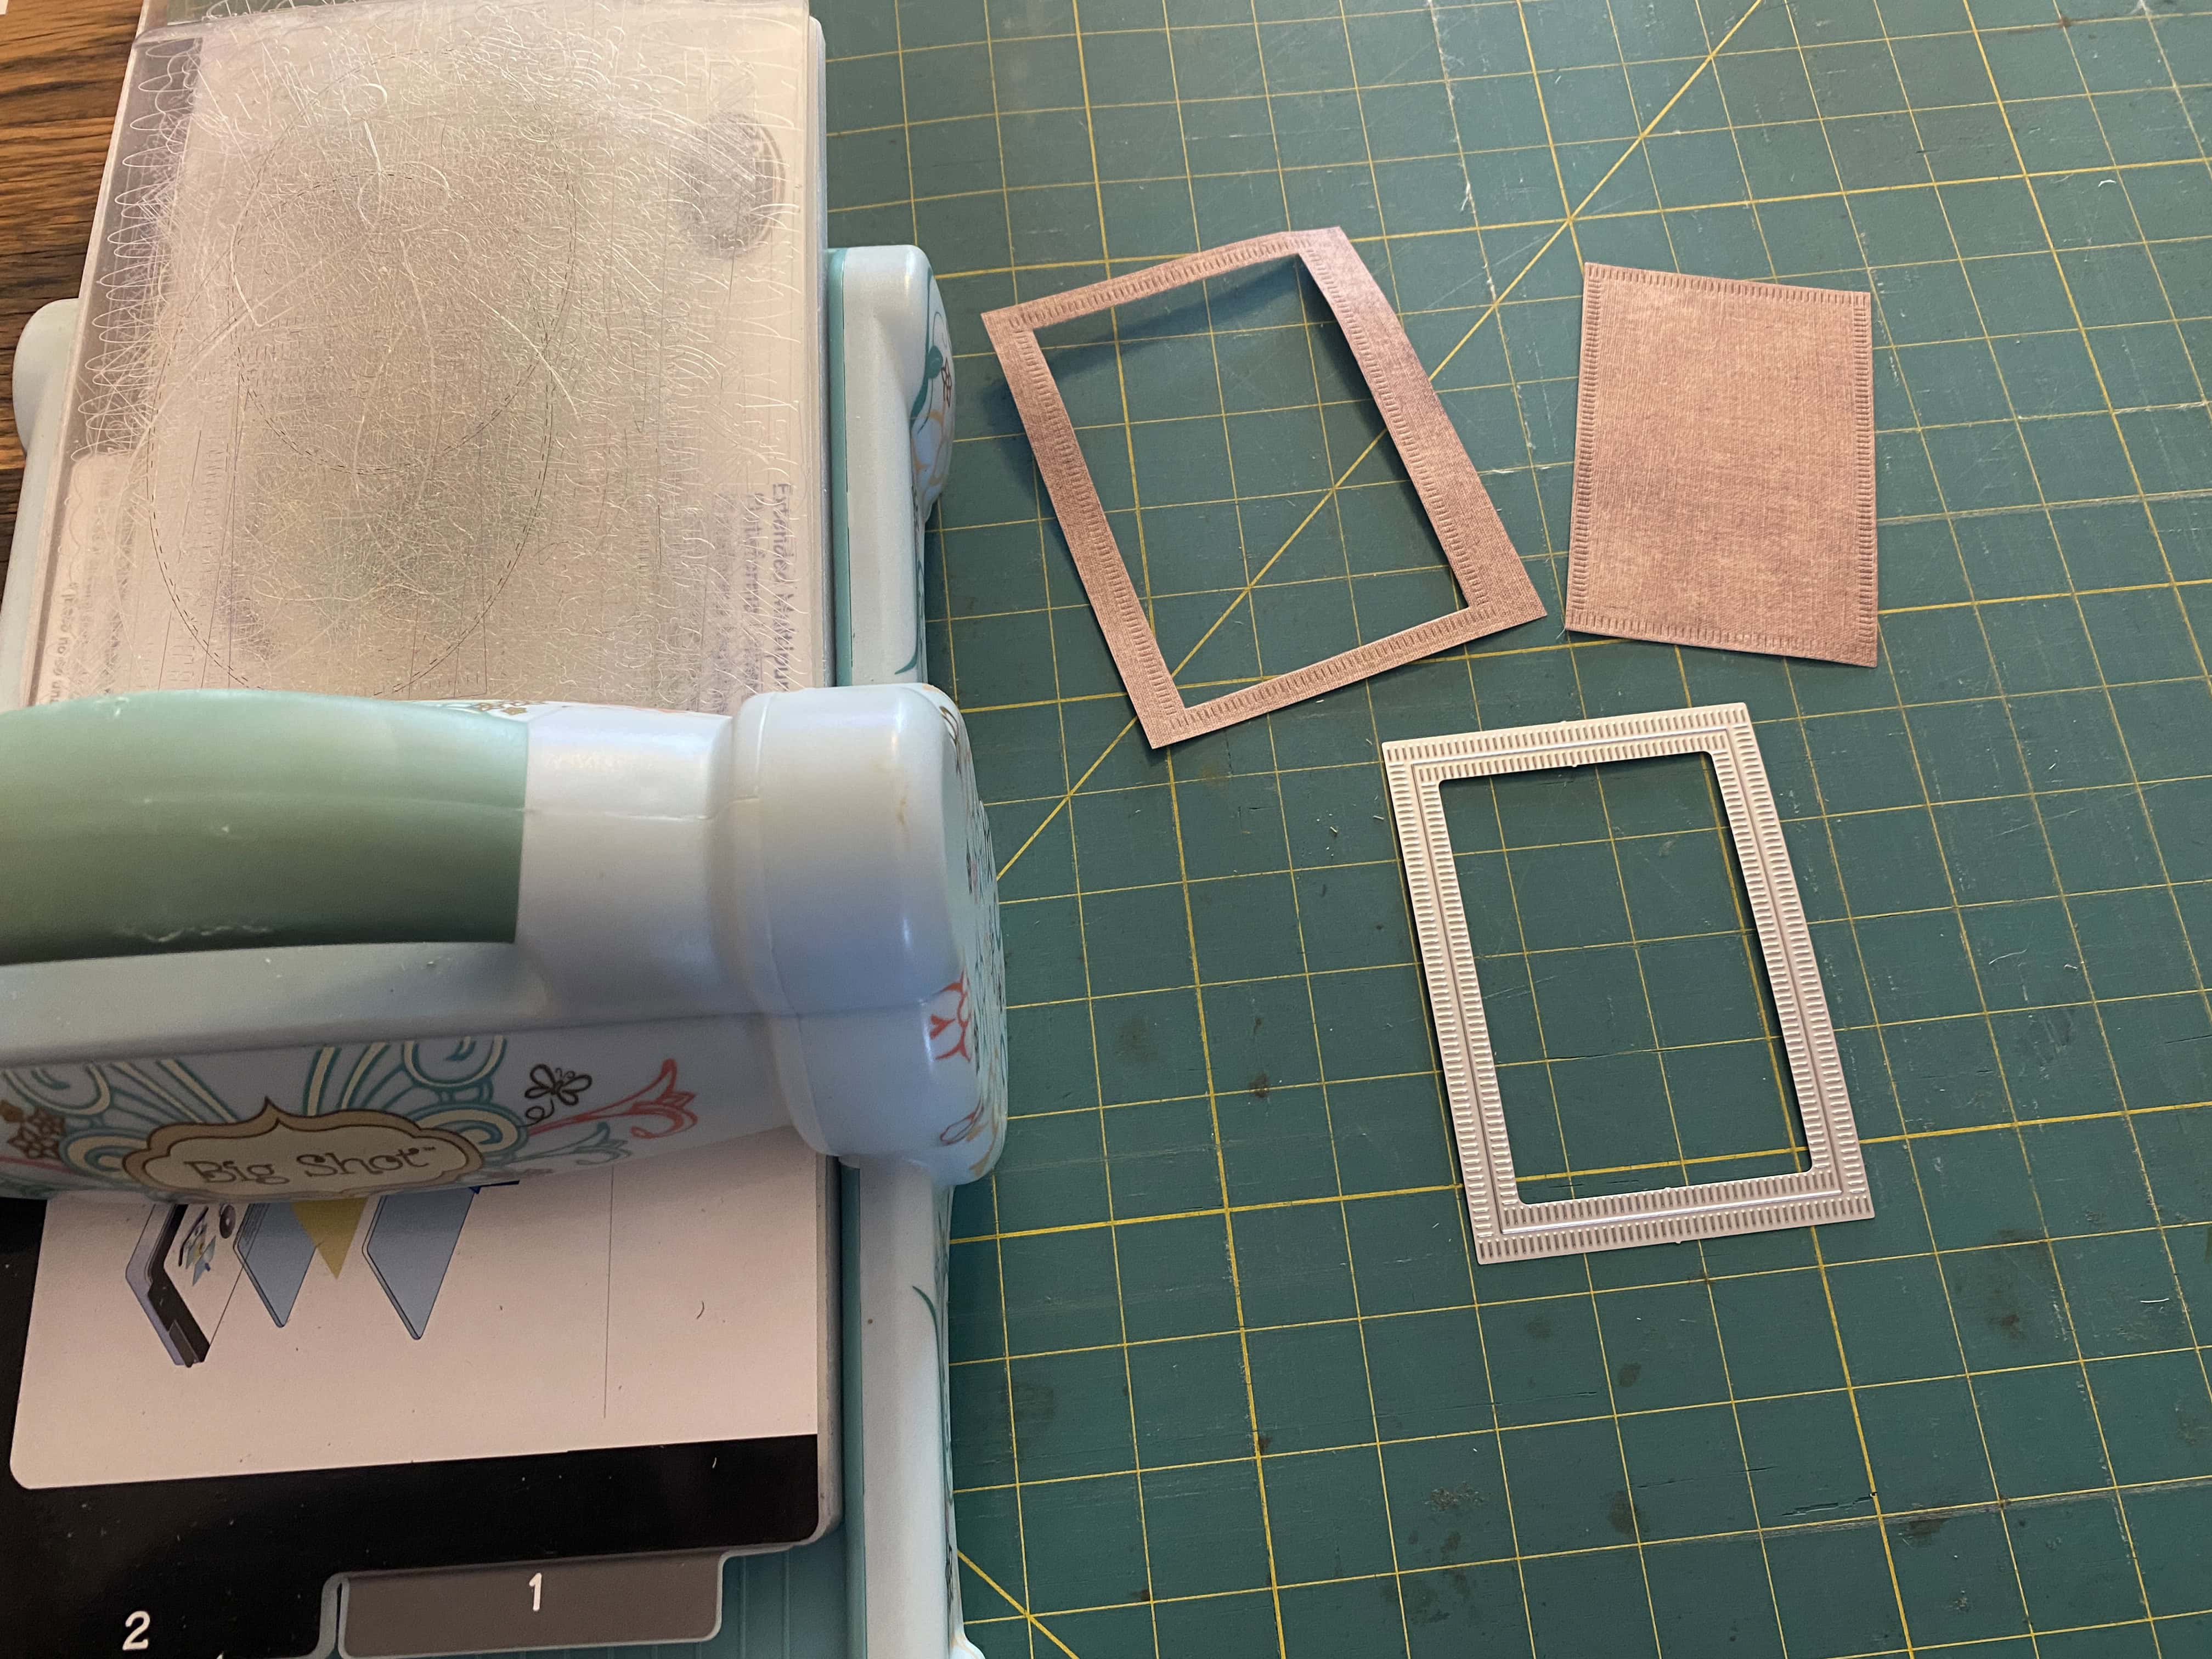
Use the solid rectangle in this step; set the frame/border aside for later
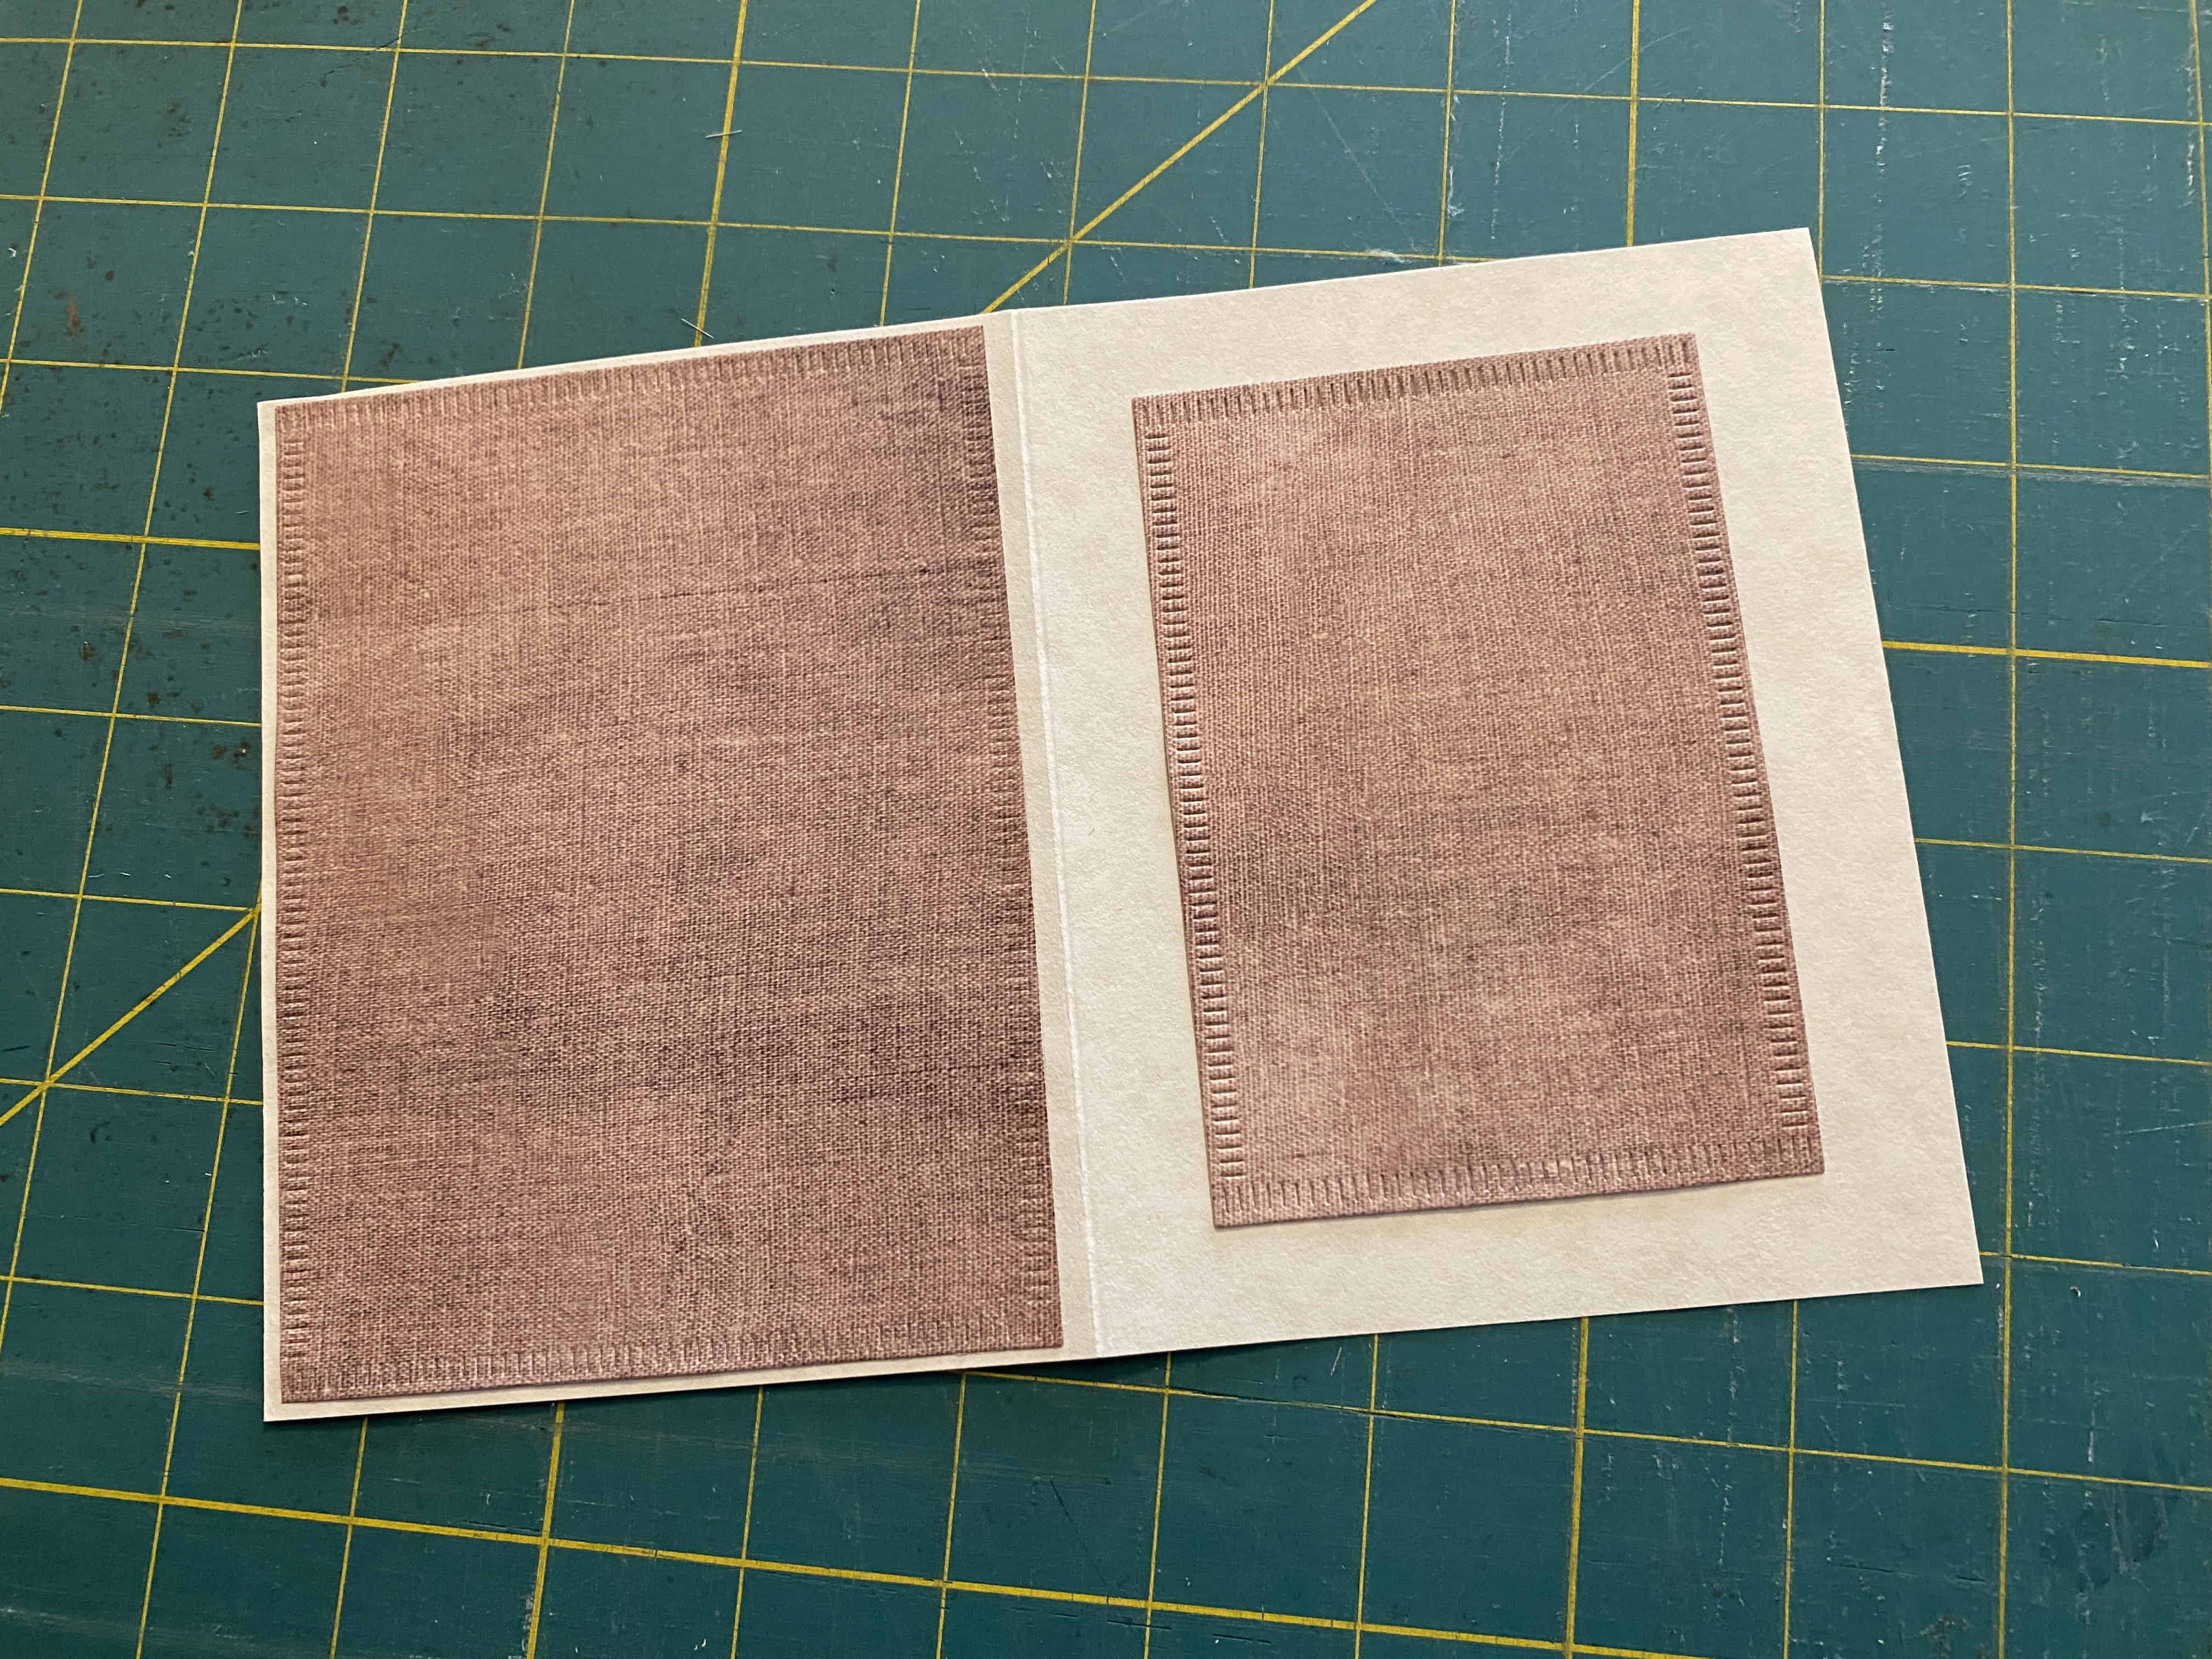
Center the solid rectangle on the front of the card; use an adhesive tape roller to attach
If you ever have extra cut pieces, store them with your dies for future use
Step 5: Cut the ‘Peek Through’
Center your ‘peek through’ die on the front, making sure the cutting side is down.
Use low tack tape to hold the die in place—otherwise, it might wiggle around when going through your cutting machine.
Be careful about the tape you use, because you don't want to risk tearing your paper when you remove the tape after cutting. Test it first on a piece of scrap paper!
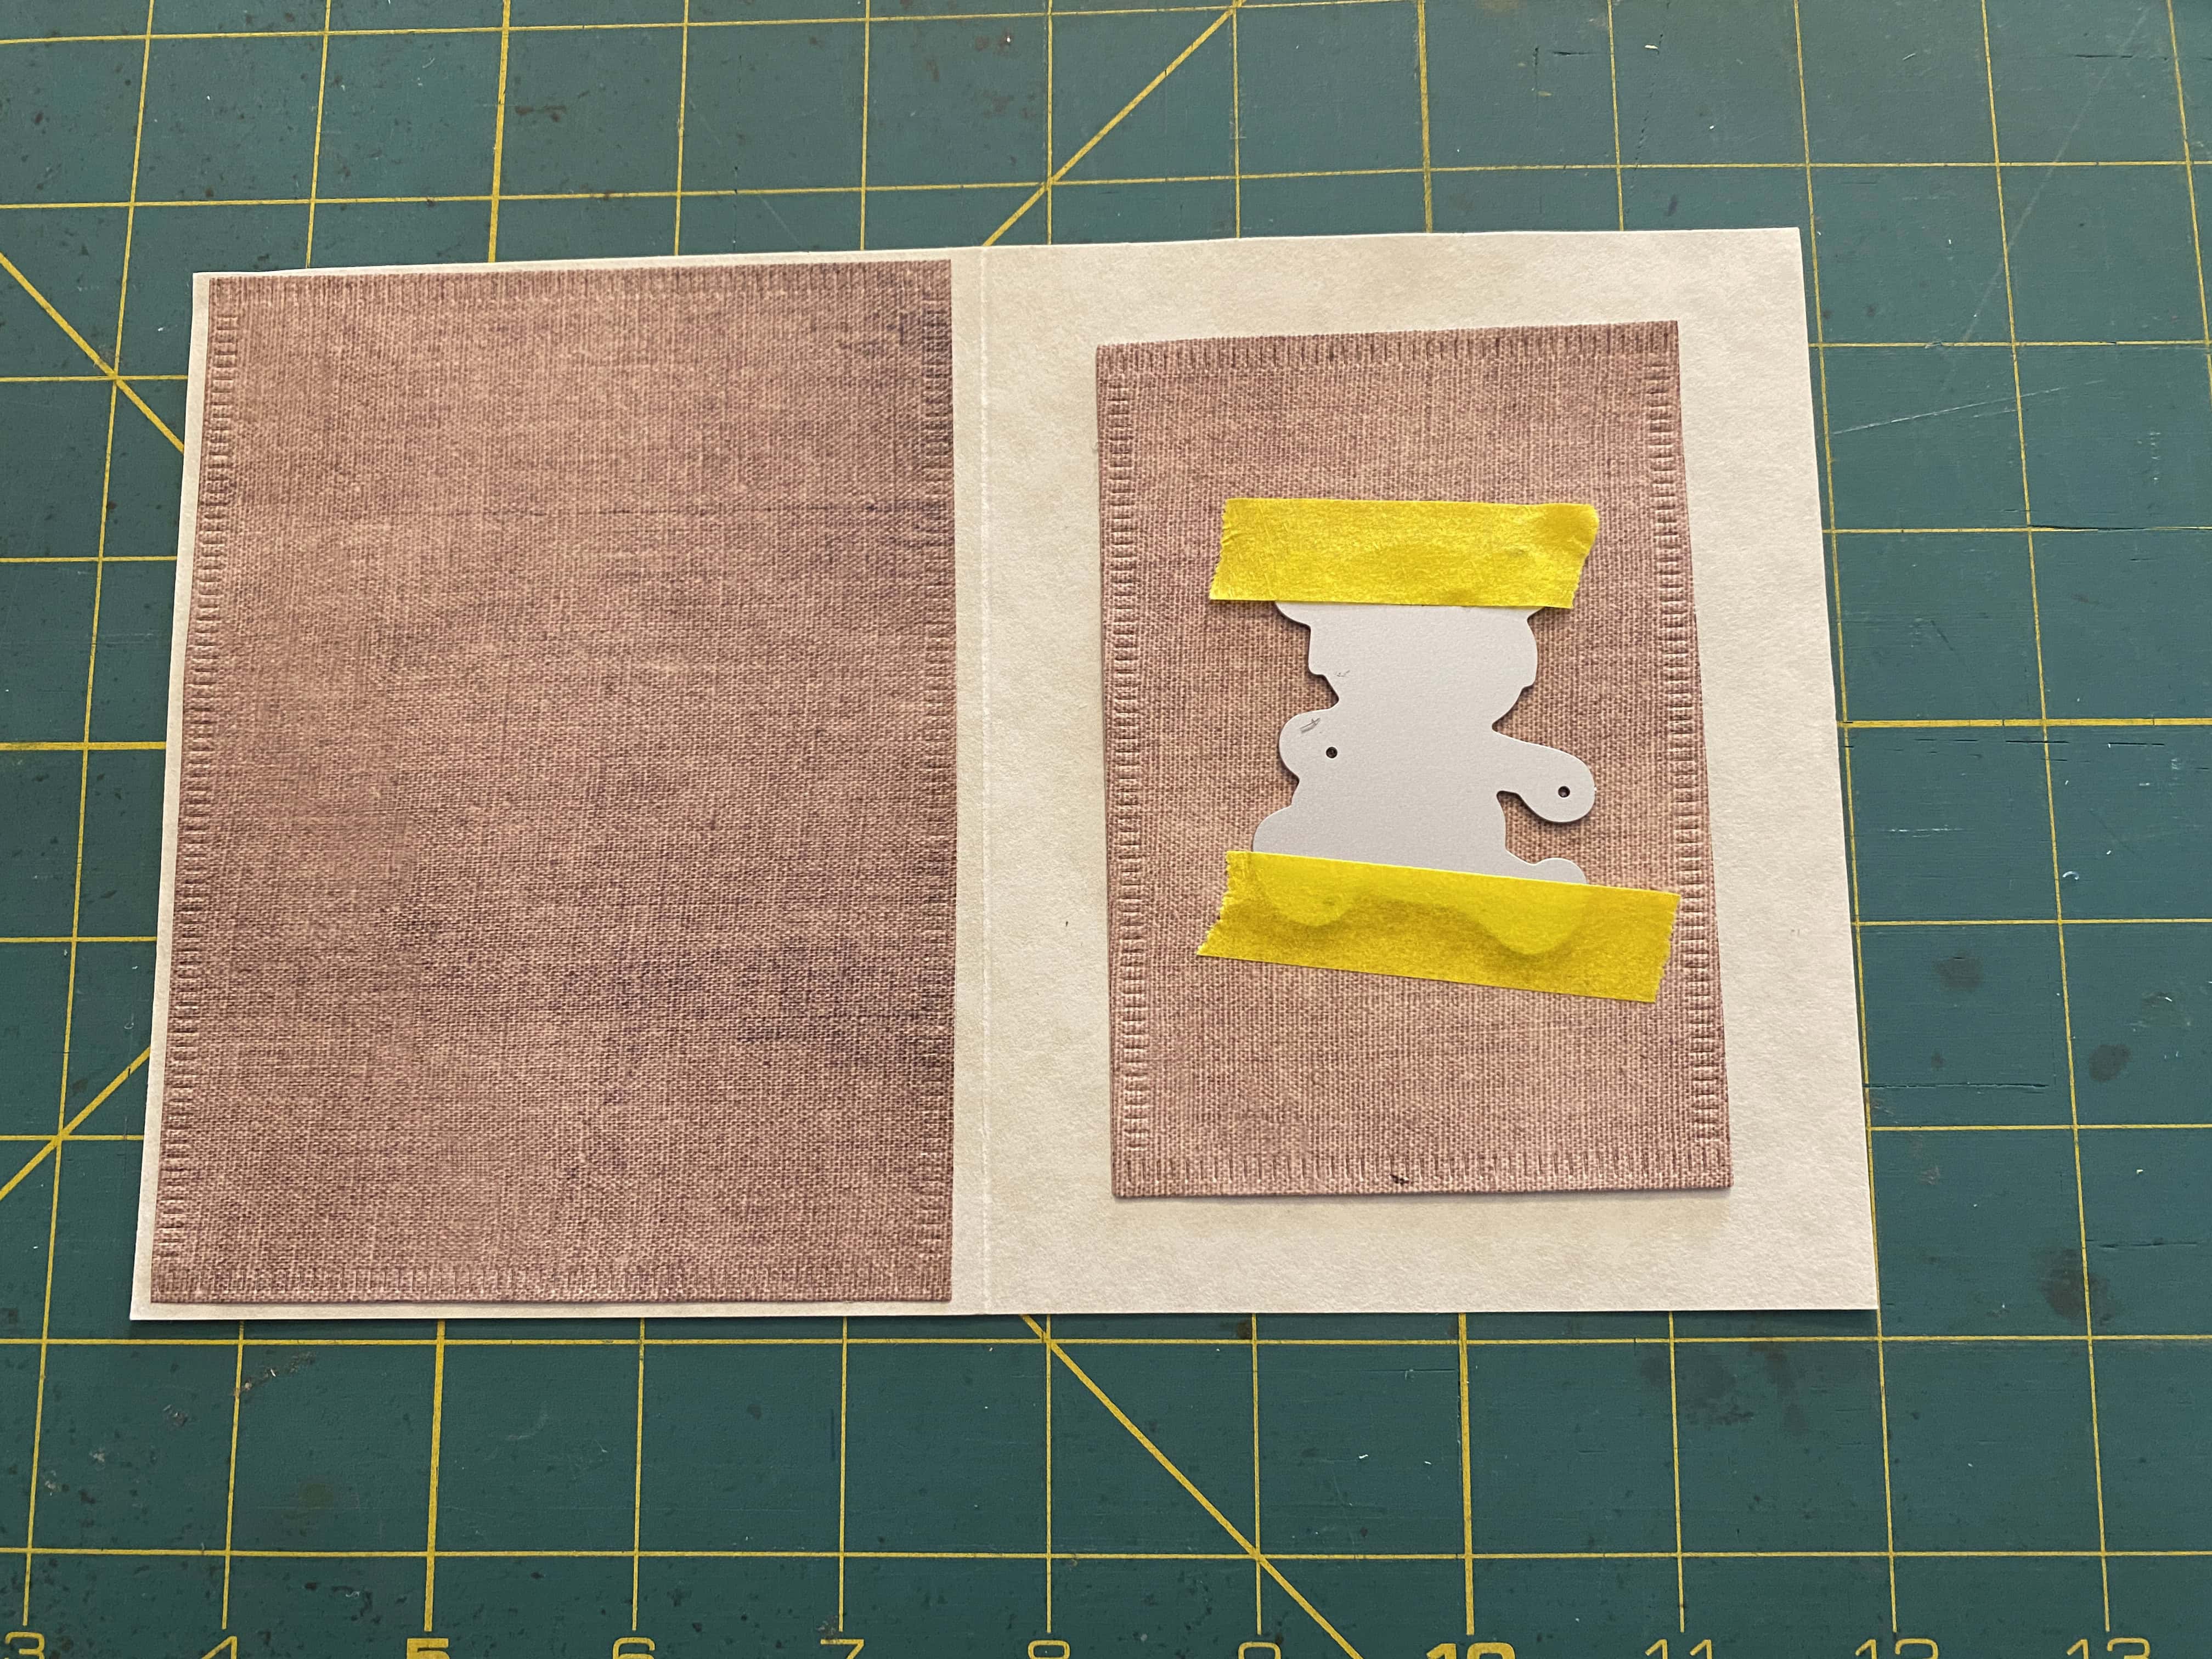
This tape isn't officially ‘low tack’, but it's reasonably priced, and I haven't had problems with paper tearing if I remove it gently
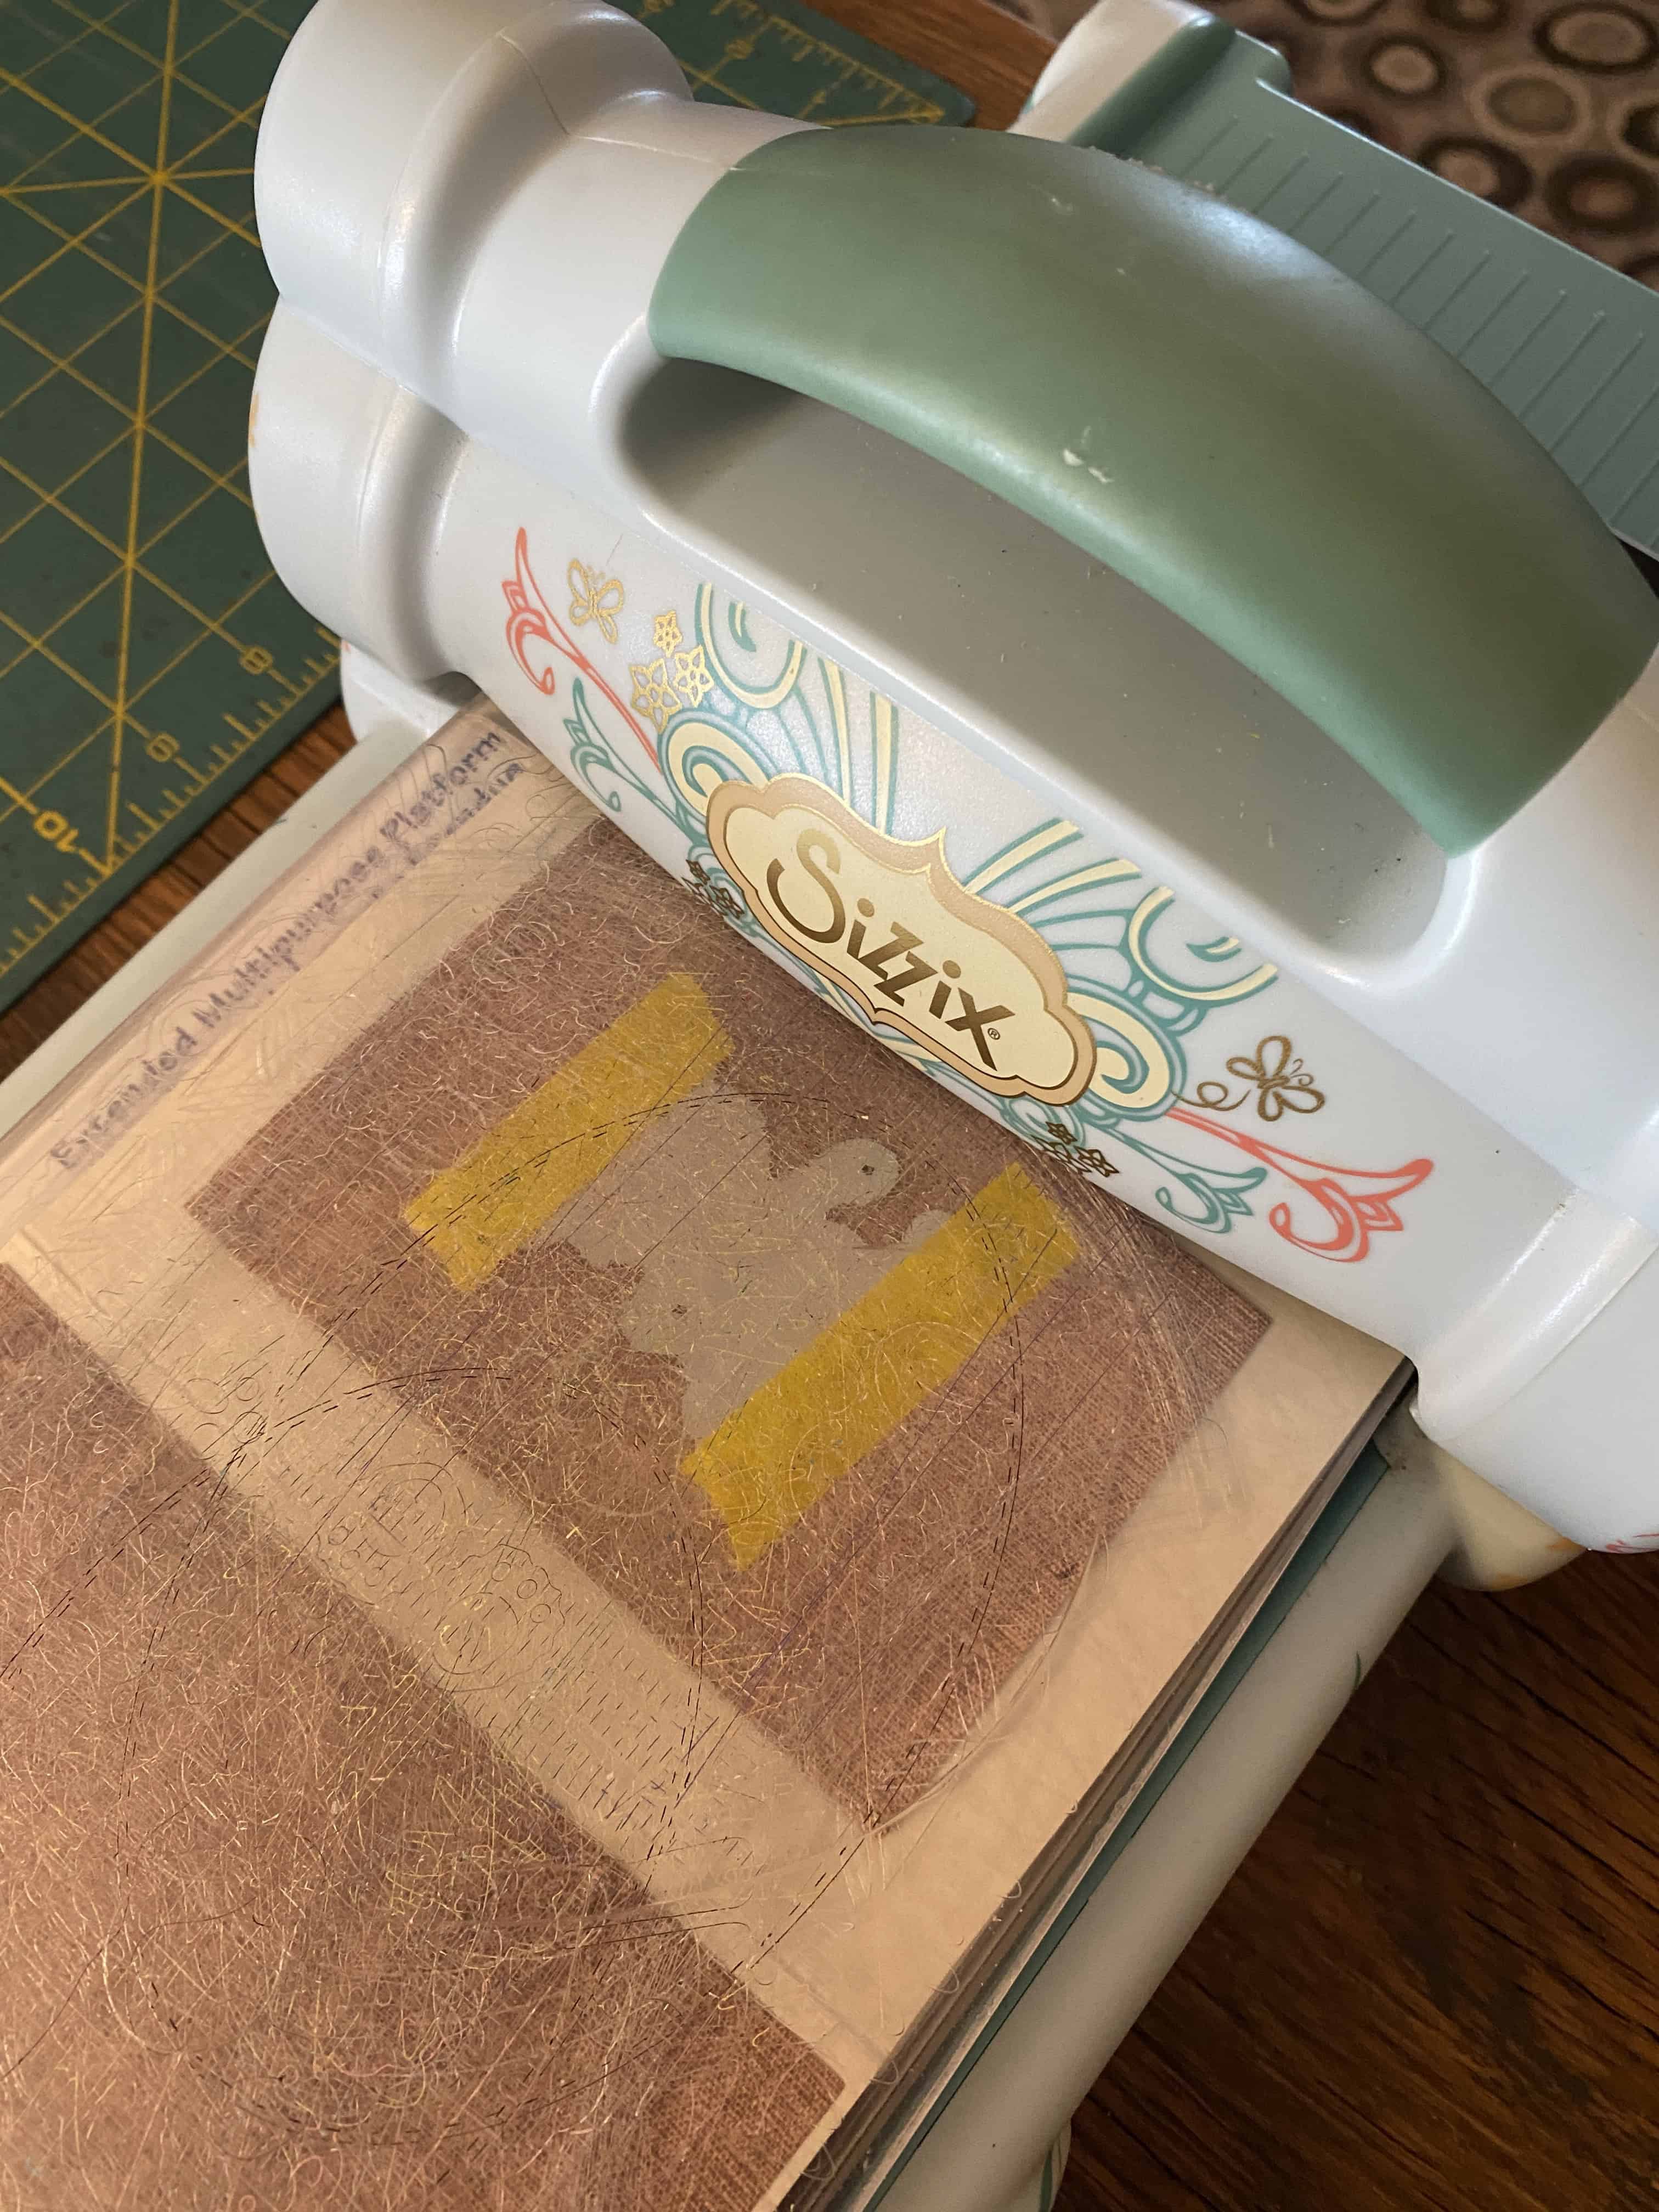
Run just the front through your cutting machine. Make sure you don't cut through the back of your card!
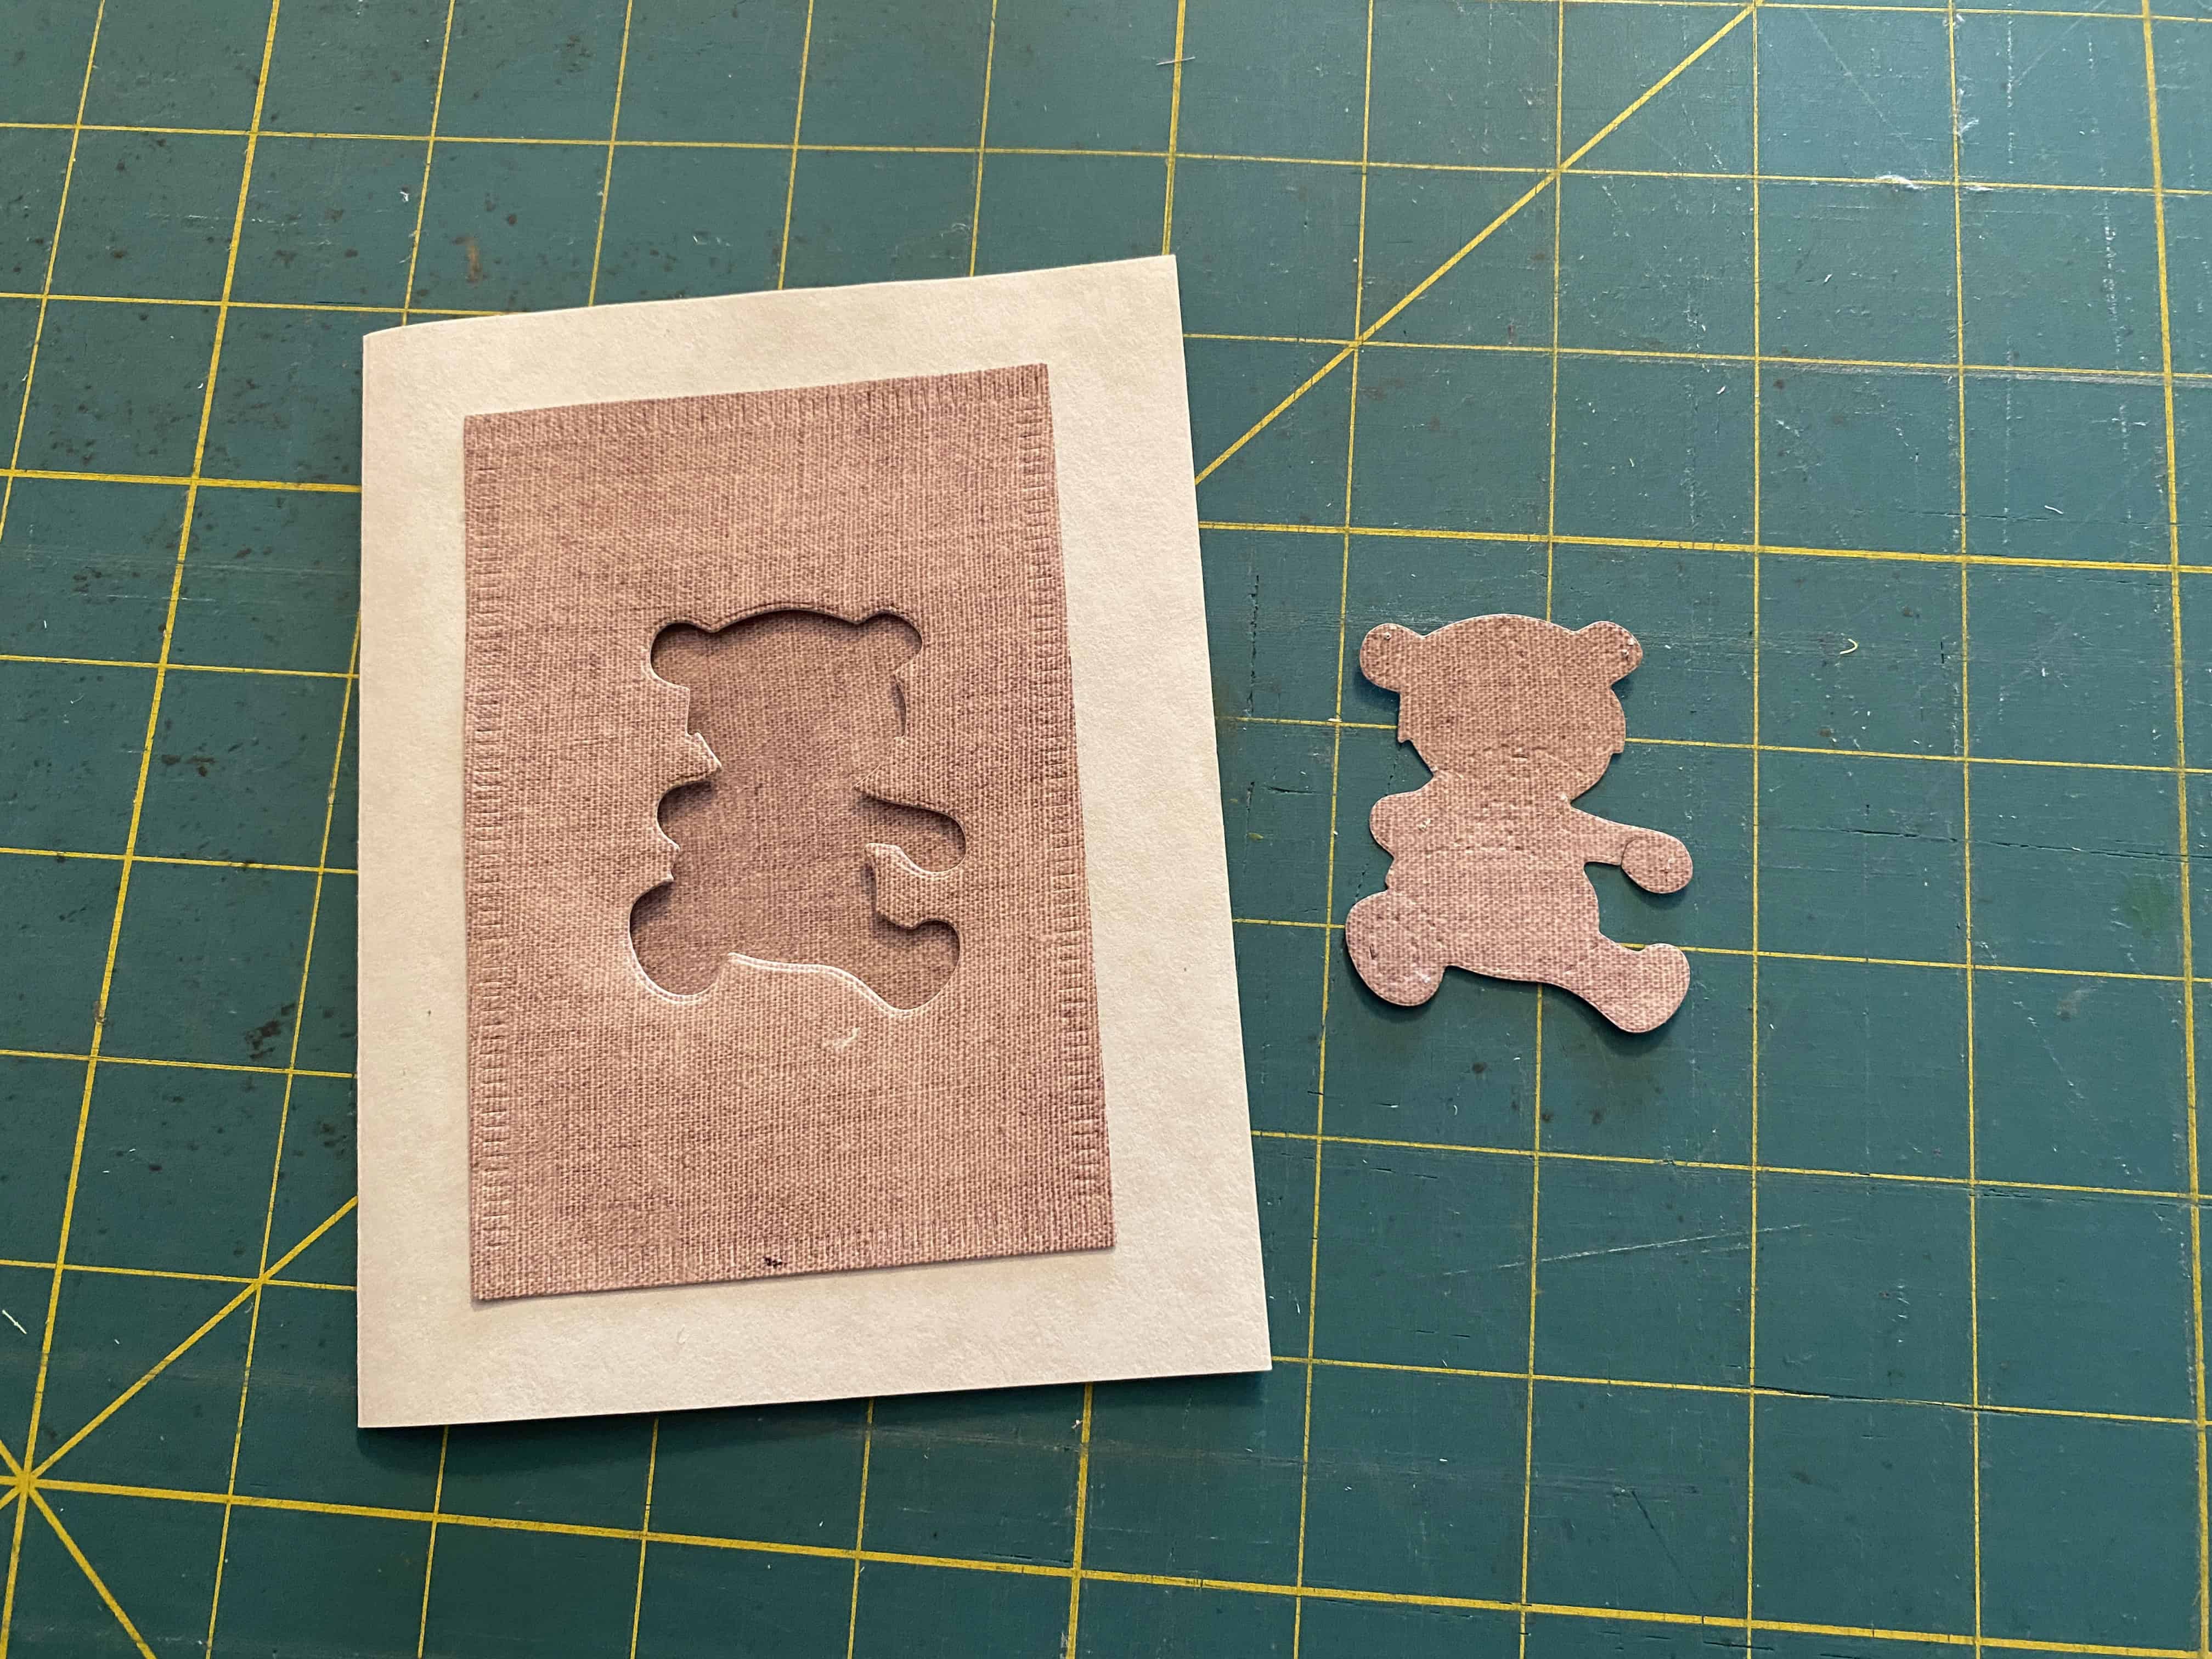
Save your cut-out piece for a future use!
I use these glassine envelopes to hold extra cut pieces, and store them with the dies
Step 6: Front Outside Frame
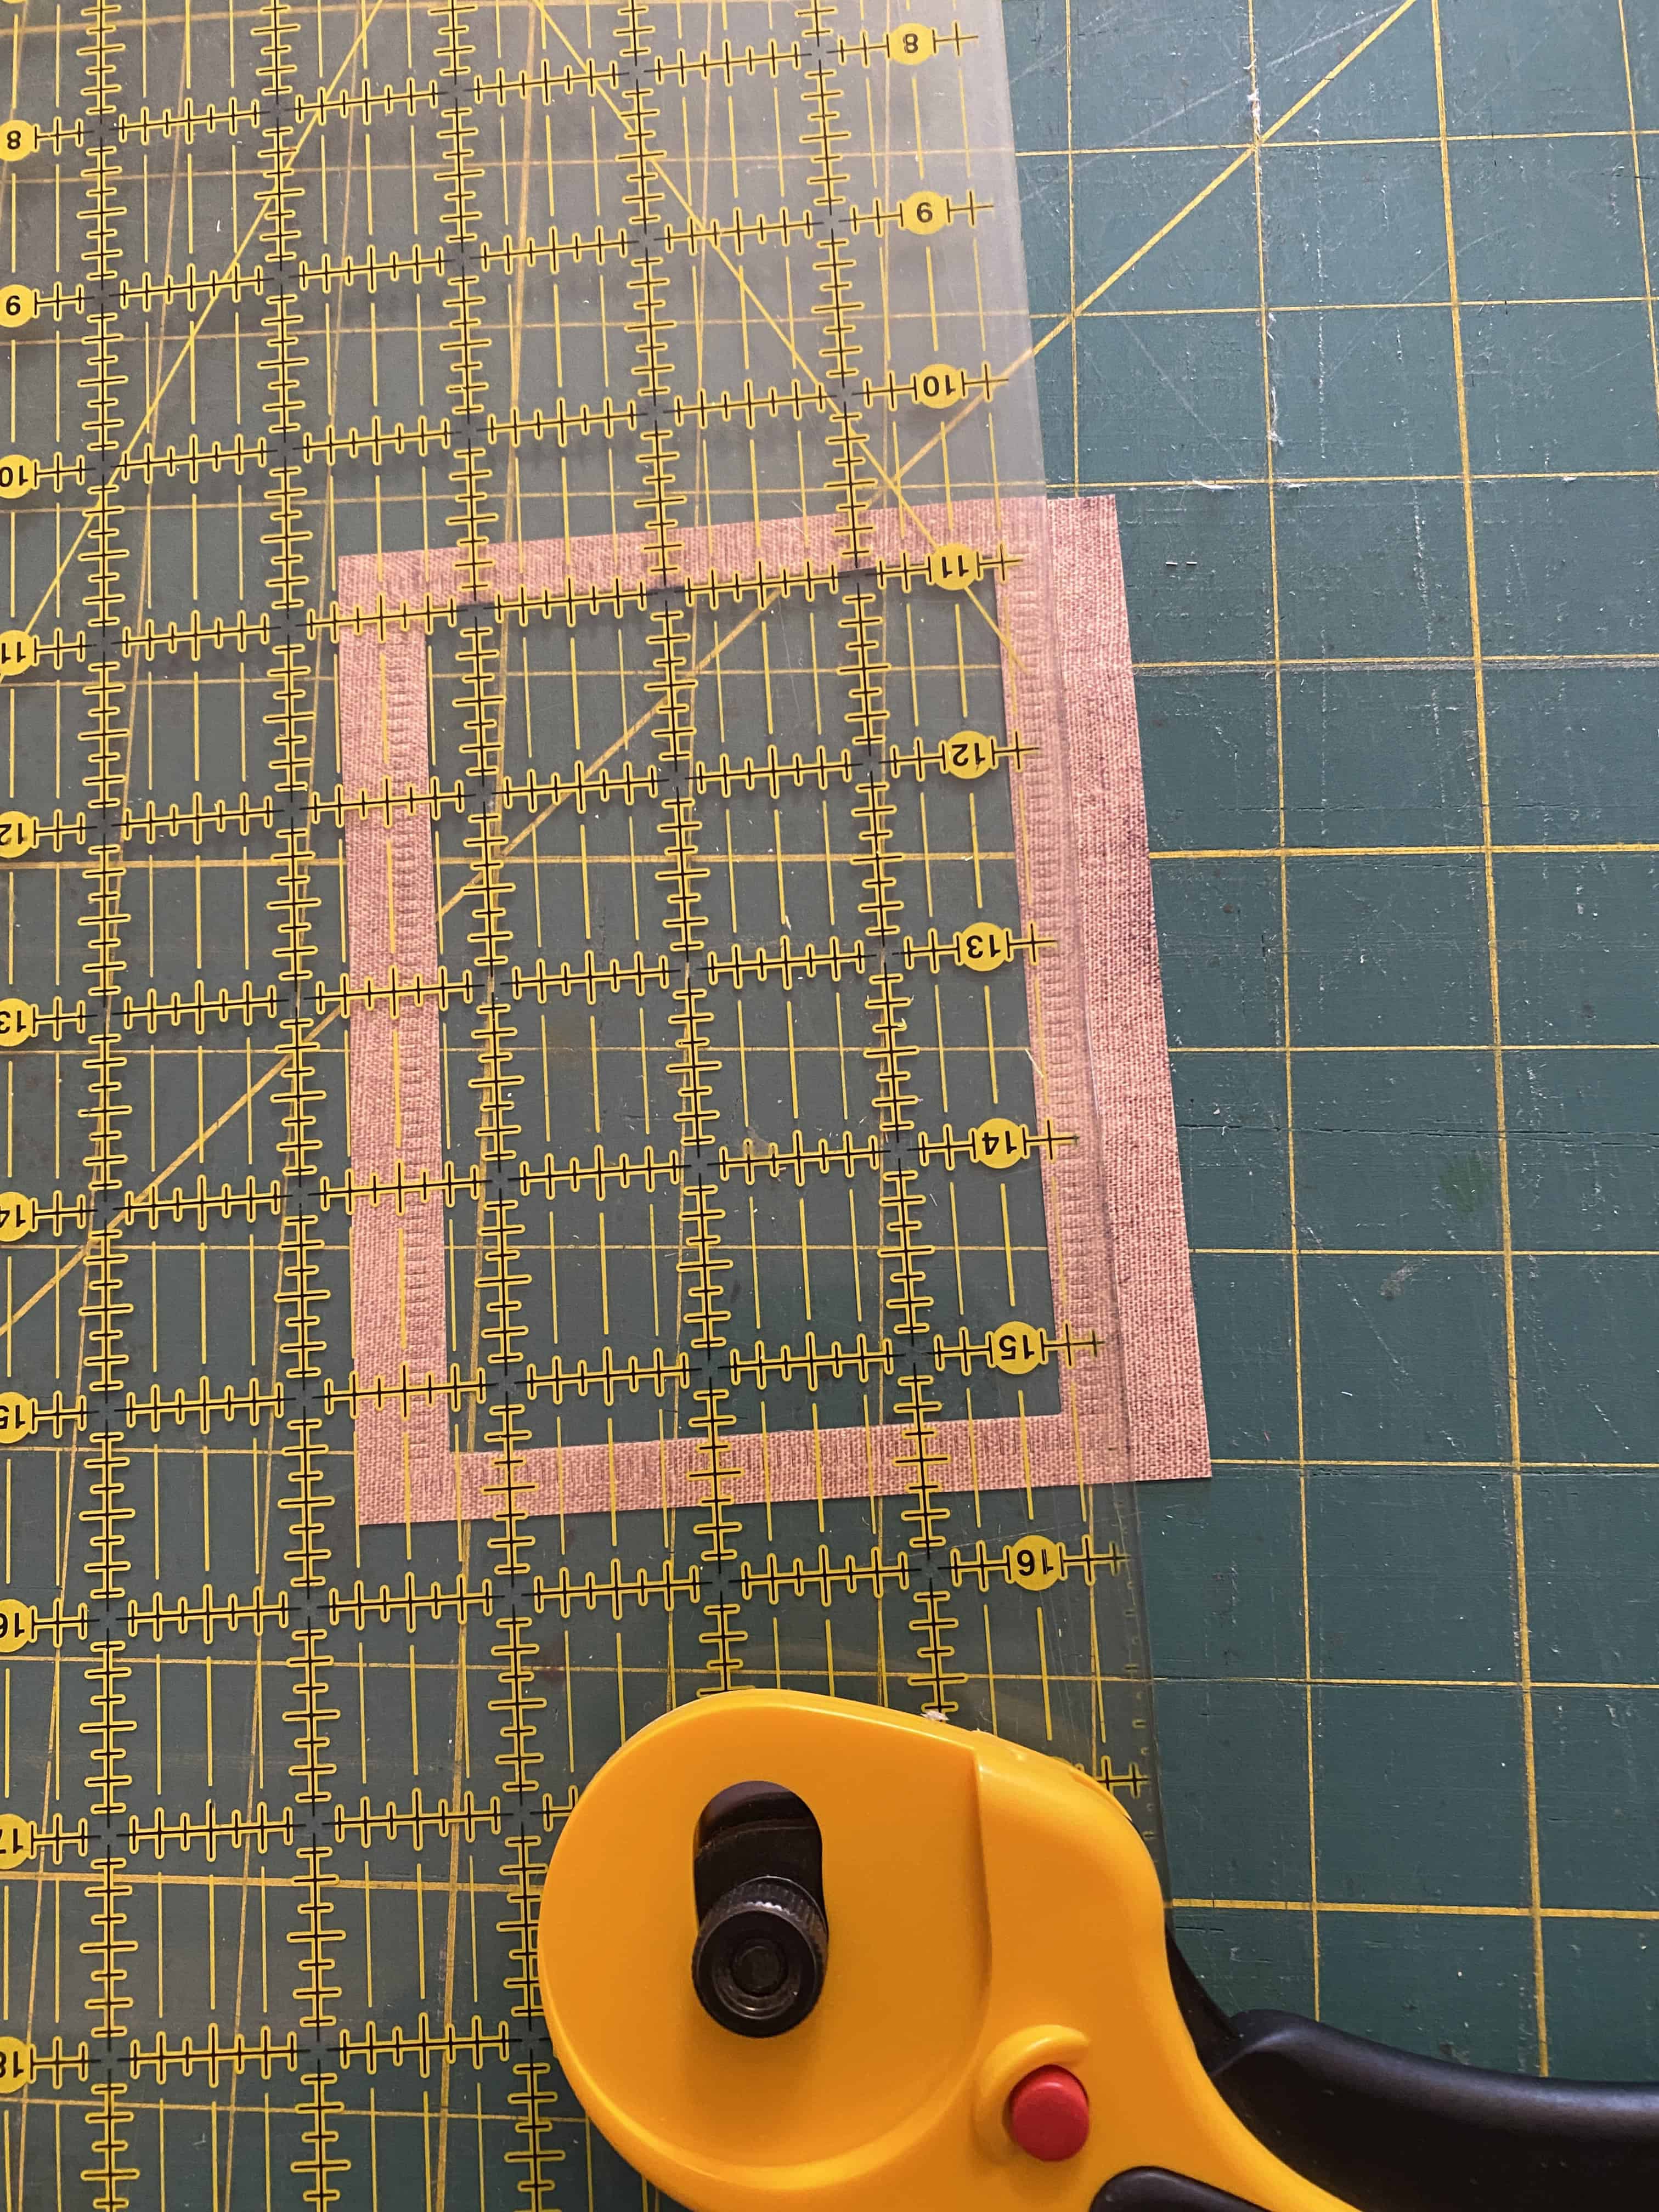
Use a quilting ruler and rotary cutter to trim the frame/border piece that was set aside from Step 4
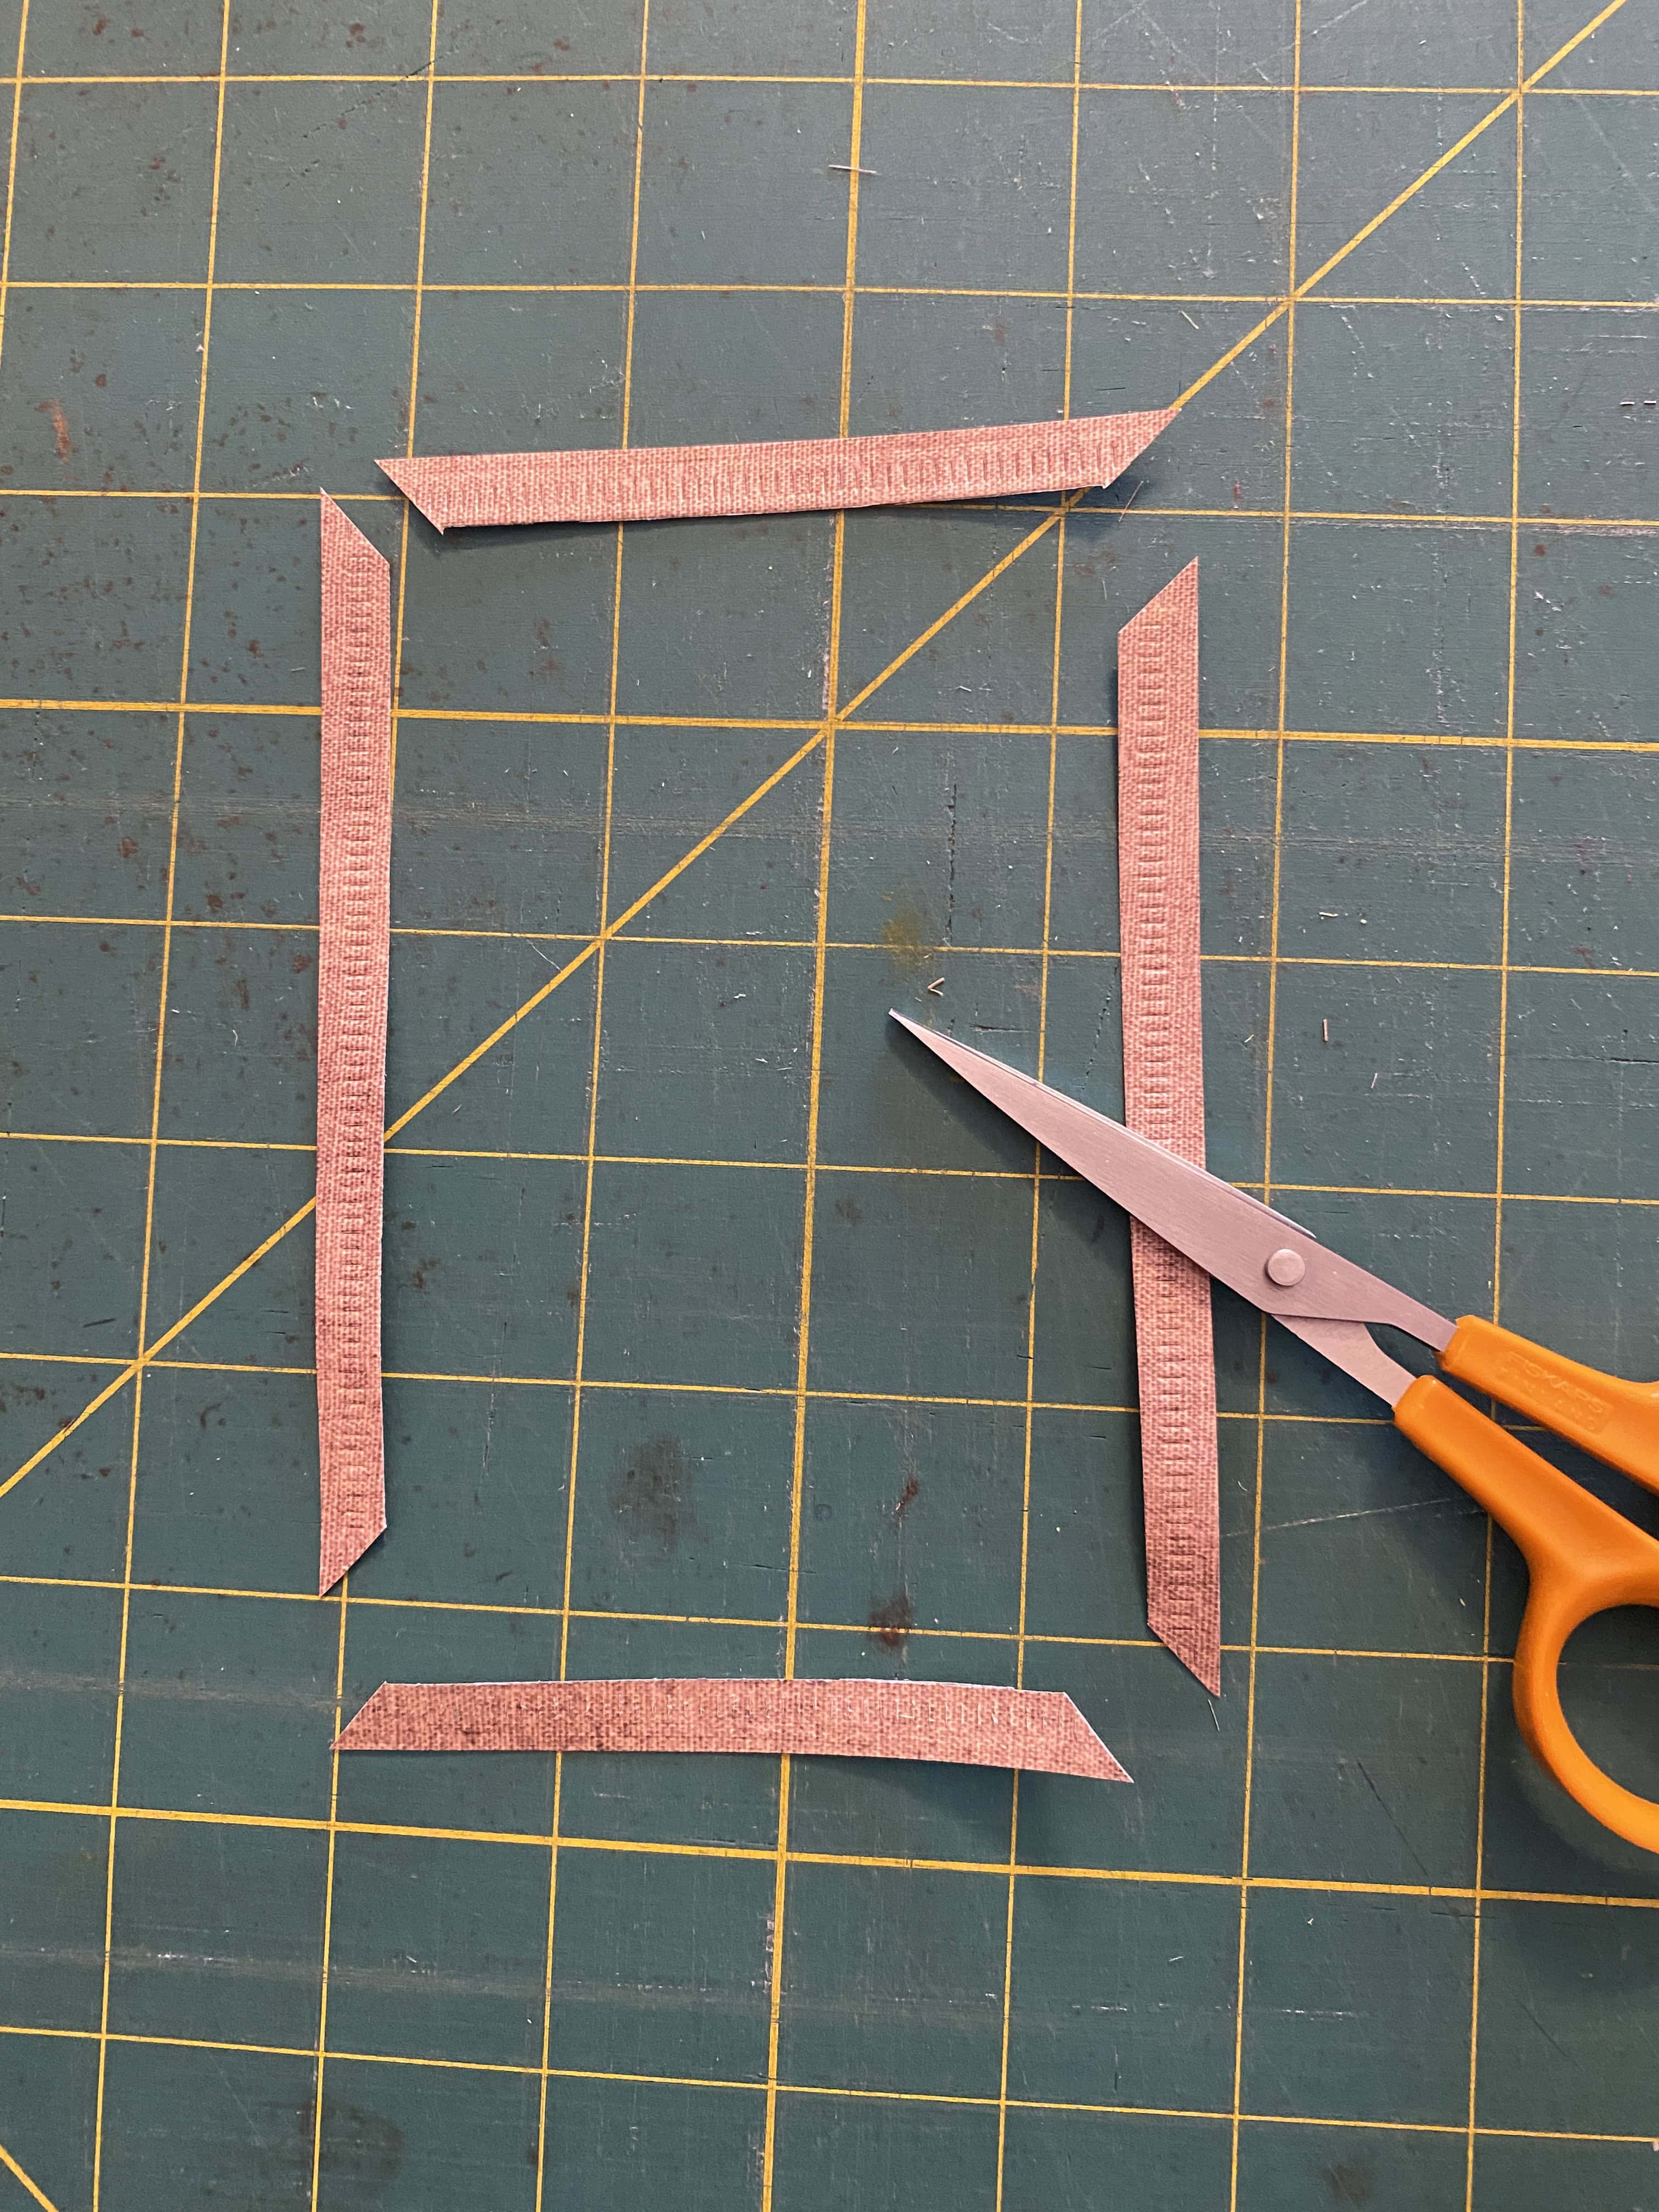
Cut your frame into four pieces (I use these precision scissors)
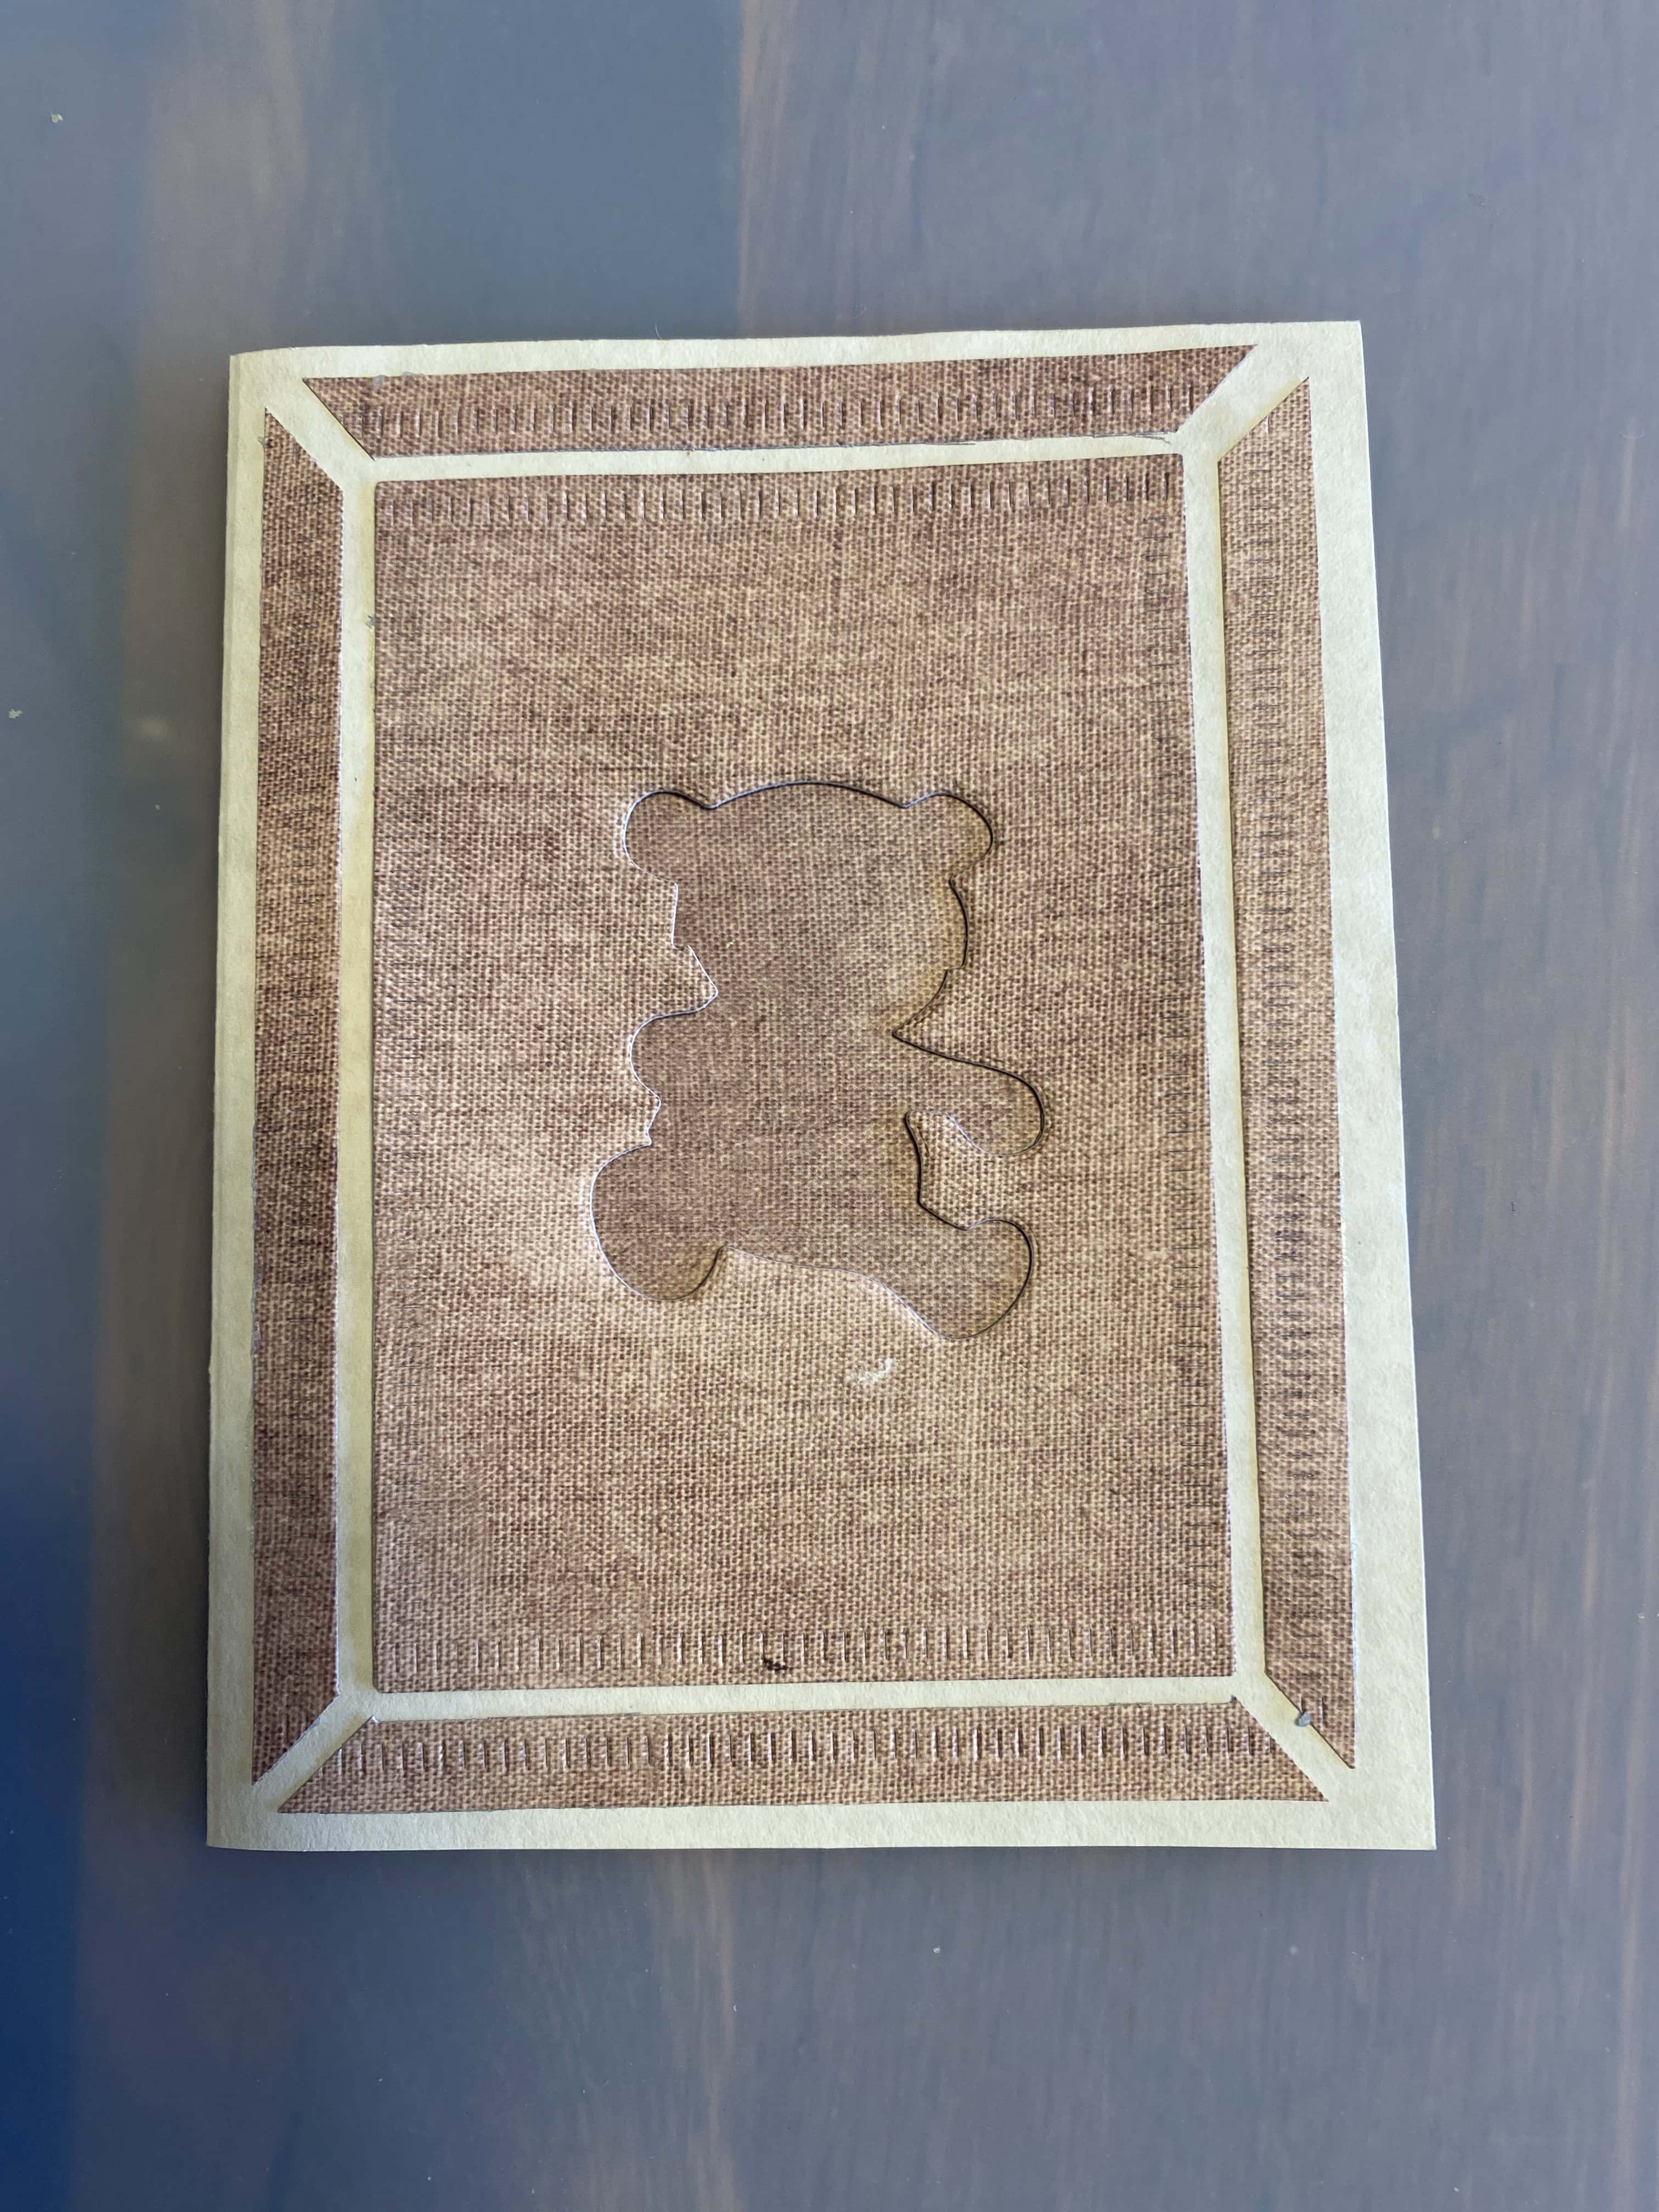
Use an adhesive tape roller to attach the frame to the front of the card
Step 7: Inside Die Cut Image
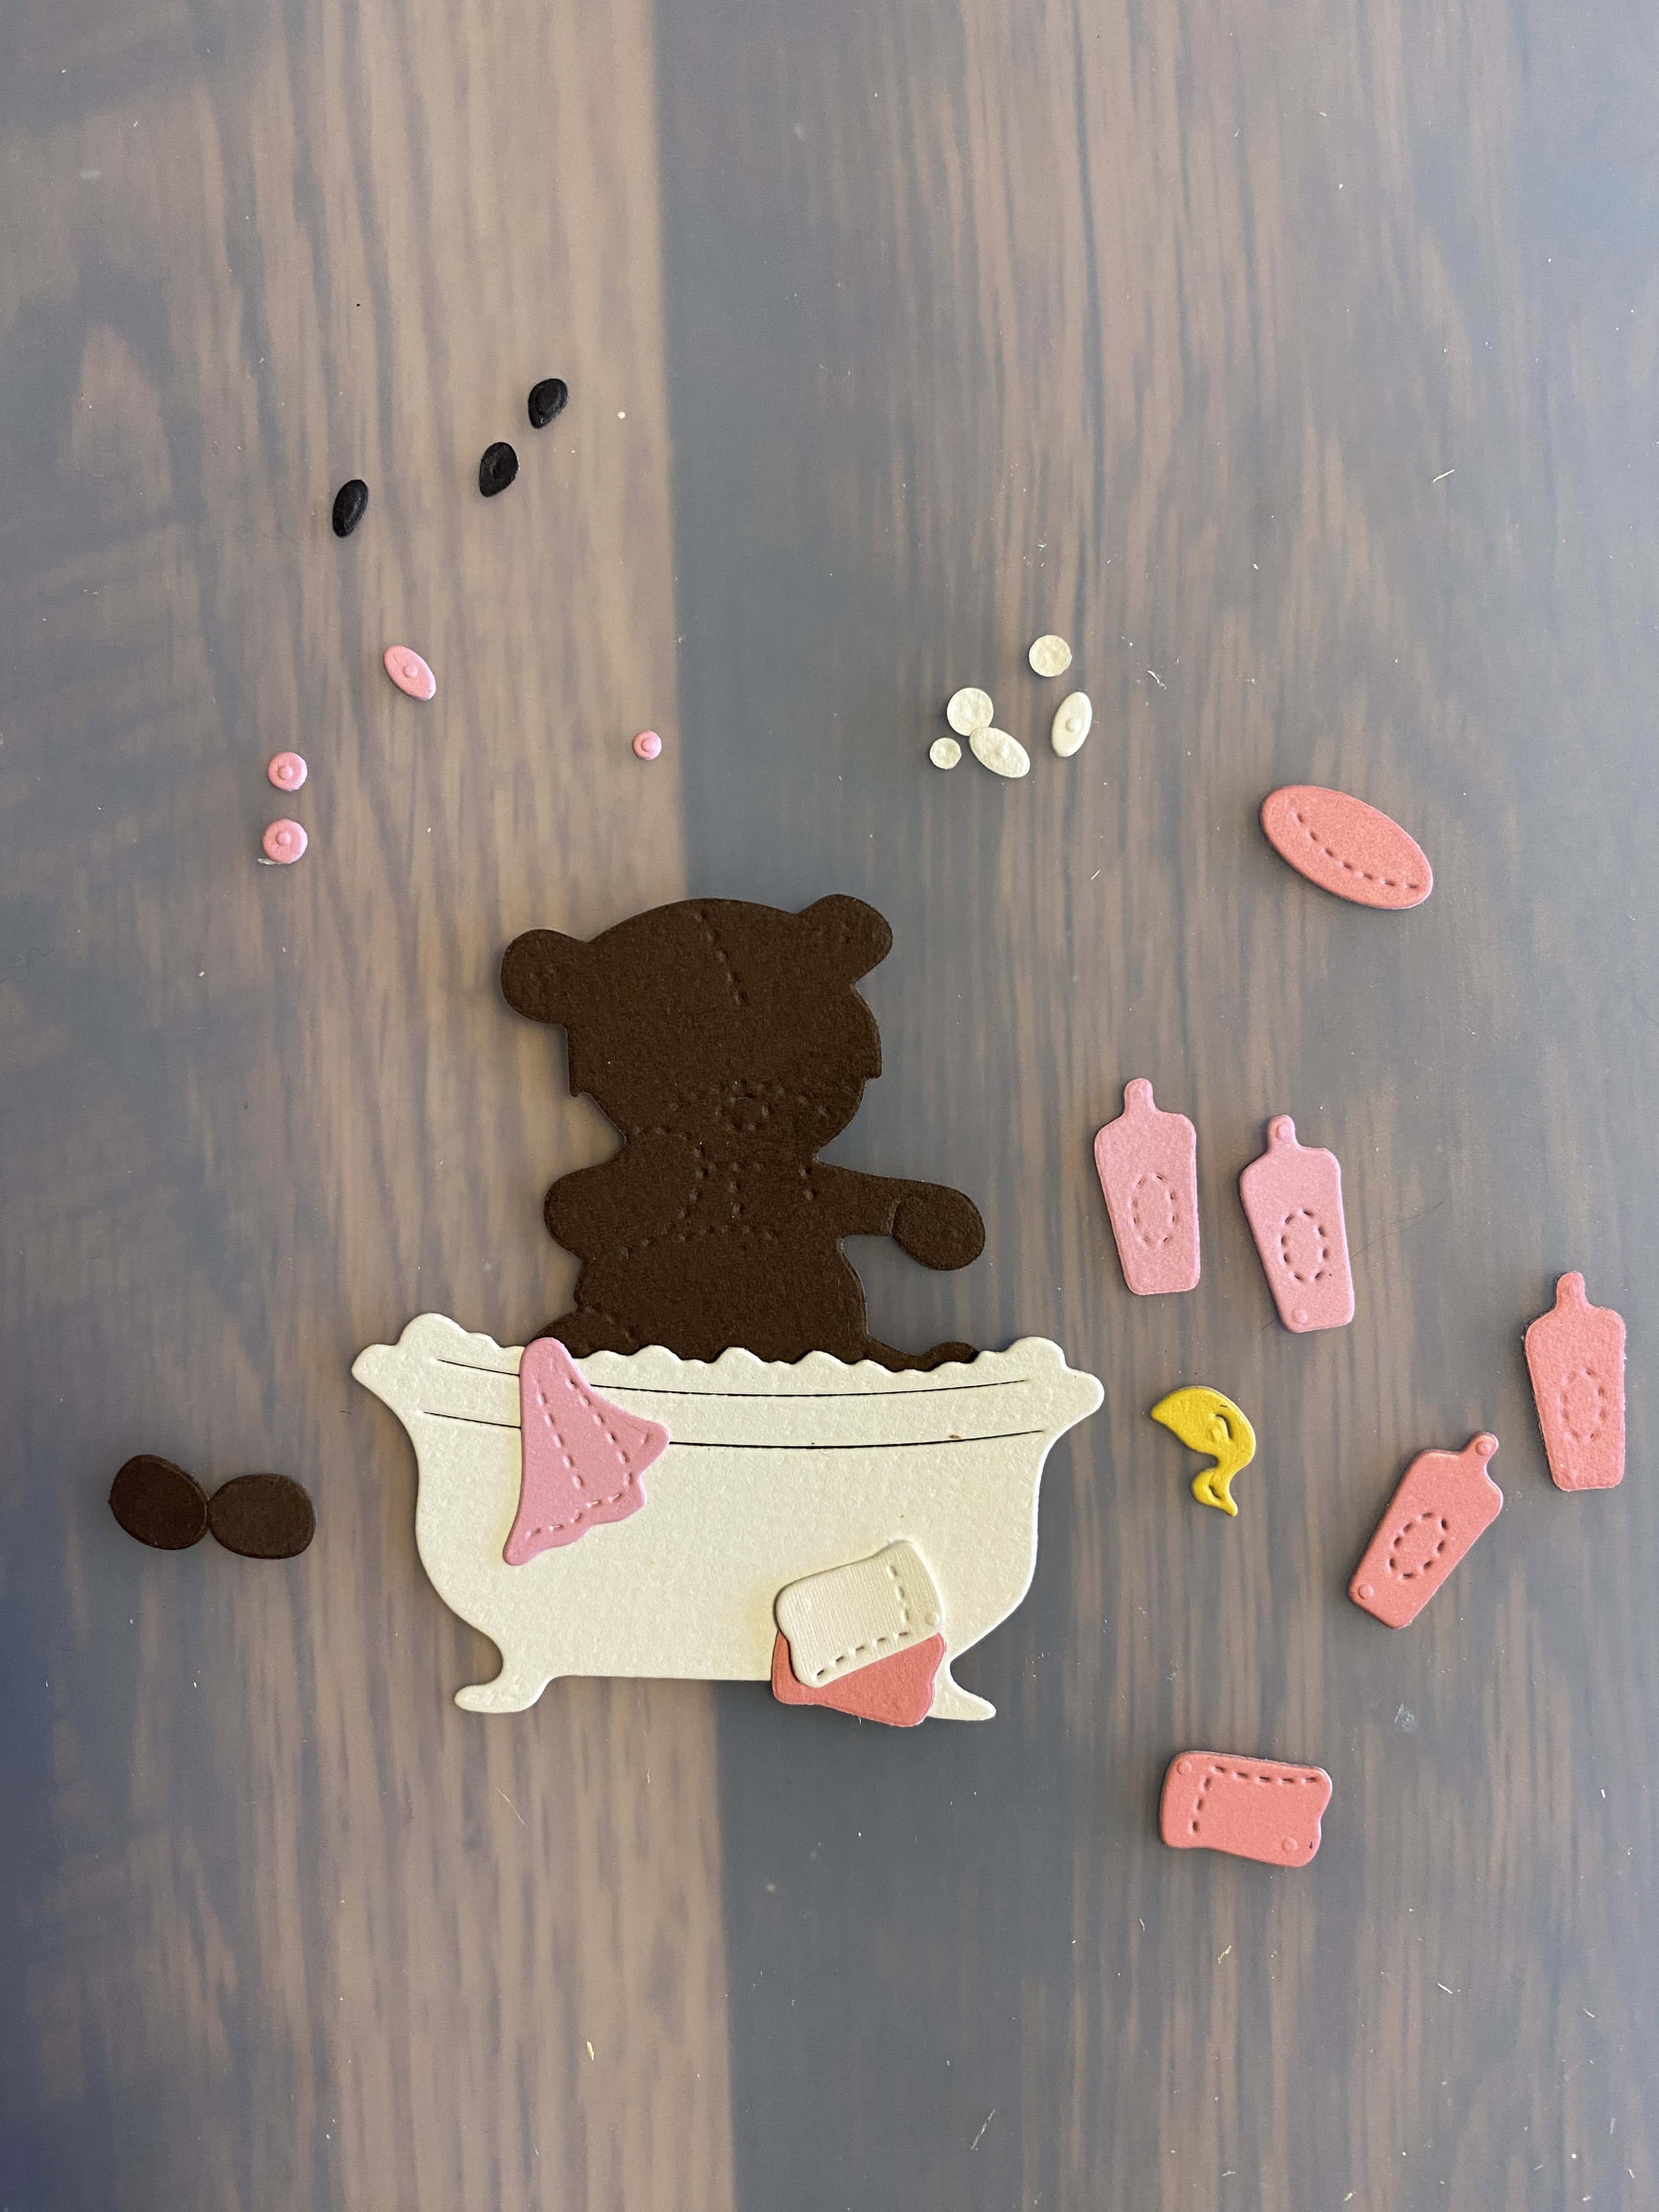
Cut the pieces for your inside die cut image
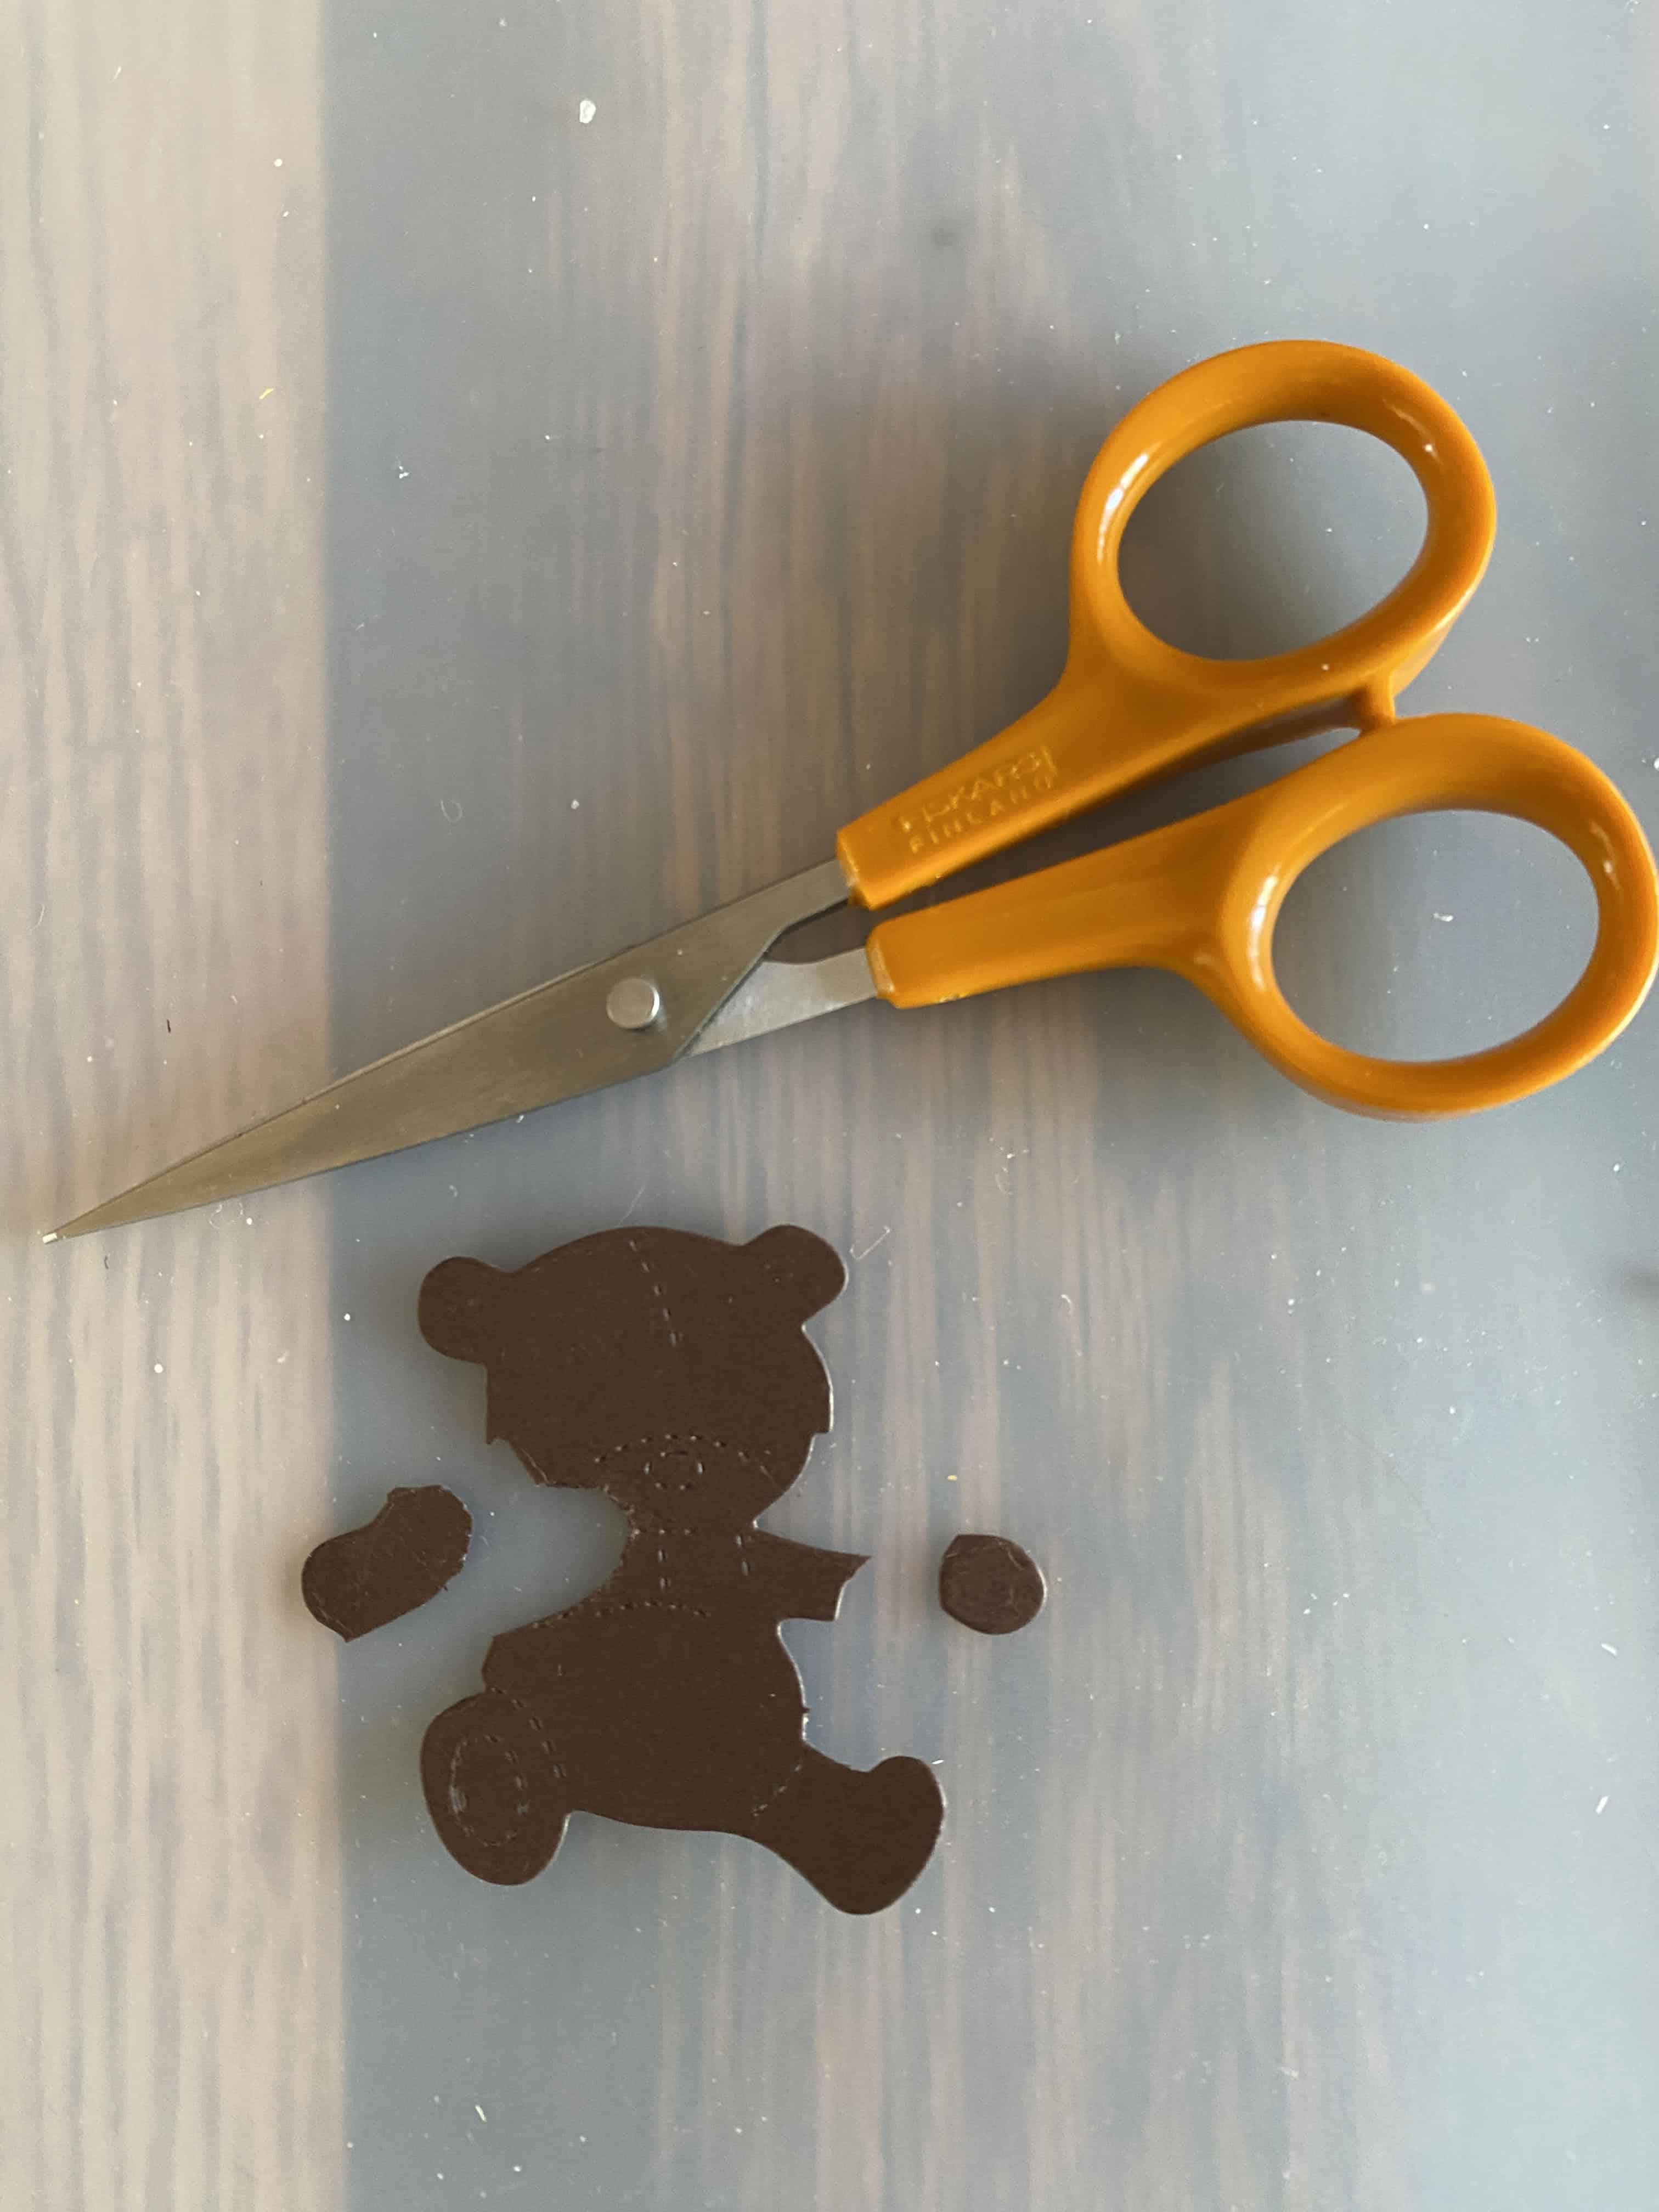
For pieces that require layering, machine-cut an extra piece and use precision scissors to cut off the required parts
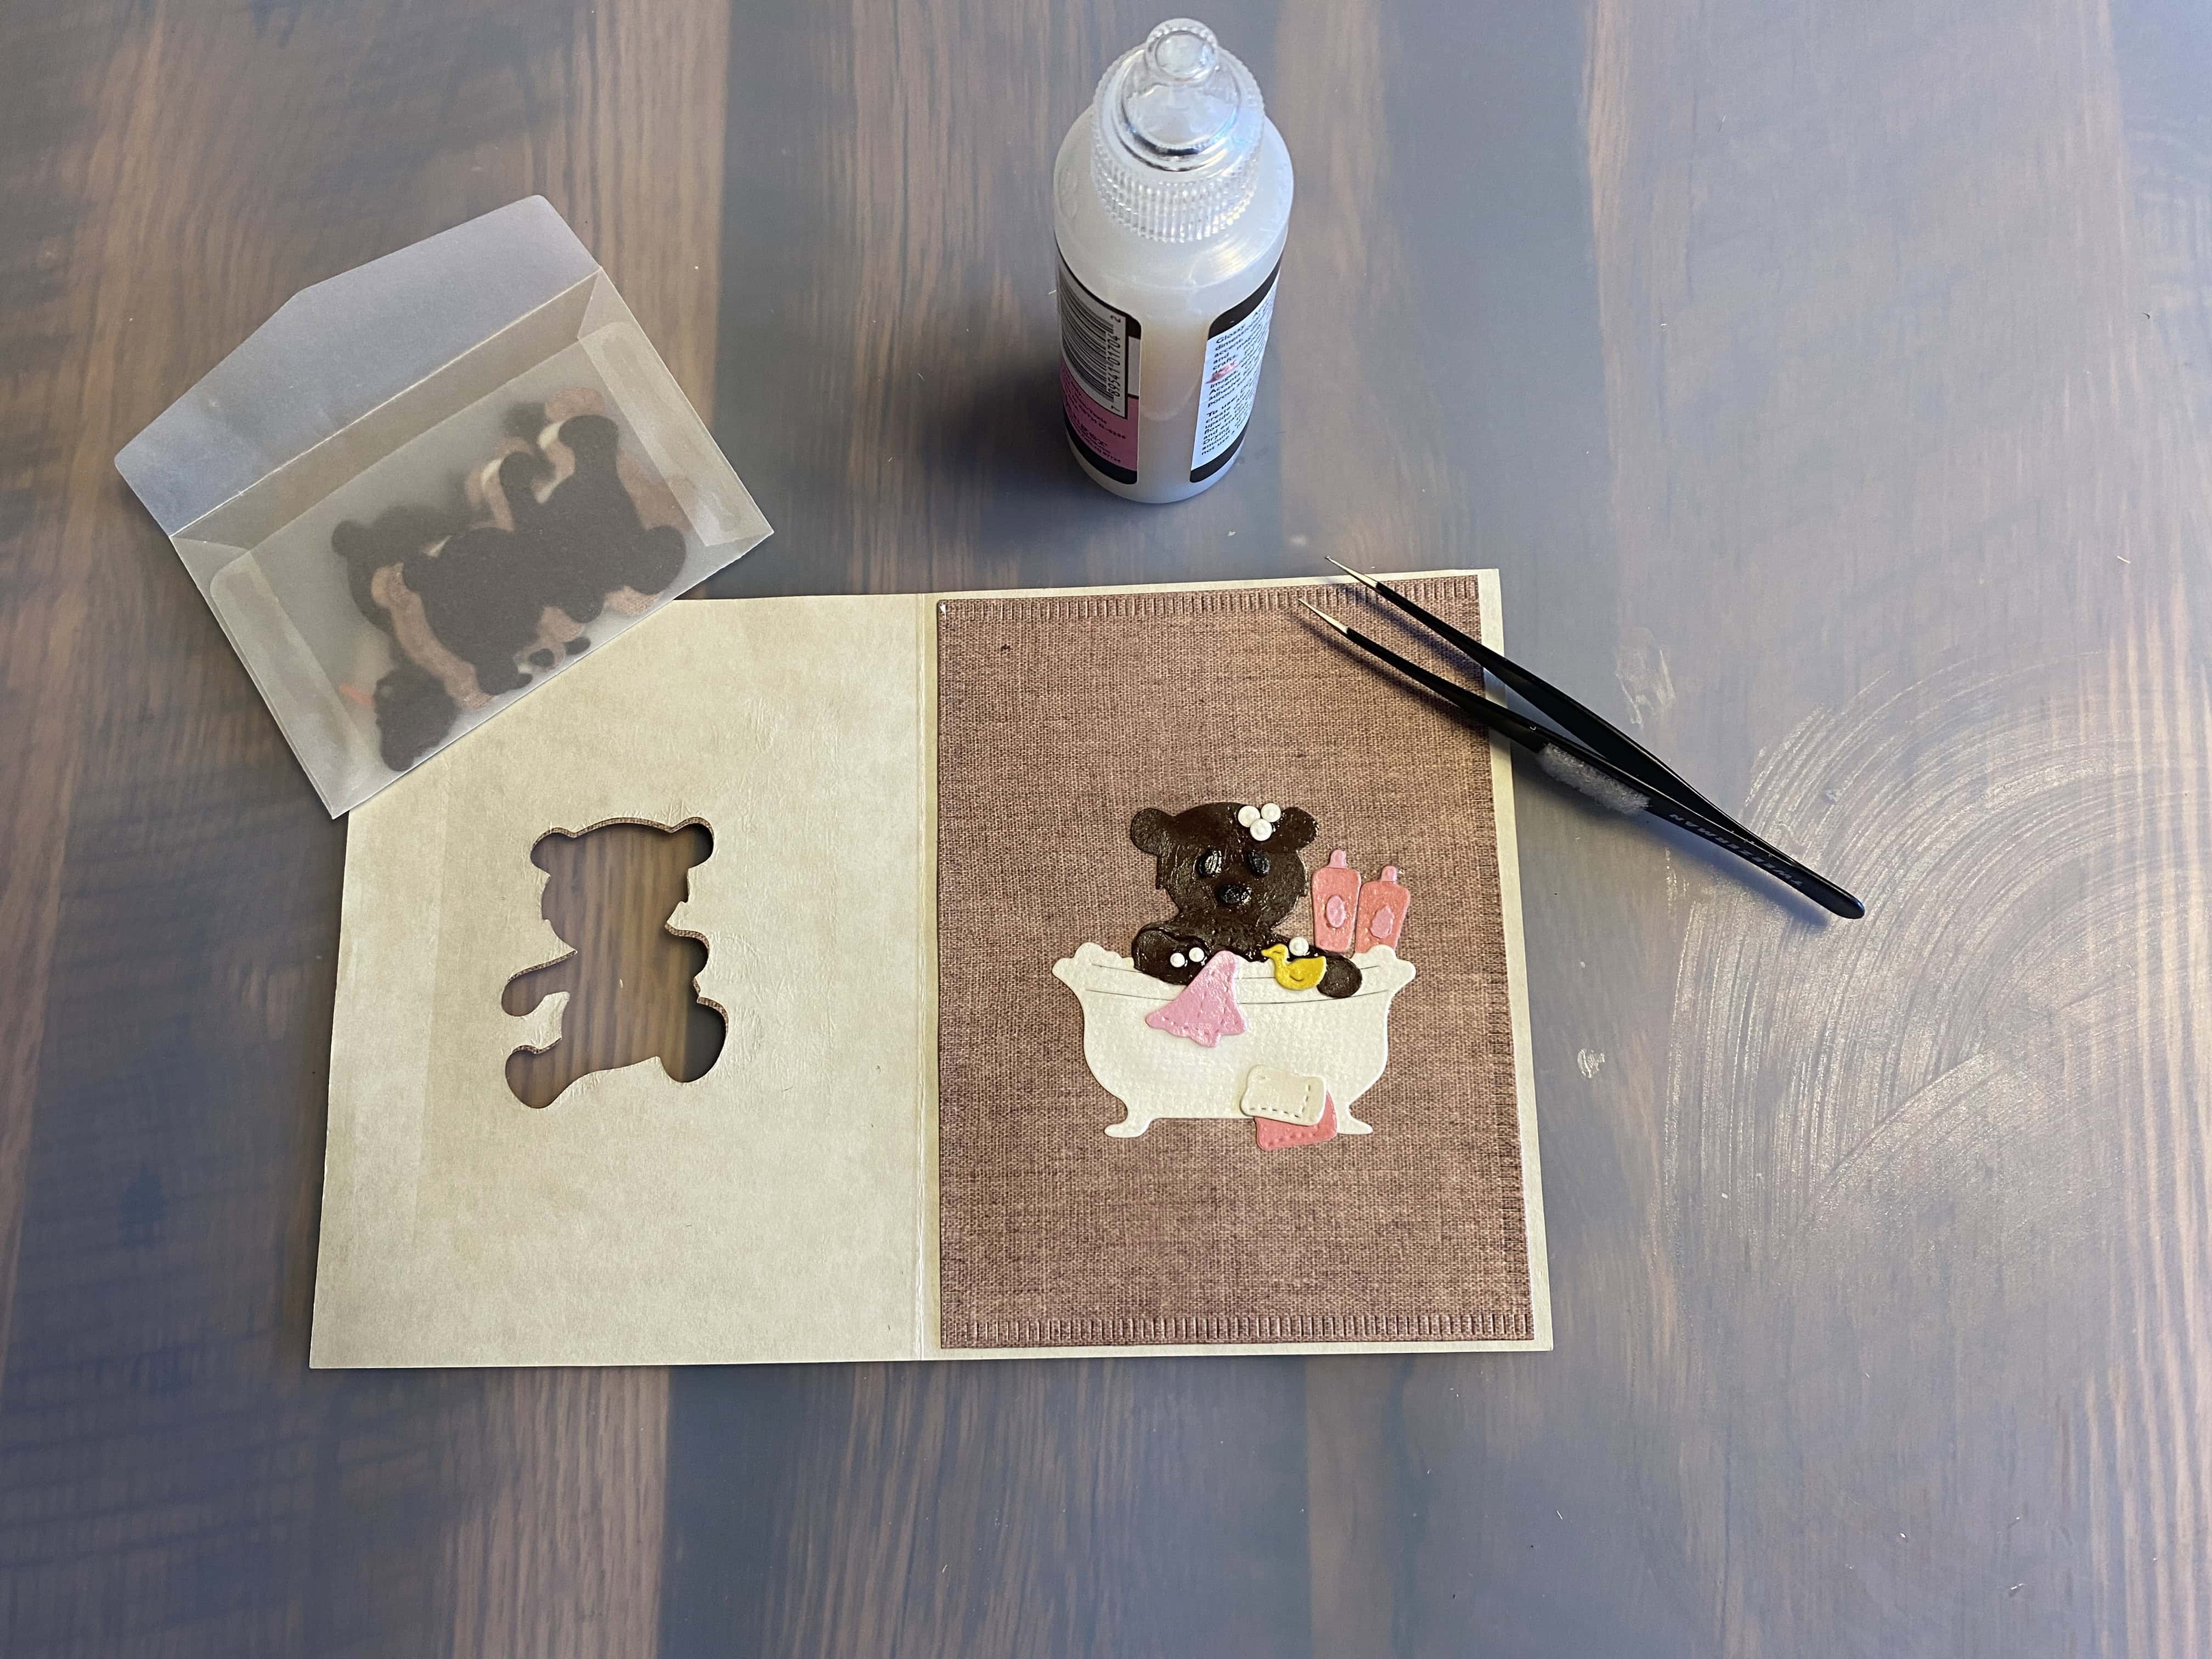
Use Glossy Accents to assemble the inside die cut. Be very careful to align your show-through piece properly with the cut-out!
I use precision tweezers to help position tiny elements.
I also rub Glossy Accents over the entire finished image (let it dry) to give a beautiful sheen and texture (which is hard to capture in an image).
Step 8: Add Your Desired Message
Add your desired message, and you're done!
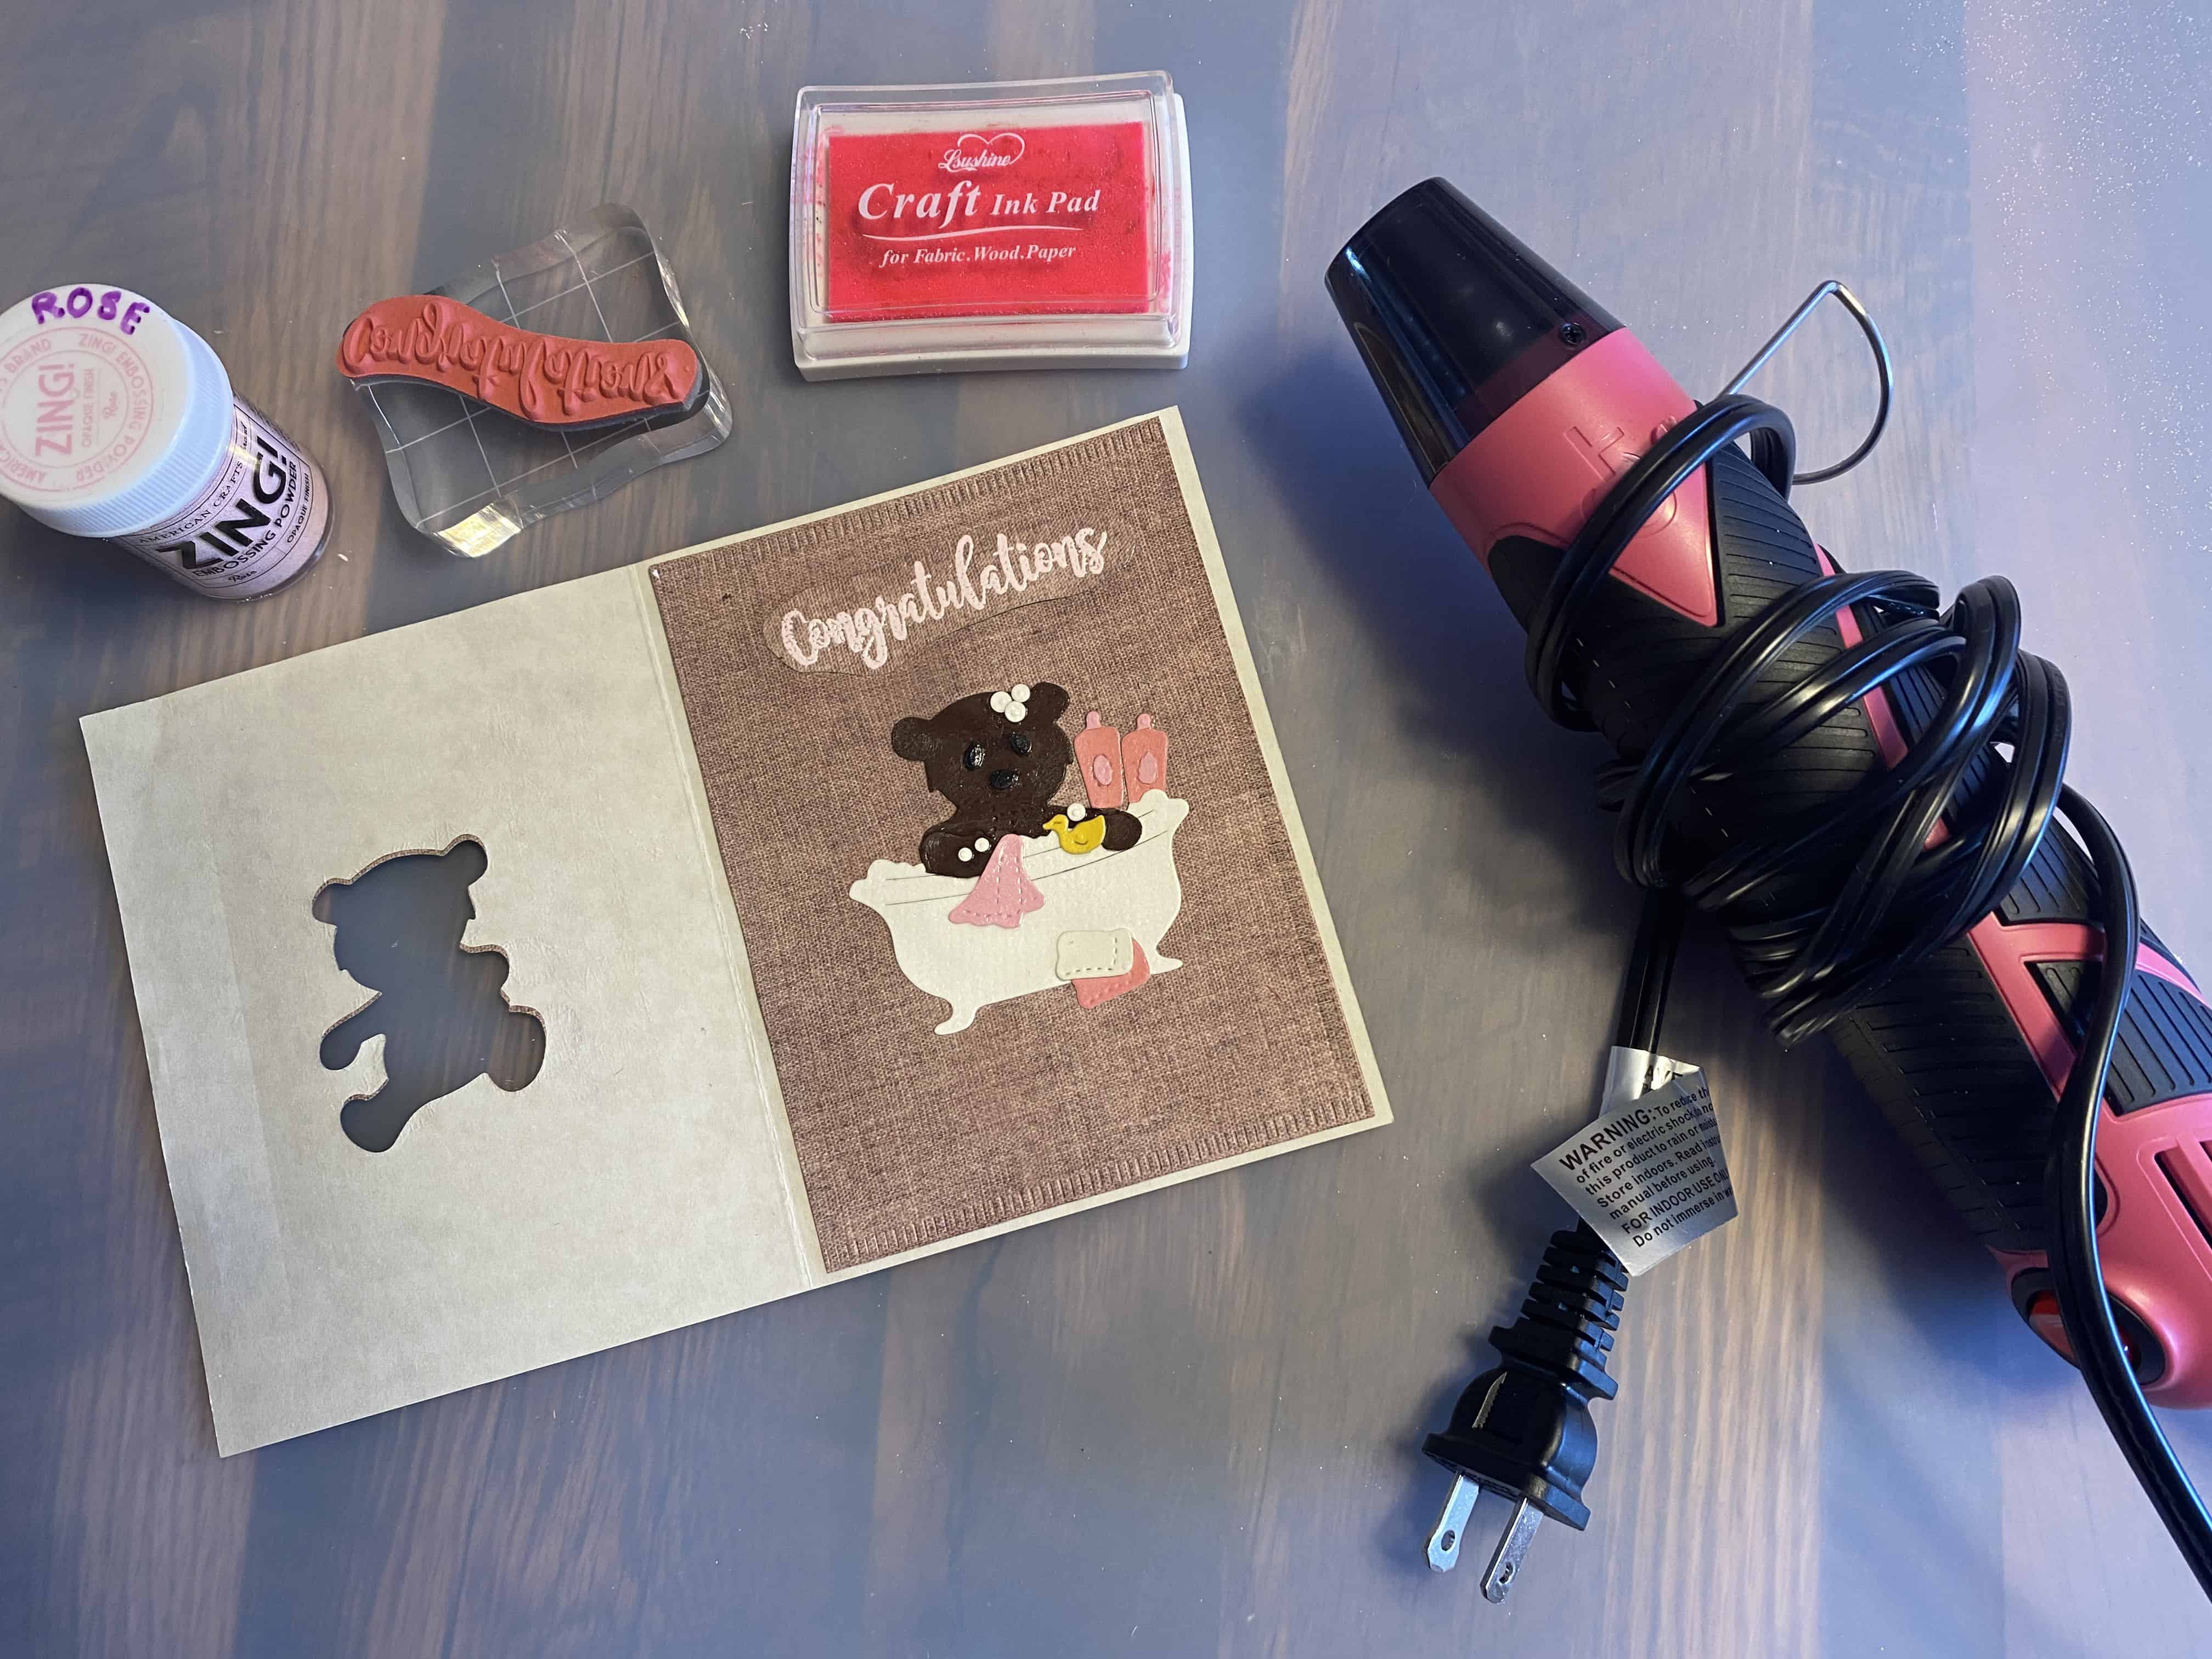
I chose to stamp/emboss ‘Congratulations’ on a separate piece of the background paper, trim, glue.
Done!