http://fishcaro.crosswinds.net/day_30_creating_imagemaps.htm
INDEX CARDS #30:
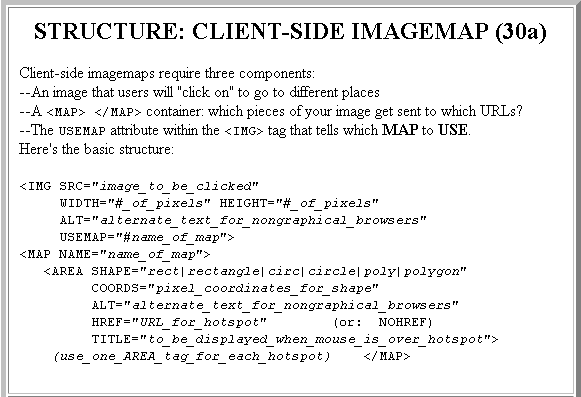
STRUCTURE: CLIENT-SIDE IMAGEMAP (30a)--An image that users will "click on" to go to different places --A <MAP> </MAP> container: which
pieces of your image get sent to which URLs?
--The USEMAP attribute within the <IMG>
tag that tells which MAP to USE.
Here's the basic structure: |
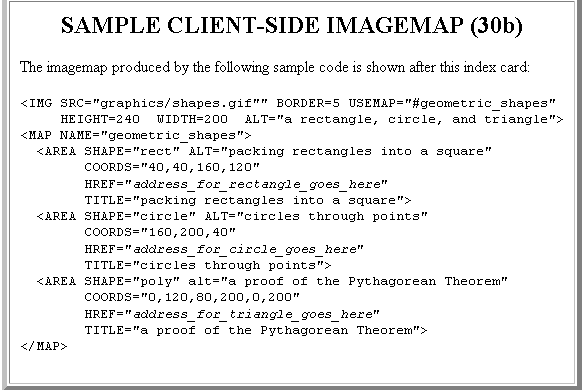
SAMPLE CLIENT-SIDE IMAGEMAP (30b) |
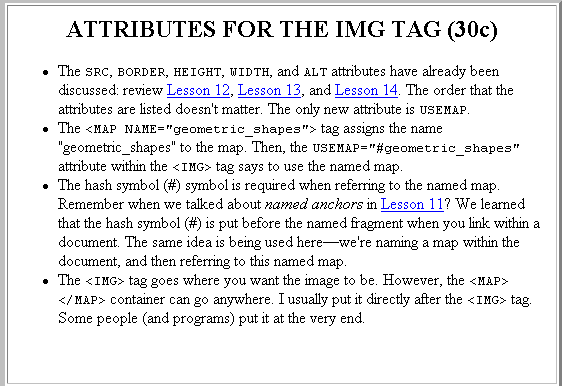
ATTRIBUTES FOR THE IMG TAG (30c)
|
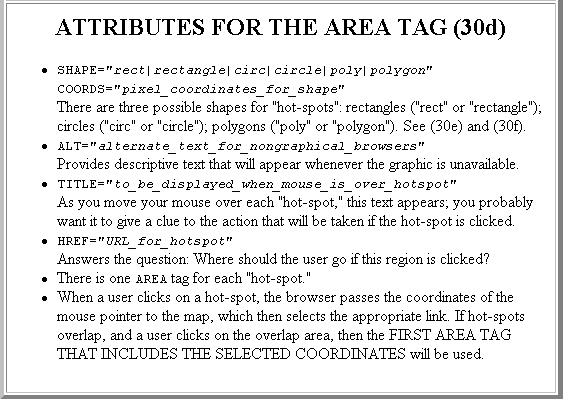
ATTRIBUTES FOR THE AREA TAG (30d)
|
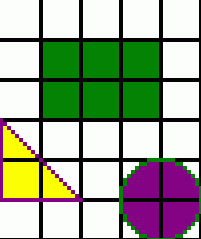
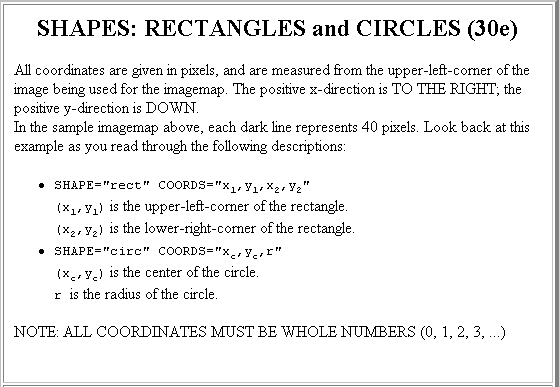
SHAPES: RECTANGLES and CIRCLES (30e)In the sample imagemap above, each dark line represents 40 pixels. Look back at this example as you read through the following descriptions:
|
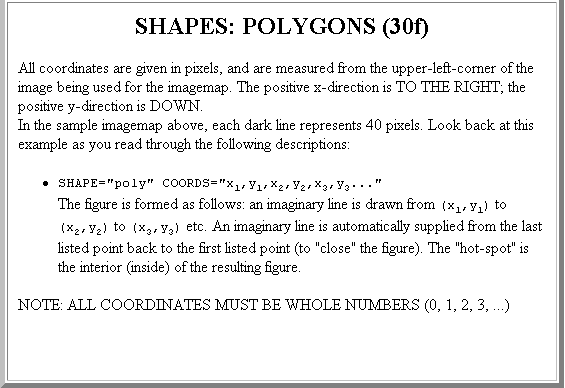
SHAPES: POLYGONS (30f)In the sample imagemap above, each dark line represents 40 pixels. Look back at this example as you read through the following descriptions:
|
Printable version of Index Card 30a
Printable version of Index Card 30b
Printable version of Index Card 30c
Printable version of Index Card 30d
Printable version of Index Card 30e
Printable version of Index Card 30f
WORKSHEET #30:
ASSIGNMENT #30: