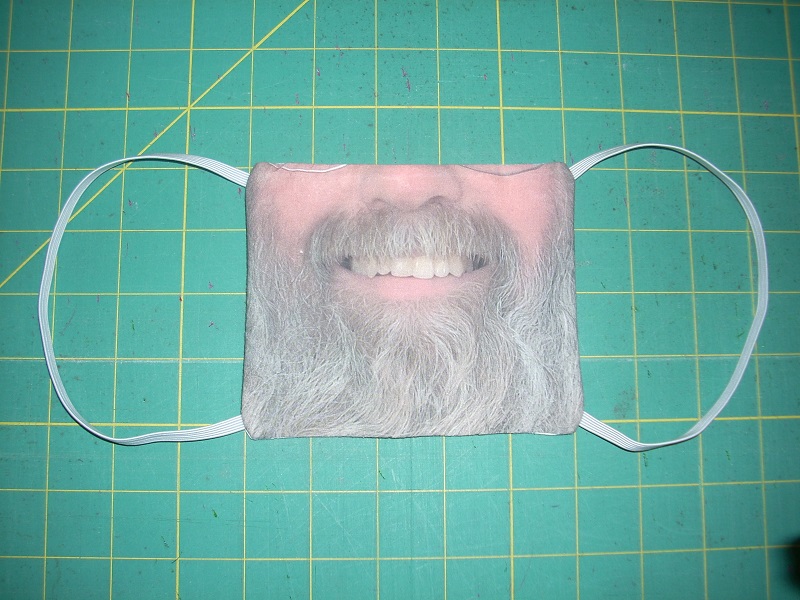
the finished mask
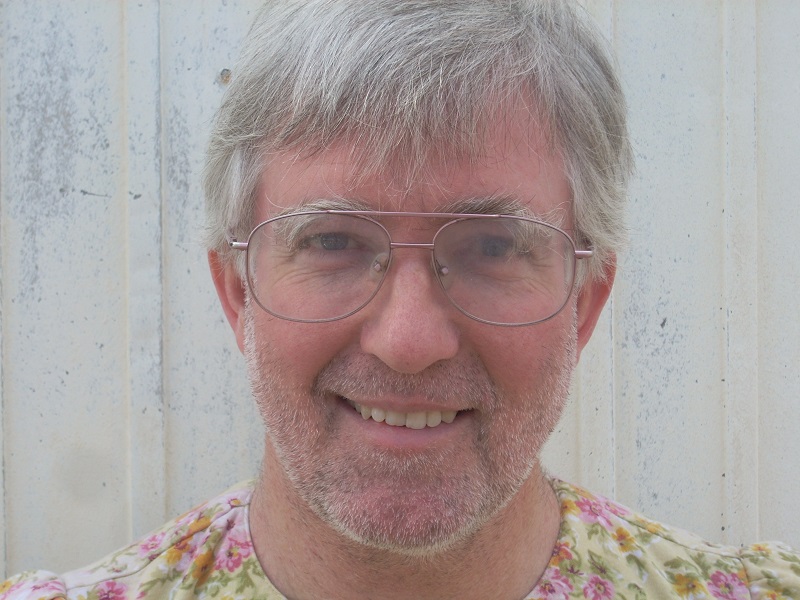
Ray, without mask
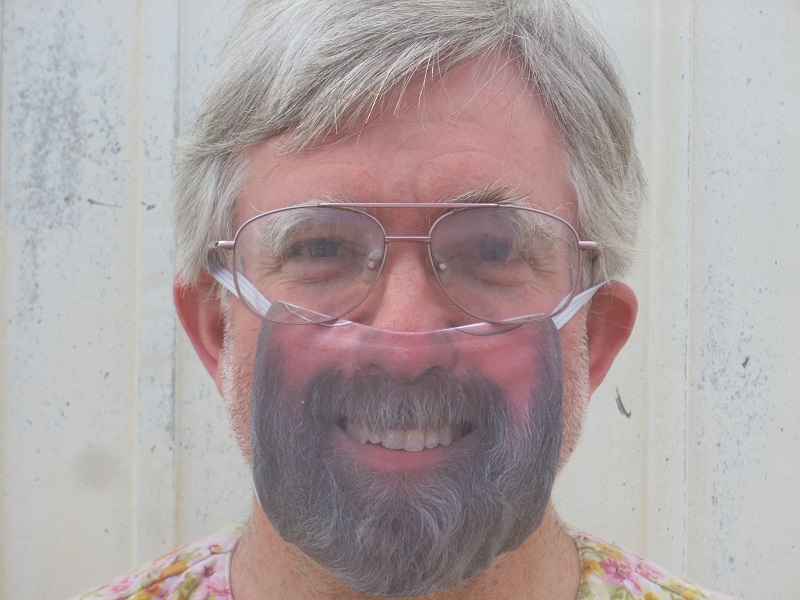
Ray, with mask
(instant full beard!)
|
the finished mask |
Ray, without mask |
Ray, with mask (instant full beard!) |
 (1) Send PDF to photo-on-fabric printers, with 100% cotton fabric and instructions. Ray had bearded and clean-shaven versions. Here is Ray's write-up on how he got the photo just right. |
 (2) Get printed fabric sheets back. |
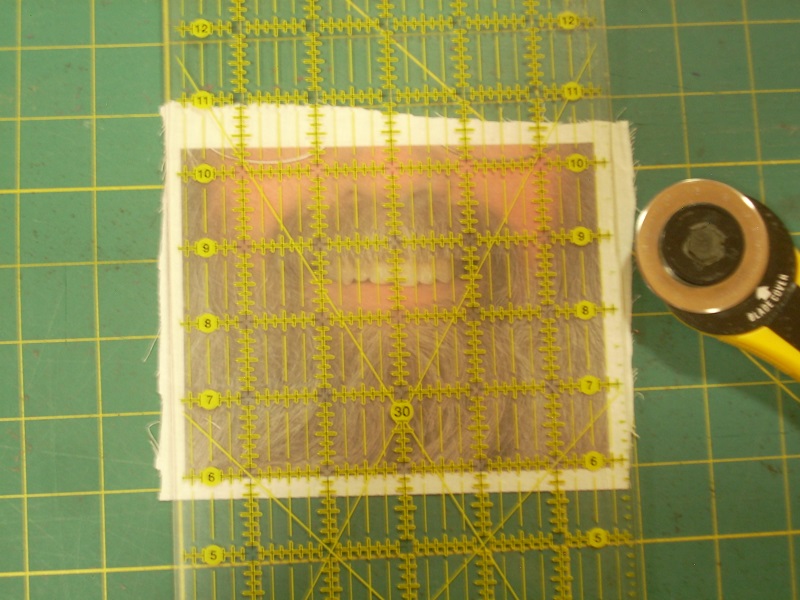 (3) Cut 1/4" around images. Use a rotary cutter and quilting ruler. |
 (4) Cut one piece of lining to exactly the same size as image. I just lay the image on top of the lining, and cut around it with my rotary cutter and quilting ruler. If your lining fabric has a little bit of stretch to it, that will help in step (14). |
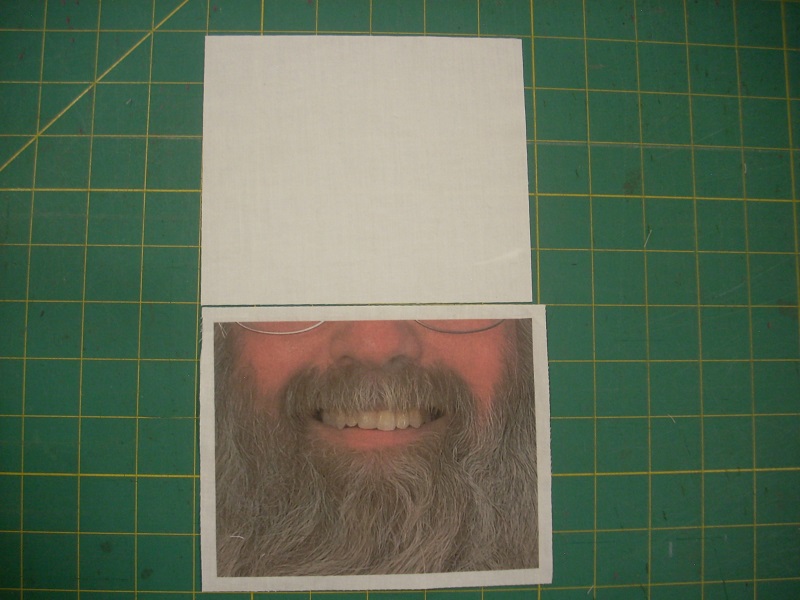 (5) Trim the lining width 3/16". (Look carefully! The lining width is a bit shorter now!) Only trim the width, NOT the height. One-quarter inch is too much, and one-eight inch is too little! This simple adjustment ensures that no stitches will show on the sides of the finished mask. |
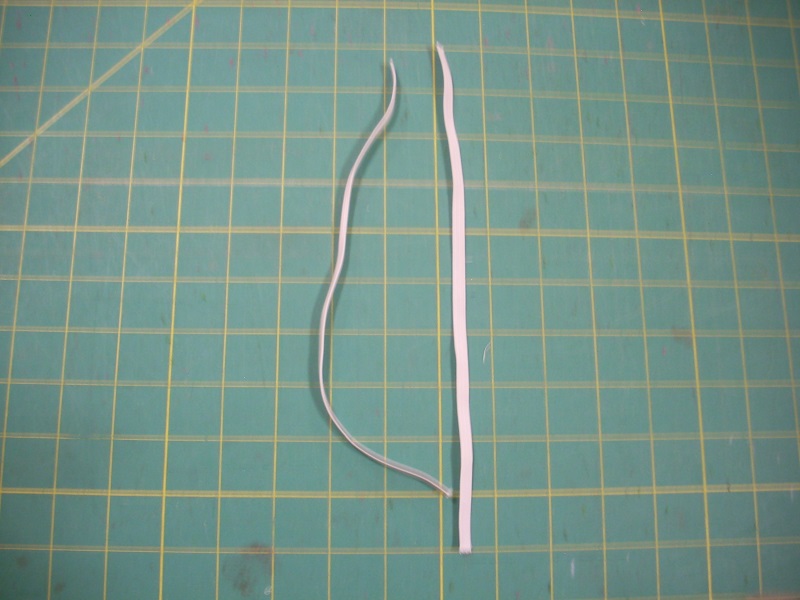
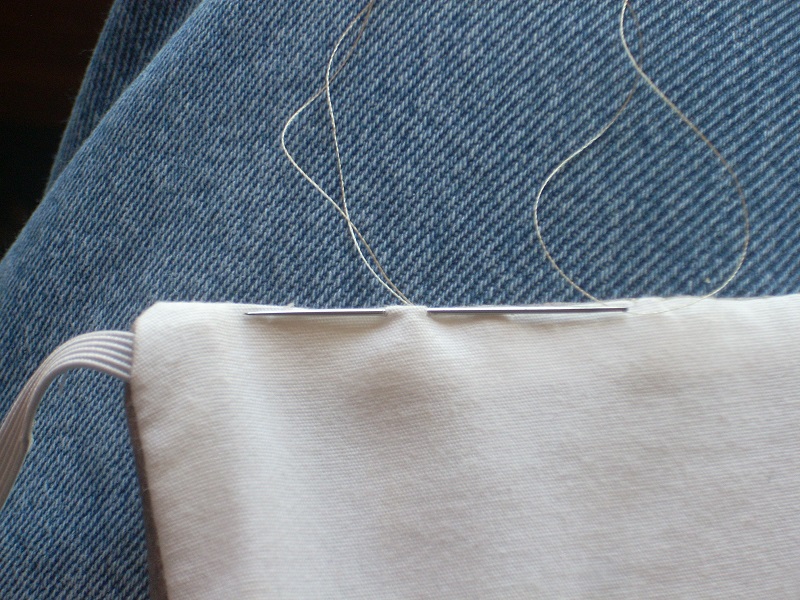
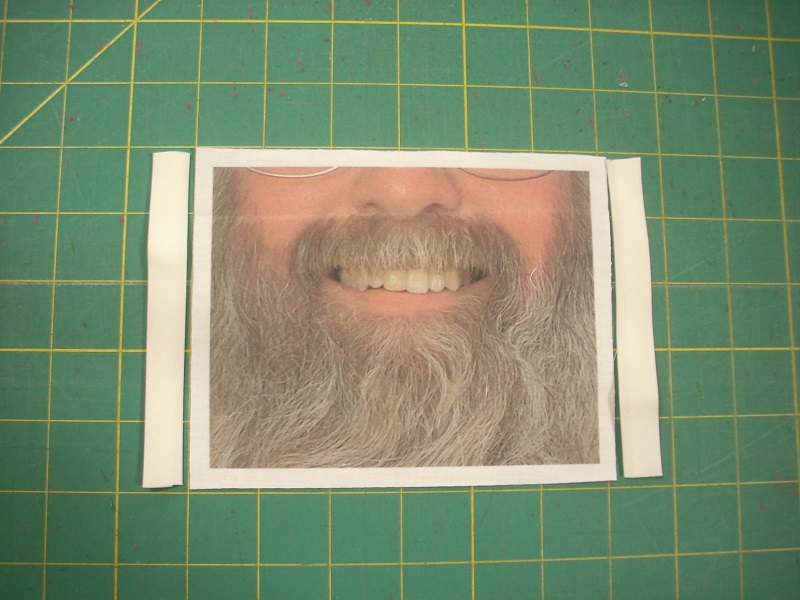 (6) Cut two pieces of 1/2" bias tape; they should be the height of the fabric. This tape will be hidden on the inside, so color doesn't matter much. (Check that the color won't show through.) This tape stiffens the edges of the mask, to prevent a wrinkly face! |
 (7) Sew the bias tape to the wrong side of the image (both sides): place the tape about 1/8" from the edge; the open edge of the tape should be on the left/inside; sew very close to the right edge of the tape. |
 (8) This shows both bias strips sewn in place. |
 (9) Cut two pieces of 1/4" elastic. It should be quite rigid; that is, reasonably hard to stretch. It will go from the top of the mask, around your ear, to the bottom of the mask. For Ray, each piece is 10" long. You may need some trial-and-error to get the correct length for you. |
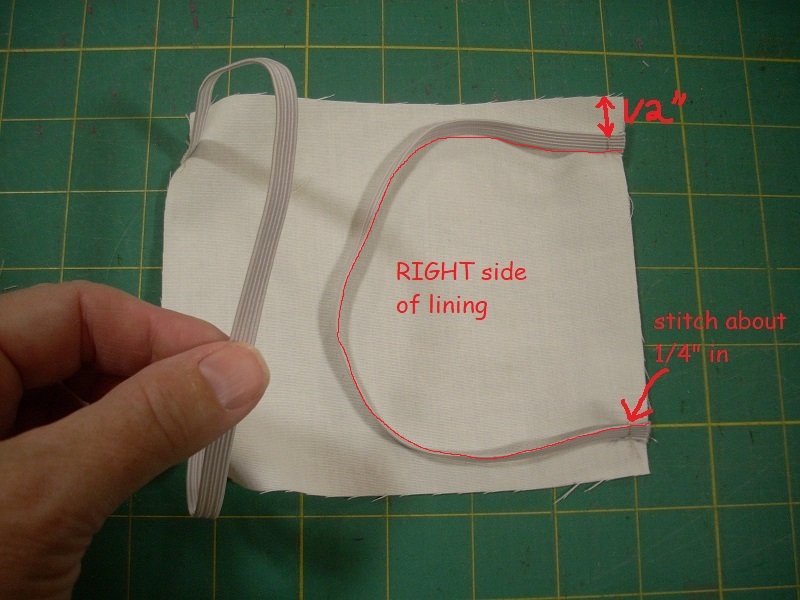 (10) Attach the elastic to the right side of the lining, as shown. Each end should be about 1/2" from the top/bottom. Stitch about 1/4" from the sides. Be very careful not to twist the elastic as you loop it from top to bottom! |
 (11) Put right sides together. (So, the elastic is on the inside.) Align the right edges, and stitch 3/8" from the edge. Be very careful that the elastic stays properly positioned inside. |
 (12) This shows the first side stitched, and then opened up. |
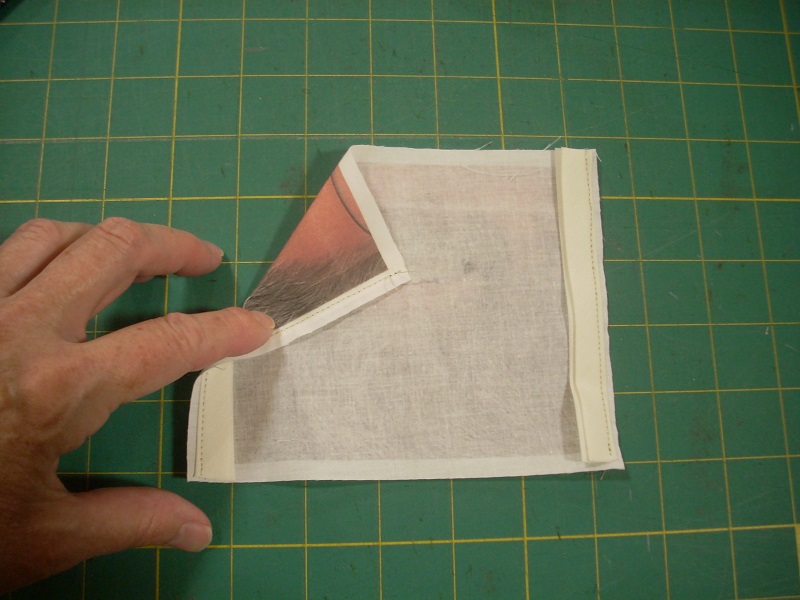
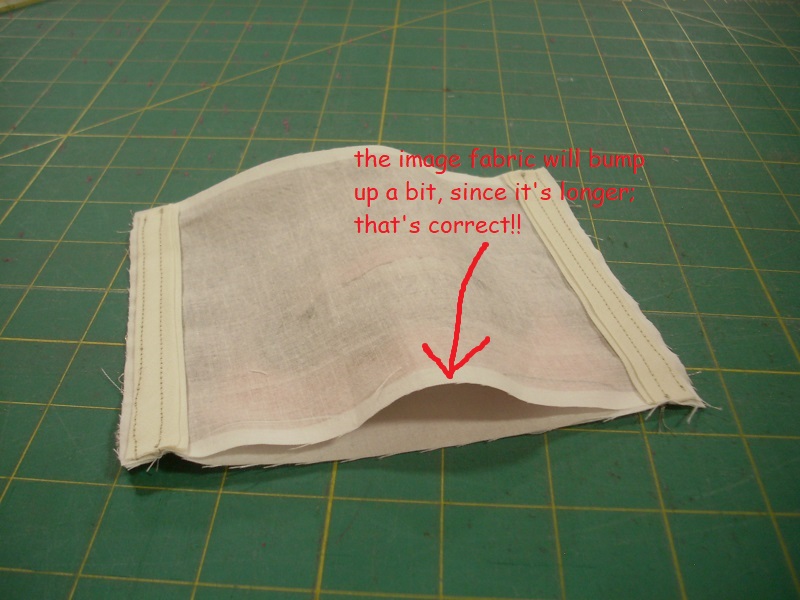 (13) Put right sides together again, and align the remaining edge. Remember that the lining's width is a little shorter than the image fabric! Because of this, the image fabric will bump up a bit—that's correct! Stitch this second side 3/8" from the edge, again being careful of the elastic inside. |
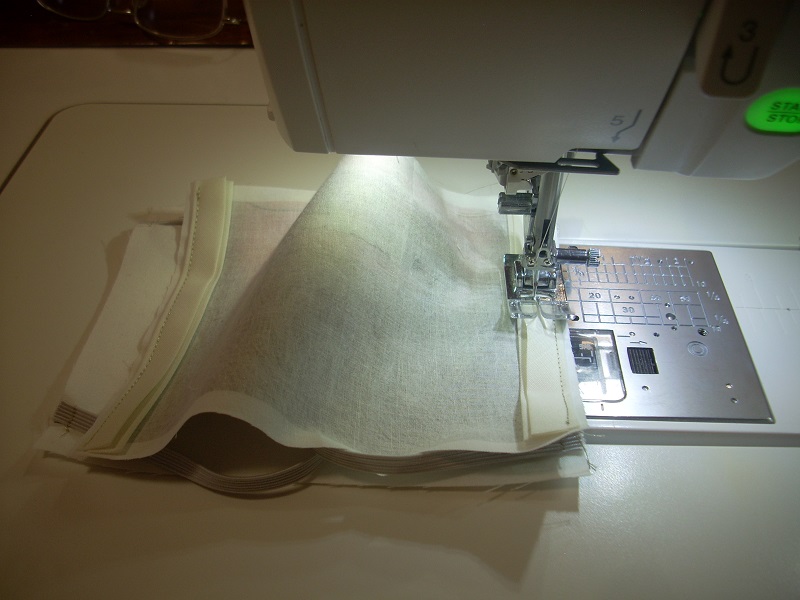
 (14) Still right sides together, stitch the top (nose) side. This time, sew just over 1/4" from the top. You will need to stretch the lining while you sew! Then, sew again, just a smidgeon farther in. This second row of stitching helps to adjust the very small ‘gathers’ on the image fabric. This is likely the trickiest part of the entire construction. |
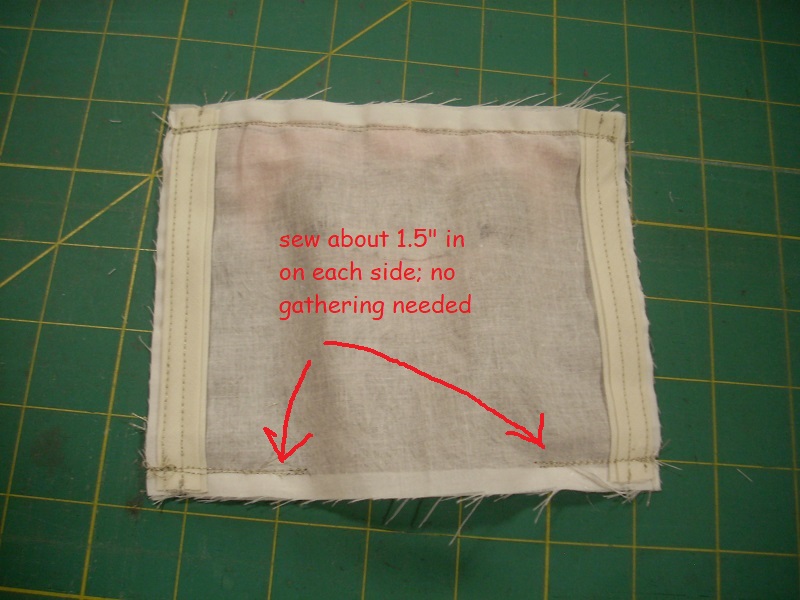 (15) On the bottom (chin) edge, sew about 1.5" in from each side. Again, you're sewing just over 1/4" seams, so you're stitching in the photo part (not the border). You don't need to stretch the lining, because the ‘gathering’ will be taken care of with the hand-sewing (next step). You're leaving the middle part open to turn right-side out. |
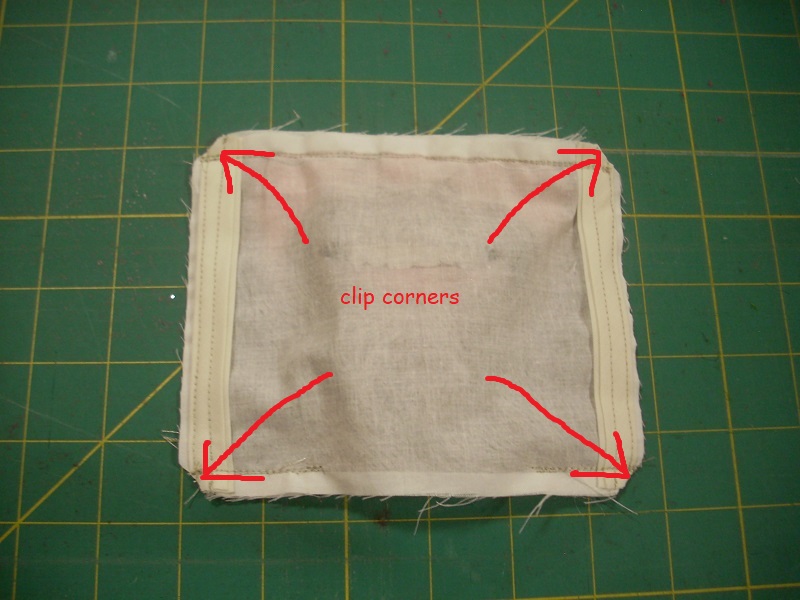 (16) Clip corners slightly. This reduces the bulk and helps to get sharper corners when you turn (next step). |
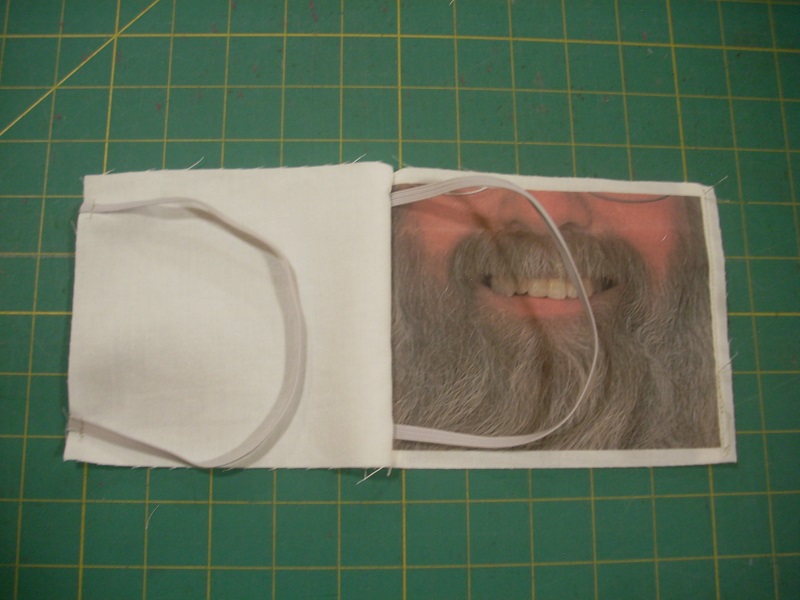
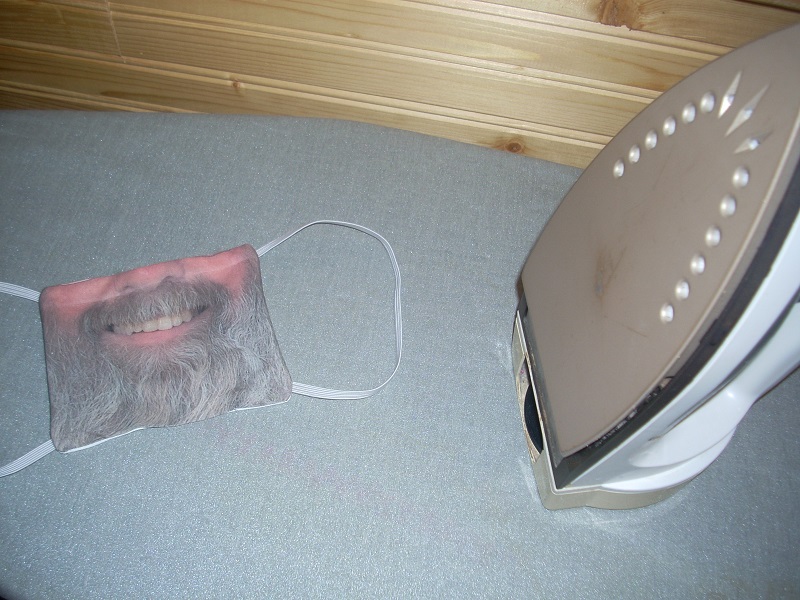 (17) Turn right-side out. (Pulling on the four elastics will help.) I use my purple thang to poke out the corners. Iron carefully. Since the image is a bit wider than the lining, the image will fold over to the back ever-so-slightly on both sides, completely hiding the side seams. |
 (18) Use an invisible stitch (YouTube, 2:09) to sew the bottom closed. Gather while you sew, by taking up a bit more of the photo fabric than the lining fabric on each set of two stitches. Press again, as needed. Enjoy! |
||
I asked Ray to describe how he took the photos and got them printed. Here is his response, together with the ‘story’ of how the masks came to be! Ray gave me permission to share his words here.
Getting the photo right
The hardest part of making my ‘face’ face masks was getting the face image right.
I took photographs of my face in various lighting using my professional photography equipment,
being careful to light all sides equally, then picked out the smile I liked the best.
I brought this image into a Word document and sized it approximately right, then printed it.
I compared the initial print to my face in a mirror to determine whether the image size was too big or too small,
then adjusted the size up or down and reprinted.
I did this several times until the size was exactly right, interpolating between sizes.
Getting the face coloring right
Then I started working on matching the color.
I tweaked the hue, saturation and brightness repeatedly, printing each and holding them up to my face to compare the color.
I continued this until I had a printout that was exactly the right size and color.
Ray's first mask used an inkjet printer
Once this was done, I took some white bed-sheet fabric, used a temporary adhesive to attach it to a piece of paper.
I used my inkjet printer to print my face on the fabric, then removed the fabric from the paper.
I cut out the fabric face image and folded and ironed the edges,
then temporarily adhered it to a mask ‘base’
which was a piece of white fabric with edges sewn over and elastic bands to go around my ears sewn into the corners.
Problems with the inkjet mask
This mask looked good, but it had several problems:
Finding a DTG (Direct-To-Garment) printer
I used these inkjet-printed masks for several months while I searched for a DTG printer who could make indelible fabric prints for me.
There seemed to be none in town, so I did a web search and found 3V Tees out of Atlanta.
They were hard to contact and communicate with—it was email only, and I think English was not their main language—but
I managed to arrange to have 10 face mask images printed for \$50.
3V Tees said they needed 100% cotton to print on,
and I was afraid tee-shirt material they used would be too thick for a mask,
so I ordered a white 100% cotton sheet with a tight weave from Amazon.
When it arrived I cut it into roughly 8.5" $\times$ 11" pieces, put them in a padded envelope and mailed it to 3V Tees,
along with an exactly-right printout from my inkjet printer.
Then I created a high-resolution PDF of my face from the Word document and emailed it to 3V Tees,
asking them to please match the color and size as exactly as possible from the printout I mailed them.
Gluing the photo to the mask
A few weeks later, and after paying their \$50 invoice,
I received ten prints of my face, all exactly the right size and color.
I used temporary fabric adhesive to attach this to my mask base.
Now I had a mask that didn't run when it got wet, and could be washed.
But it did keep falling off. My next step was to use permanent adhesive.
Unfortunately the permanent glue bled through and made unsightly spots in the front of the mask.
At least my face didn't keep falling off at untimely moments.
Asking Carol about sewing a mask
A few months later I consulted with Carol about making a mask
where the face was sewn on instead of being glued on.
We batted around a number of ideas and came up with a design that looks great and is comfortable too.
This morning I tried on the prototype and was excited about how well it looked and fit.
The new design [instructions on this page] uses elastic that is pre-tensioned so it seems much less likely to stretch over time.
She’s going to make two more for me using the new design. Thank you, Carol! [You're very welcome, Ray!]