I've written up a separate page for these straw star ornaments.
Experimentation: from left to right:
metallic thread, cotton thread, embroidery floss, thin yarn
Metallic embroidery floss
ends up being the best!
|
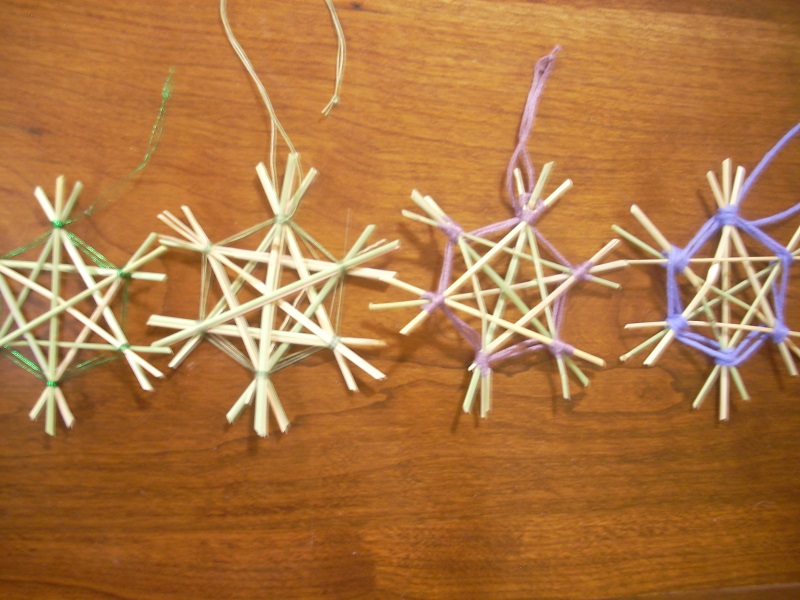
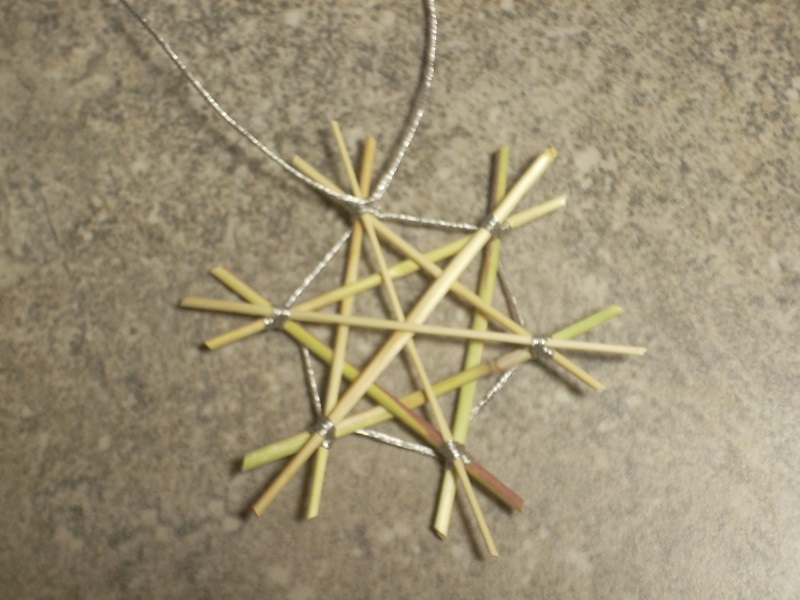
Our Arizona desert grasses work great for these! I've written up a separate page for these straw star ornaments. |
Experimentation: from left to right: metallic thread, cotton thread, embroidery floss, thin yarn |
Metallic embroidery floss ends up being the best! |
|
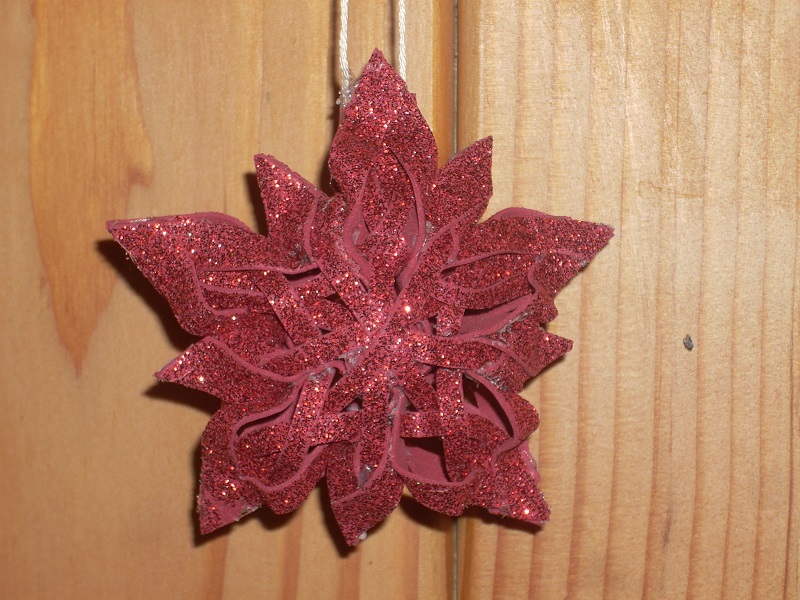
My very first one! You can see that I used too much glue; when you try to remove it, it can take some glitter with it. But, I'll get better! |
|
| Step # | Times in video | Instructions |
|---|---|---|
| (1) | start to 1:13 |
For each 5-petal star, cut five strips, 0.7cm x 10cm. (You'll need two stars total, so cut ten strips for efficiency.) When glueing the petals together (starting at 0:22), make sure you glue about 0.5cm from the end, since you'll need a hole in the middle in step (7) below. Note: It's easier to mark and cut on the wrong side of the glitter foam. |
| (2) | 1:13 to 2:26 |
Cut five shorter strips, each 0.7cm x 5cm. (You'll need two stars total, so cut ten strips for efficiency.) Glue smaller petals between larger petals. Make sure there's an opening in each smaller petal, since you'll need to poke a strip through in step (5). |
| (3) | 2:26 to 3:04 |
Cut five strips, each 1cm x 7cm. (You'll need two stars total, so cut ten strips for efficiency.) Mark 3cm from end and cut as shown. |
| (4) | 3:04 to 4:11 |
Do one at a time: Attach, trimming any corners that peek out from the side of the petal (as needed). I use tweezers to push the short pieces through. Hold short piece about 1cm from end with tweezers in right hand; put on a dab of glue at very end with left hand; position using the tweezers. In my opinion, this is the trickiest part of the entire star. |
| (5) | 4:11 to 5:50 | Push long pieces through and glue as shown. |
| (6) | Repeat steps (1) through (5) to make a second star. | |
| (7) | Cut a 13" piece of matching-color metallic embroidery floss. With both ends, tie a knot; tie a second knot in same place. Trim end close to knot. Glue knot on inside. |
|
| (8) | 5:50 to 6:26 |
Cut a 2cm x 6cm rectangle (she uses 3cm x 6cm); roll and glue. Make sure the long strips form a nice base in the center of both stars. Align the two stars carefully, and attach the ‘fattener’ to center backs of stars as shown. |
| (9) | 6:26 to end | Glue all corresponding petal tips together: large first, then small. |