|
For a rectangular pad only: (1) Measure size of pad to be covered: All units are inches. Let $\,\ell\,$ denote the length (longest side). Let $\,w\,$ denote the width (shorter side). Let $\,t\,$ denote the thickness (one inch or less). For my daughter's changing table pad: $$ \begin{gather} \ell = 33\cr w = 16.5\cr t = 0.75 \end{gather} $$ |
(2)
Determine the extra amount needed for each french seam: This design uses french seams, which totally enclose the raw edges. Let $\,f\,$ denote the allowance needed for the french seam. When I make a french seam: I sew my first seam (wrong sides together) 1/4"; I sew my second seam (right sides together) 1/2". So for me: $\,f = 0.25 + 0.5 = 0.75\,$ |
||
|
For a RECTANGULAR pad, go on to steps 3a and 3b. For a slightly-irregular-shaped pad, go on to steps 3c and 3d. |
|||
|
(3a) Cut the top rectangle: Cut one rectangle for the top: $$ \overbrace{(\ell + t + 2f)}^{\text{length of rectangle}} \times \overbrace{(w + t + 2f)}^{\text{width of rectangle}} $$ The $\,t\,$ allows for the thickness of the pad. The $\,2f\,$ gives the extra allowance needed for the french seams on each side. I always round UP to the nearest half inch. Better to be a teeny bit too big rather than too small! For example, for me: $$\ell + t + 2f = 33 + 0.75 + 2(0.75) = 35.25\ ,$$ but I rounded up to 35.5 inches. Go on to (3b). |
(3b)
Cut the bottom rectangle, then cut it at the three-quarter mark: If desired, use a different (plain) fabric for the bottom. Cut a second rectangle: same width as the top, but 8 inches longer: $$ \overbrace{(\ell + t + 2f + 8)}^{\text{8 inches longer}} \times \overbrace{(w + t + 2f)}^{\text{same width}} $$ Six extra inches are needed for back pocket overlap. Two extra inches are for pocket seam finishing. Then, separate it into two pieces by cutting it three-quarters of the way down its length. Put a pin to mark both edges produced by this cut; they will be finished in the next step. Go on to (4). |
||
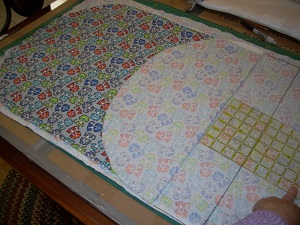
(3c) Cut the irregular-shaped top piece: If your pad is irregular-shaped (like a specialty bassinet mattress cover), then first trace tightly around the pad (on the wrong side of the fabric). Then, use a flexible ruler to make marks $\,\frac{t}2 + f\,$ (inches) away from your tracing. Use a marking pencil to ‘connect-the-dots’, then cut. Go on to (3d). |
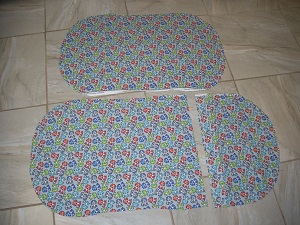
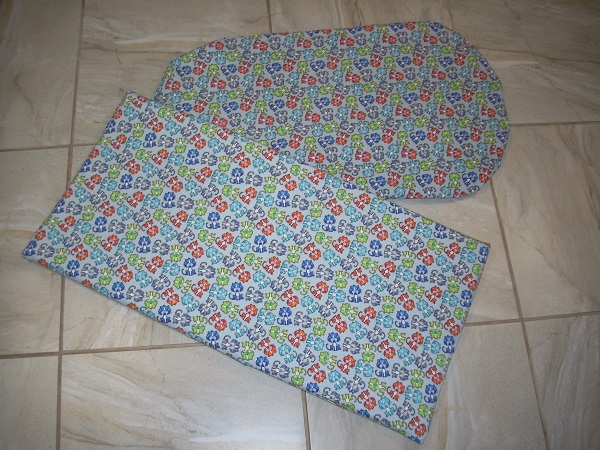
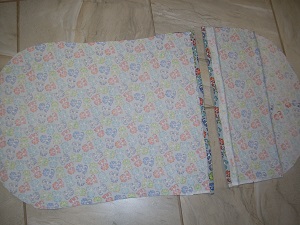
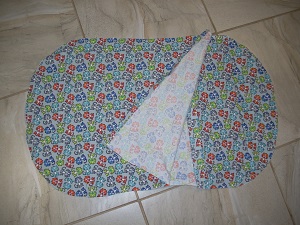
Take your top piece and place it, wrong sides together, on the desired bottom fabric. Fold it back on itself about 3/4 of the way along the length, as shown (left). Measure out $\,4\,$ inches from the folded edge, and cut the ‘extended three-quarter back piece’. Similarly, cut an ‘extended one-quarter back piece’ (again with 4 extra inches). The extra on both back pieces is used for the overlap (where the pad is inserted). The top piece and both bottom pieces are shown above (right). |
||
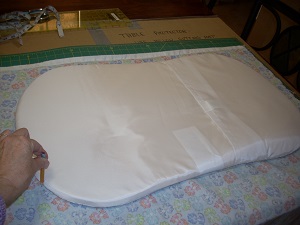
 (4) Finish the pocket edges on the two bottom pieces: Finish both ‘pocket’ edges on the bottom, so no raw edges will show: • Fold in (right side to wrong side) a scant 1/2" and press; zig-zag near raw edge. • Fold in a generous 1/2" again and press; stitch close to edge (straight, zig-zag, decorative—your choice). |
 (5) Attach top to bottom along long edges with a french seam: Lay the top piece on a flat surface, wrong side up. Align the two bottom pieces on the top, WRONG sides together: put the shorter bottom piece UNDER the longer bottom piece, as shown. The two bottom pieces will overlap—this is correct! Pin. Stitch a 1/4" seam around the entire perimeter. (For rectangles: feel free to round the corners ever-so-slightly.) (If you have a 1/4" presser foot, here's a good opportunity to use it! Janome 9400QCP: presser foot O, use Quilt stitch #2 OR: use an overedge stitch with presser foot M) Turn inside out, so RIGHT sides are now together. Press the just-stitched seam carefully. Sew again with a 1/2" seam to complete the french seam. Turn right-side out; check that all raw edges have been completely enclosed. |
||